Corvette Mods - Exterior
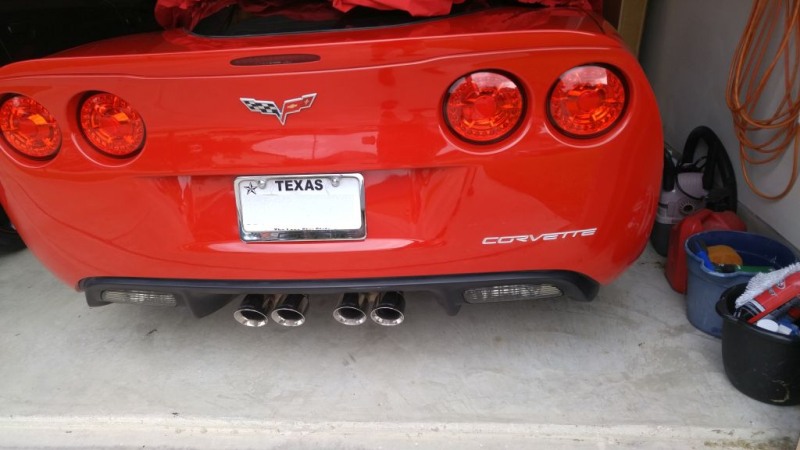
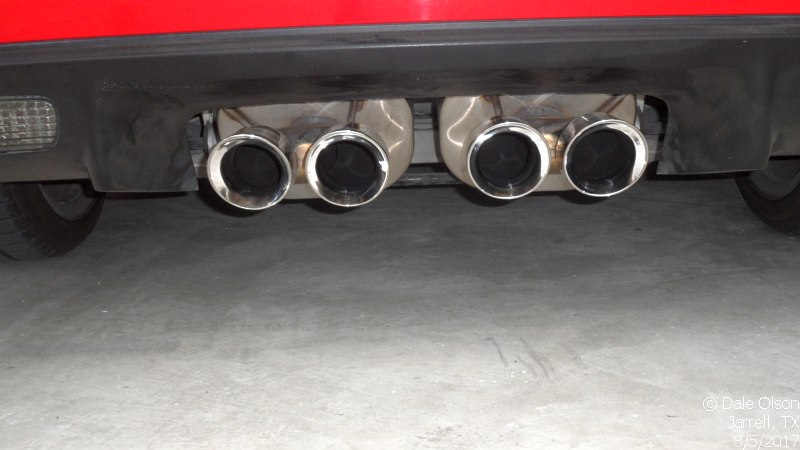
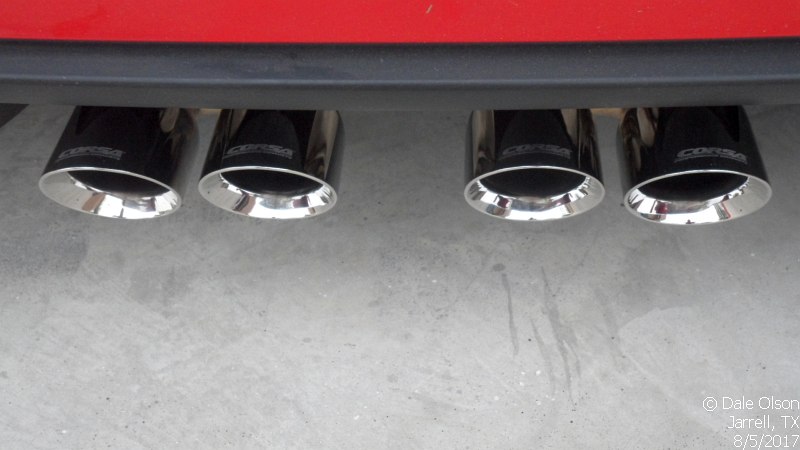
Corsa Sport Cat Back Exhaust
My very first mod or change was to the exhaust system. I had a Corsa Sport exhaust on my 2010 Dodge Challenger & really like the sound. Very quiet until you get on it & no drone on at highway speeds.
I found a slightly used set from a Corvette forum member who lived in San Antonio & met him halfway to pick them up. This saved about $50 to $75 or more in shipping. I would have done the installation myself as I have a 4-post lift. But, I was getting ready for a 10-day trip & wanted them on before I left. So, I stopped at my local muffler shop & for a small fee it was done.
- Drop the rear sway bar. Just remove the 4 nuts that hold the sway bar bushings. That's fine and dandy if the lower bolts were installed correctly at the factory. Mine were installed on the exhaust side and not the engine side. So, when we removed them & that allowed the lower control arm to drop. Now, we had to mess around to get the bolts back in from the engine side before removing the old exhaust.
- Spray some PB Blaster on all the nuts and rubber isolators.
- Start in the rear and disconnect the mufflers from the isolators.
- Loosen the nuts on the muffler to mid pipes.
- Remove the center support nuts/bolts/springs.
- Remove the nuts from the mid pipes to cats.
- Wiggle the mid pipes from the mufflers.
- Remove the mufflers
- Install the Corsa mufflers in the isolators
- Install the muffler pipes. This takes 2 people.
- Install the mid pipes. Again it takes 2 people.
- Start at the front and SNUG the mid pipe to cats nuts.
- Re-install mid pipes center hanger nuts/bolts/springs.
- Now align the pipes and mufflers before you tighten anything.
Your done.. Crank it up and listen to the sound. While you at it check for leaks.
Lug Nut Upgrade
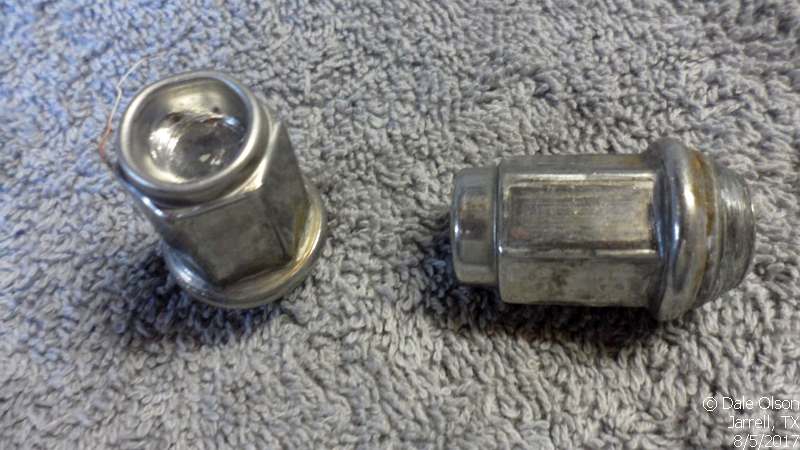
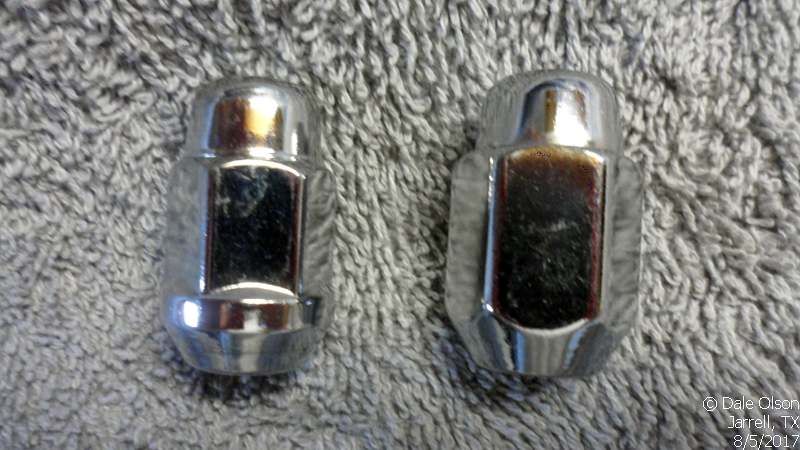
The auto manufacturers have been using tin-plated lug nut caps since at least 1983 and if you have ever taken your car to the dealer or a tire shop for any work that requires removing the wheels sooner or later you're going to have to replace the lug nuts as they will be ruined by using an air powered 1/2 impact.
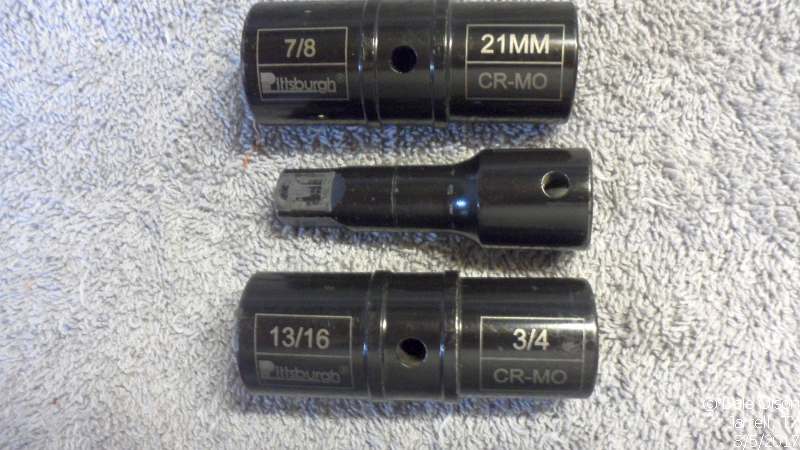
I had a blowout shortly after I bought the Corvette. After a couple of trips to Discount Tire for new tires I was good to go. But, there is always a BUT. I am upgrading my lighting & needed to take the wheels off a couple of times to get at the inner fender panels. Needless to say, the CHEAP ASS GM tin cover lug nuts bit me in the ass. So I order new ones off the net for like 89¢ a piece. They come in 2 sizes.. 3/4 & 13/16. I opted for the 13/16. While you're at it stop at Harbor Freight and pick up their lug nut socket kit.
In the first photo you can see where the impact wrenches have messed up the lug & I had to drive it out of the socket with a big ass punch. The 2nd photo shows the difference in lug nut sizes.
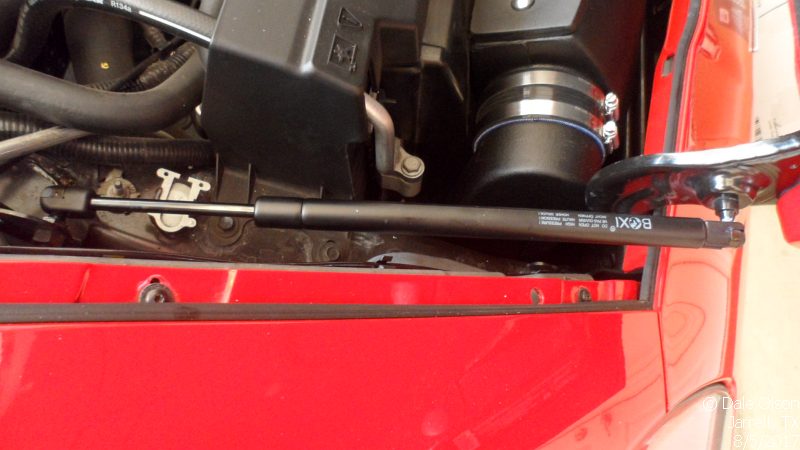
Hood Strut Replacement
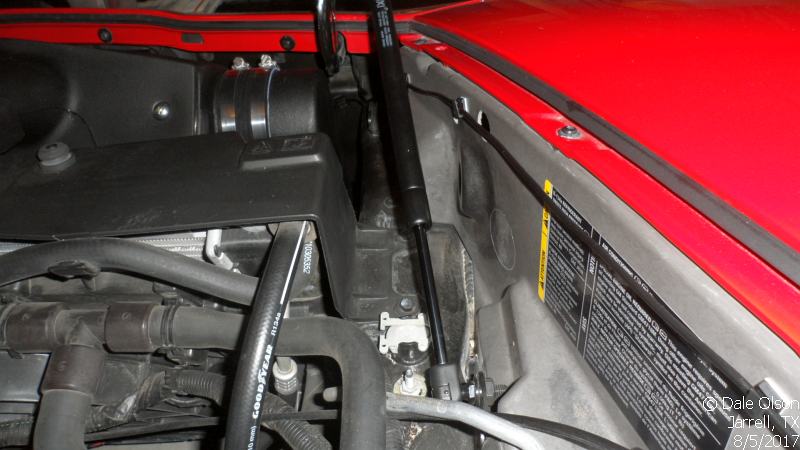
Our Corvette club had a Food Drive & mini car show... My hood slammed shut twice from the wind. Obviously, the hood struts were shot. So, I checked the GM and Corvette sites and wow what outrageous prices... $30 a pop. Well being the "thrifty" guy that I am I did a little searching and found a set on Amazon for $16.89 for the PAIR with FREE shipping and NO TAX. What the hey, take a chance. Well, they showed up in 3 days & all I can say... Hot Diggity.... they fit like a glove and are stiff as a board compared to the 8-year-old ones.
Install took about 15 mins a side from remove, clean, lube & install. To remove them
you just release the retaining clip with a small screwdriver. To install just push them
on the ball.

Old Struts
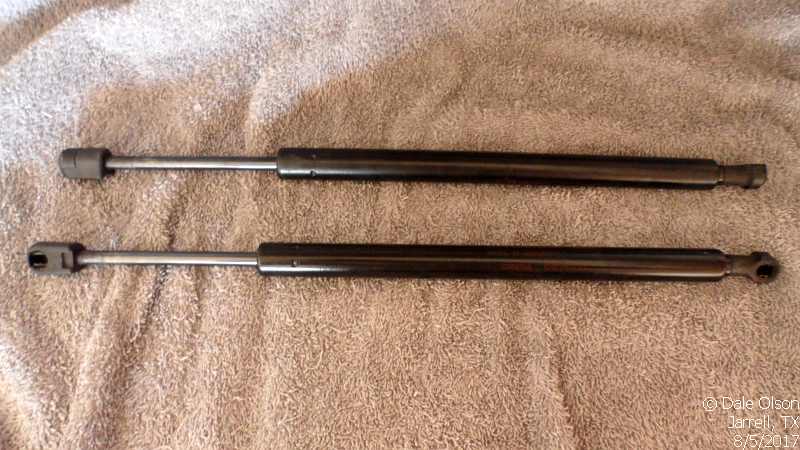
New Installed
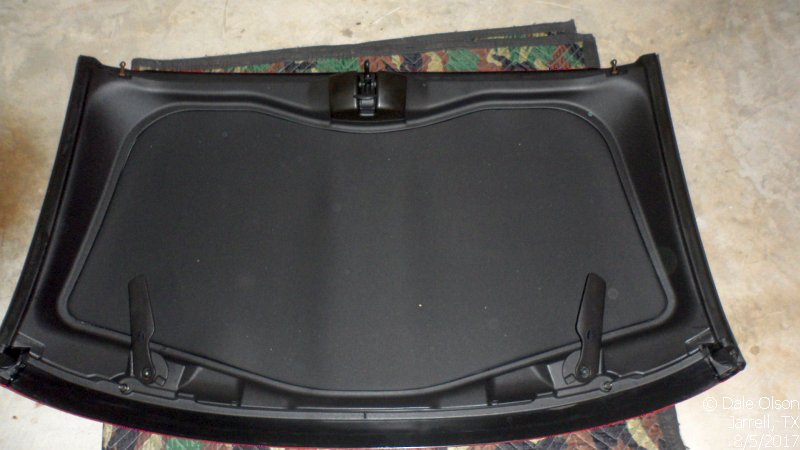
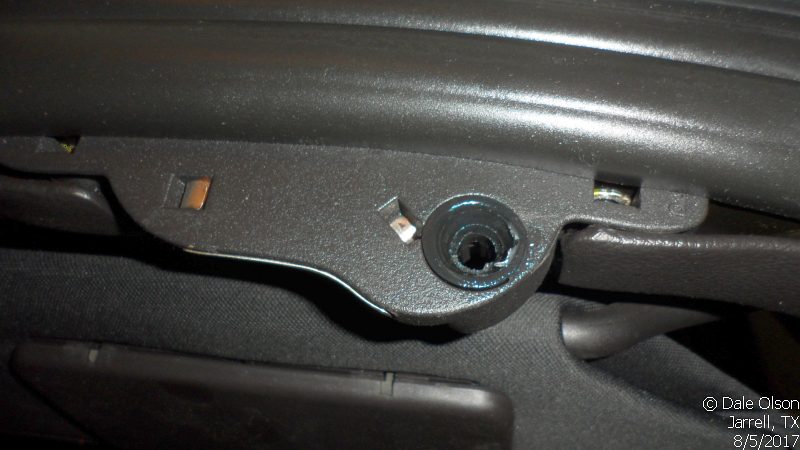
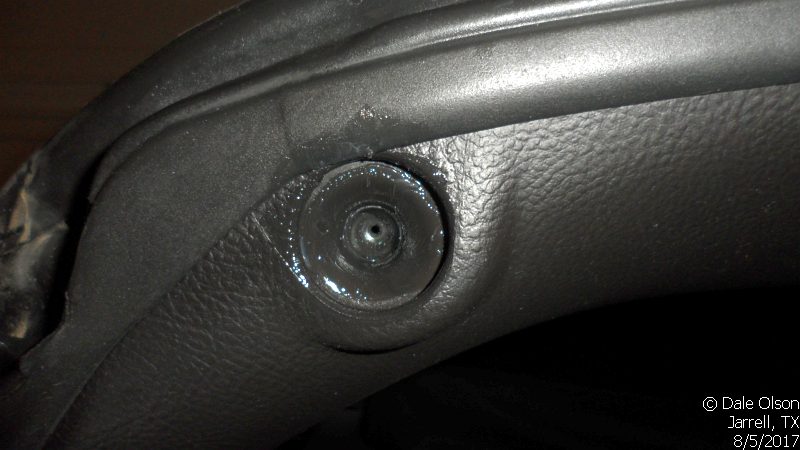
Targa Top Squeak Fix
I hate squeaks & rattles. My Targa top had a really annoying squeak out on the highway. So, I removed the top & cleaned the rubber seals on the top & on the car with some alcohol, sprayed the seals with silicone spray, cleaned & lubed the pins & connectors. Walla no more squeaks. I think this will be a maintenance item as the silicone will wear off. I looked at using silicone grease but ruled that out as it collects dust & the seal is PITA.
LED Light Upgrade
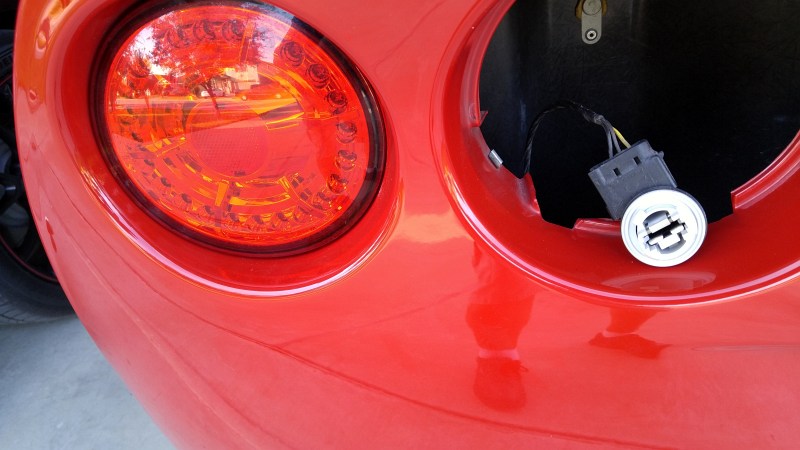
Where do you get the LEDs you ask... Well, you can get them from any number of places including eBay, any number of lighting vendors or directly from China. I got my lic plate kit from a Corvette Forum vendor which I got a fog light kit from. The backup LED bulbs I got at Walmart.
Be aware that the bulbs you remove get hot really quickly. But, if you let the car set for a bit the ECM will shut them off and you can work on removing them when they cool off.
The backup lights are a piece of cake. Just reach around the rear fascia & twist the
bulb socket to remove it. Now you have access to the bulb. Swap the bulbs, test & replace
the socket back in the housing.
NOTE - You can remove a couple of small screws on the lower portion of the fascia to give
a bit more room to get access to the bulb sockets.
The lic plate light takes a T15 torx driver to remove the lic plate light housing. Once you get access to the plug you just give a twist to R&R the bulb. Again test before reassembly.
Just remember the LED's have polarity. So, you need to check that the light works before put it back. If it doesn't light up just rotate it 180 and try again.
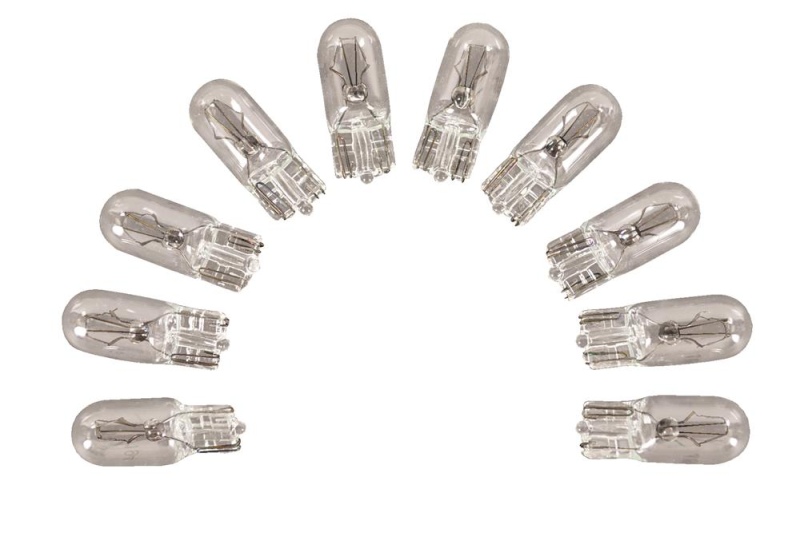
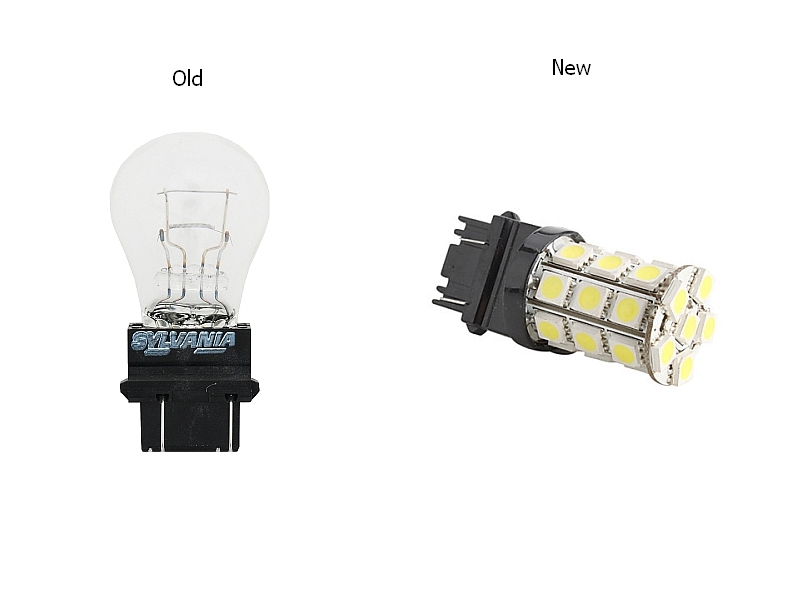
Old 194/T10 Bulbs
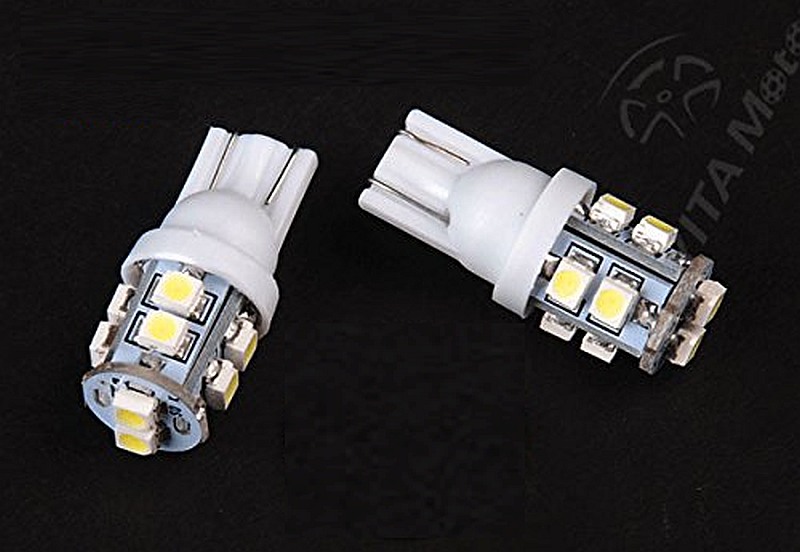
New T10 Leds
Backup Lights
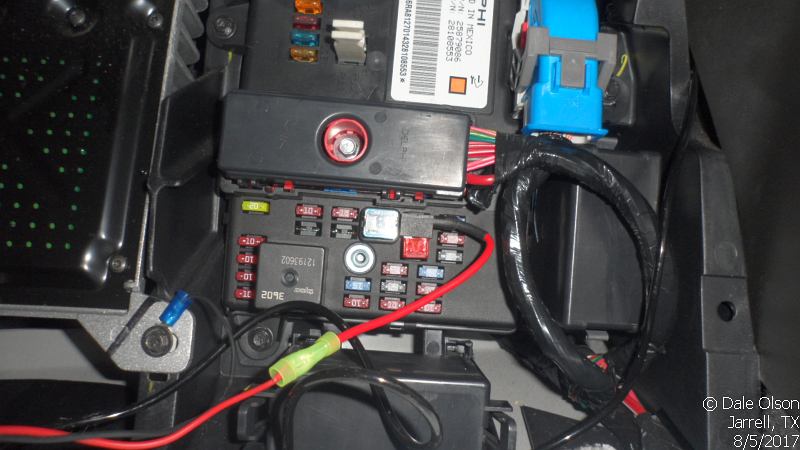
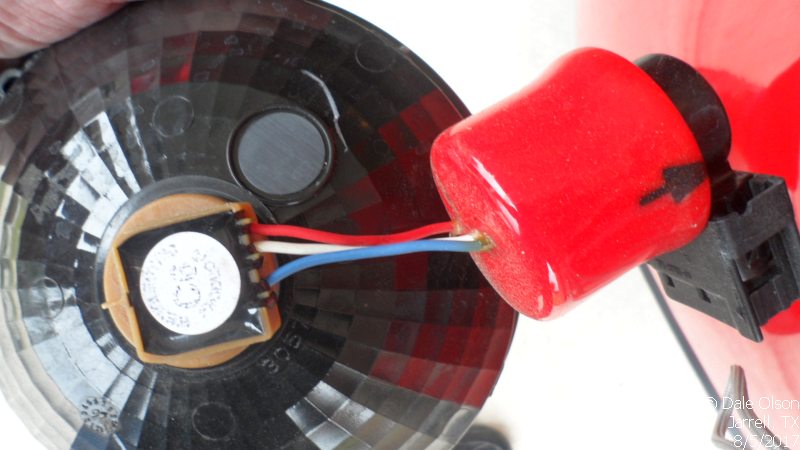
Curb Alert
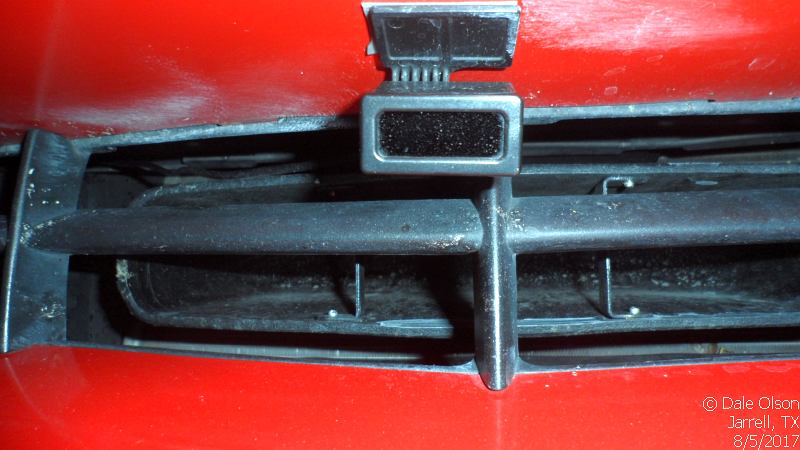
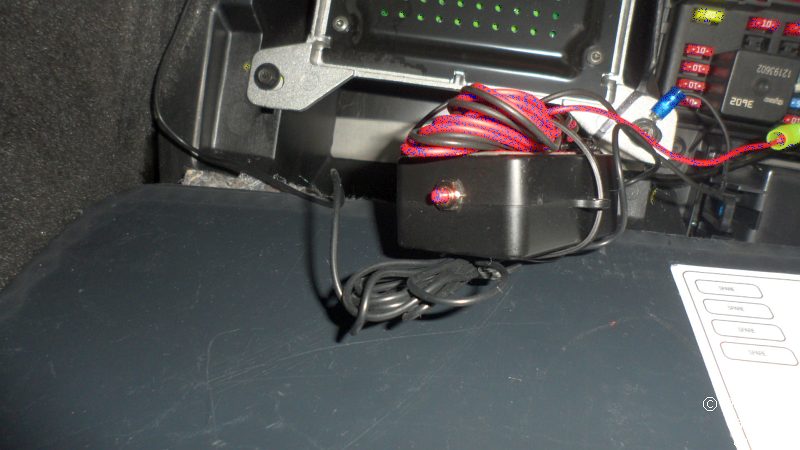
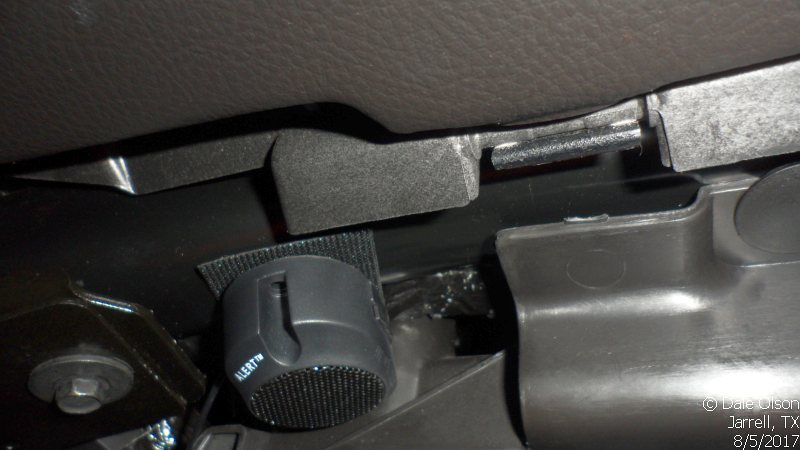
Have you scrapped your front splitter? There is no front camera on my car. So, I installed Curb Alert. No, it is not a set of those little chrome curb fleers we had in the 50's. This is a high-tech proximity sensor with an audible alarm. You mount the adjustable sensor in the grill, route the sensor wire to the passenger's foot well, hook it to the control module, attach the power & ground connections & mount the speaker. All that left is to adjust the sensor & speaker volume.
Mount the sensor. Yes I cleaned the wax and bugs off the grill.
Route the sensor wire thru the grill & into the passngers foot well.
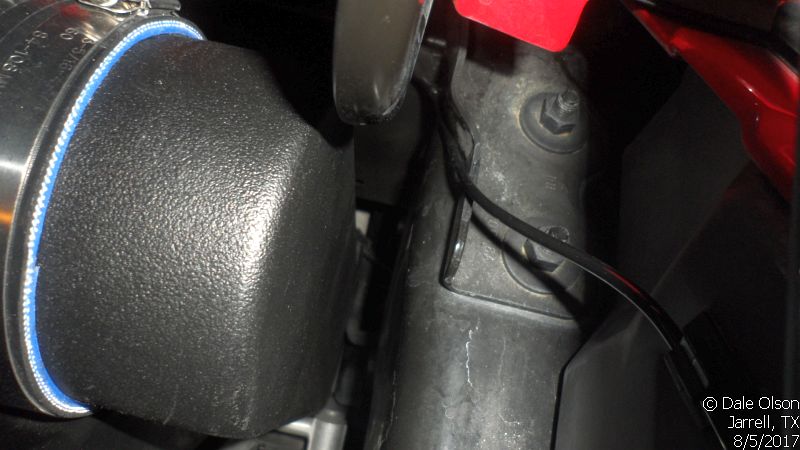
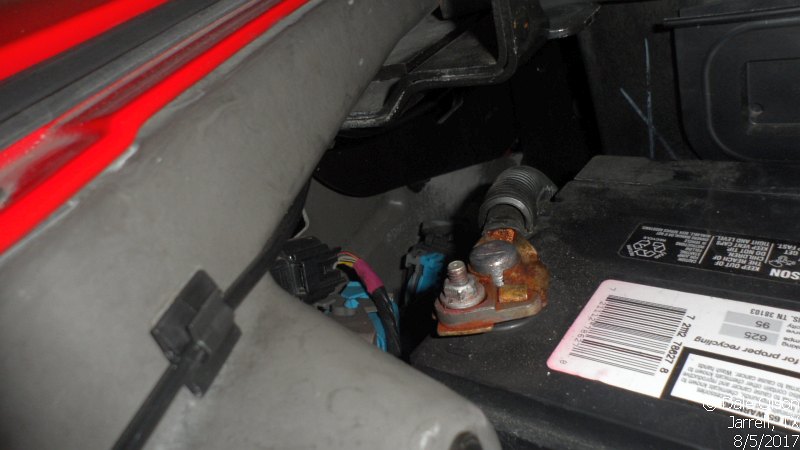
Hook up power, ground, sensor wire and speaker wire.
Mount the speaker.
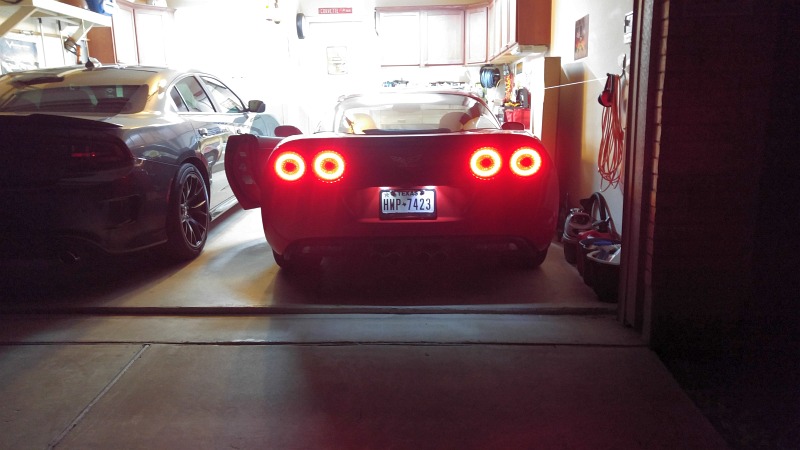
Sequential Tail Lights
What to add a little pizazz to your tail lights. Get a sequential tail light kit from Web Electric.
Install is plug & Play. Remove the 2 outside tail lights, install the new harness & test.
Note - I have replaced the sequential tail lights with Eagle Eye tail lights.
Short video of the sequential taillights.
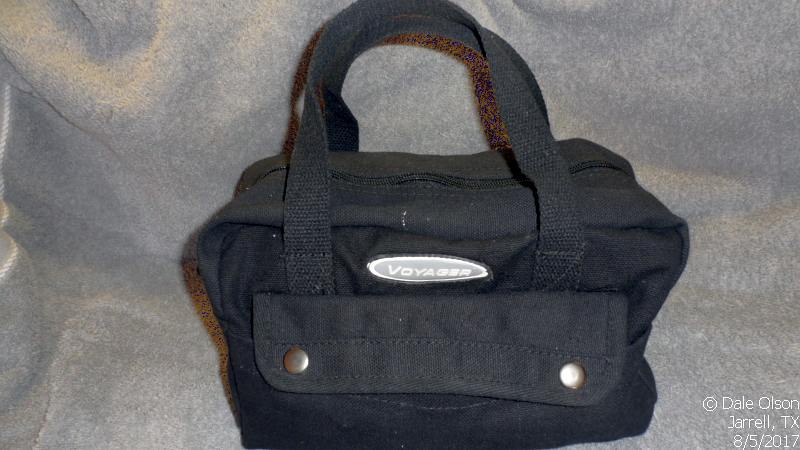
Emergency Tool Kit
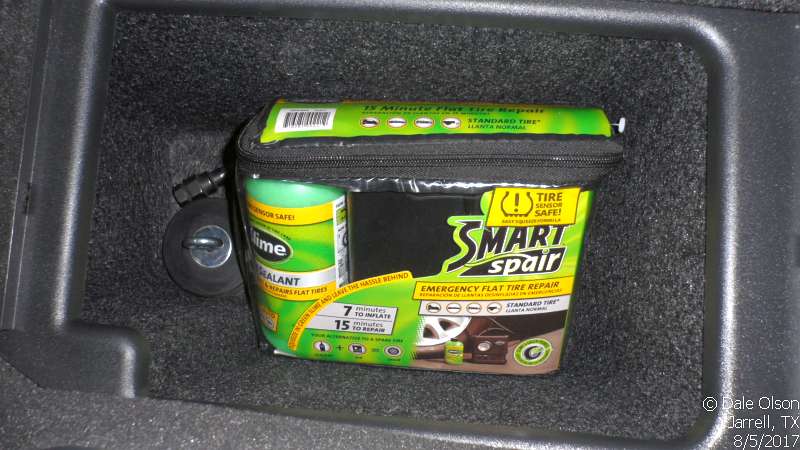
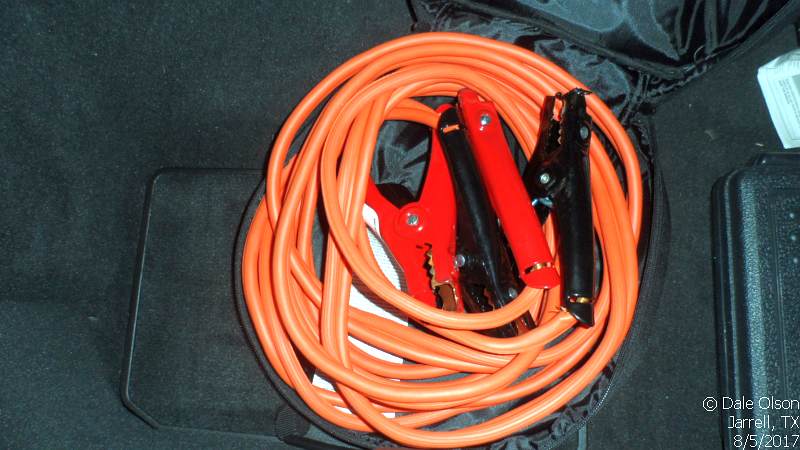
How many times have you been on a cruise, a trip to the store or any place else & either you or someone else breaks down. In some cases, it just takes a few tools to get back on the road. But, what tools do you carry & where to store them? I put a small emergency tool kit together that contains a few basic tools, jumper cables and a Fix A Flat kit. The tools would fit in one of the storage compartments in the back of the Corvette but I decided to make them portable so I could take them in any of my cars. So, a trip to Harbor Freight was in order.
Harbor Freight 11" Tool Bag - $7
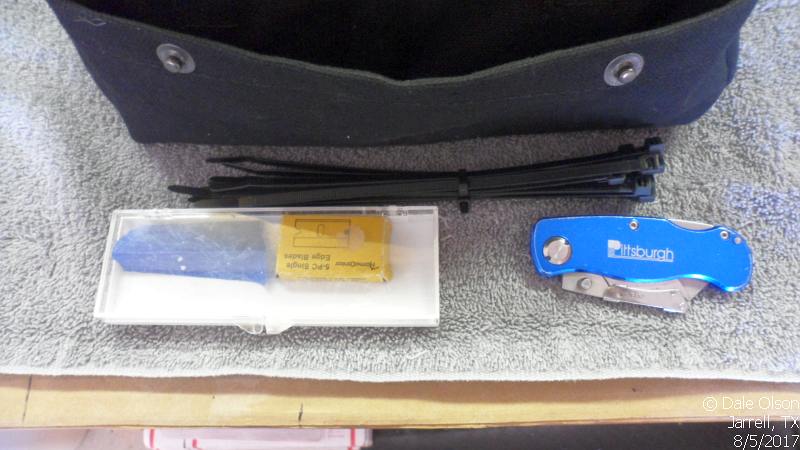
Outside Pocket
- Razor Knife -$3
- Tie Wraps - $3
- Spare Blades - ??
Inside
- Socket Set - Christmas gift many years old & has been part of 3 or 4 tool kits.
- Gloves - $4
- LED Light - FREE from Harbor Freight
- Fuses - $3
- Adjustable wrenches - spares
- Pliers - spares
- Tool Pouches - Leftover vinyl from another project. It took about 30 minutes to sew up & add a couple of pieces of Velcro to hold them shut. I used a white paint pen to ID the pouches.
- Screw Driver set - FREE from Harbor Freight
- SAE/Metric Wrenches - Spare set from an old tool kit, plus a new ratcheting set.
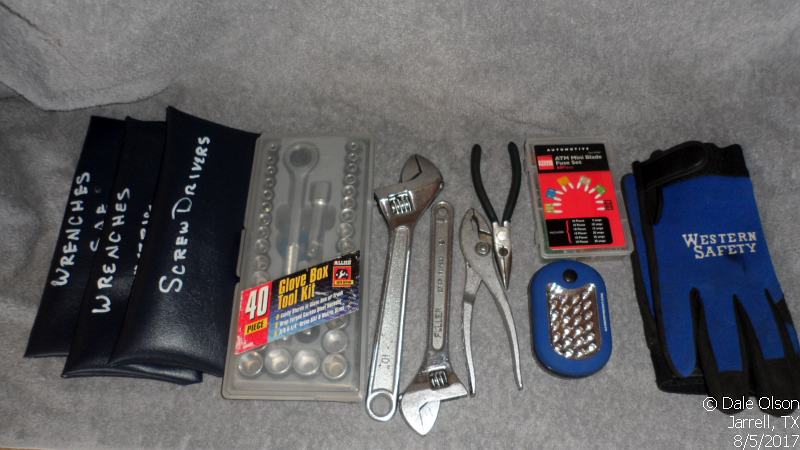
Fix-A-Flat Kit - $39
Jumper Cables - $29
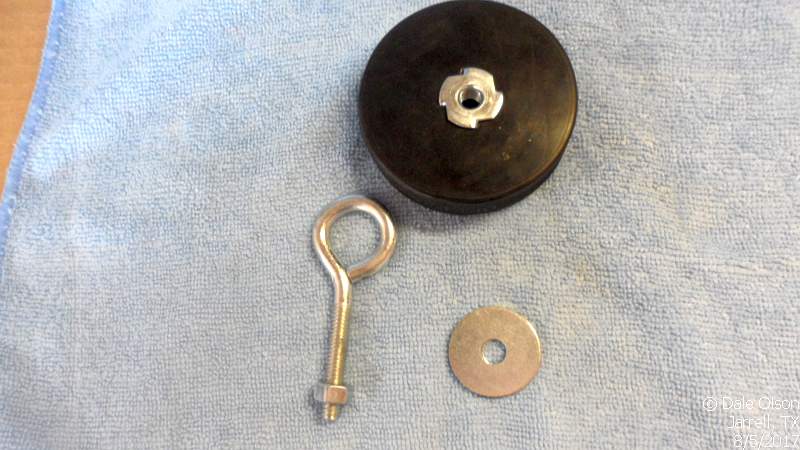
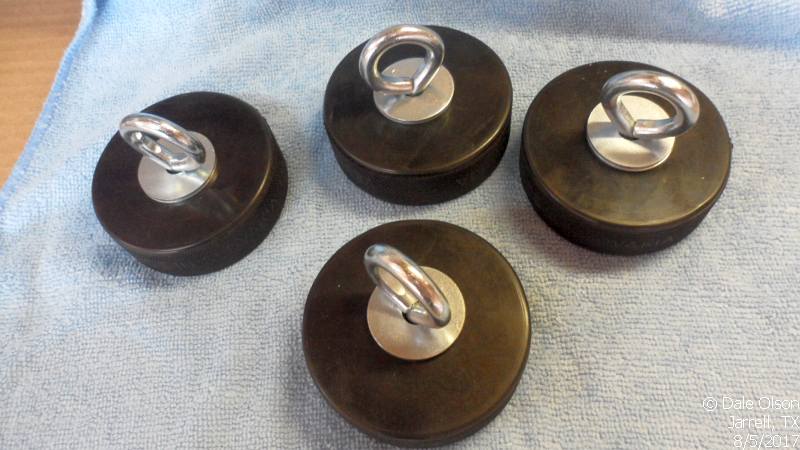
Jacking Pucks
If you don't know there are 4 points on the frame for jacking up each wheel. There is a slot & someone figured out a way to use a hockey puck, an eye bolt, a T nut & couple of fender washers. You just twist them in place and use a low-profile jack to lift the car & you have a nice cushion under the frame. You really only need 1 but then you have to move it for each location.
Hockey Puck
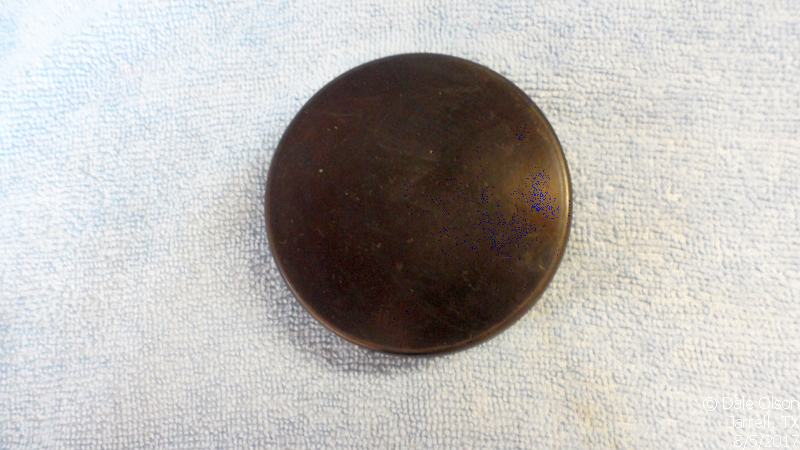
Parts
- 4 Hockey Pucks - eBay or local?
- 4 5/16"x2 1/4 Eye Bolts with 1 1/4" Eye
- 4 5/16" T nuts
- 8 5/16" Fender washers
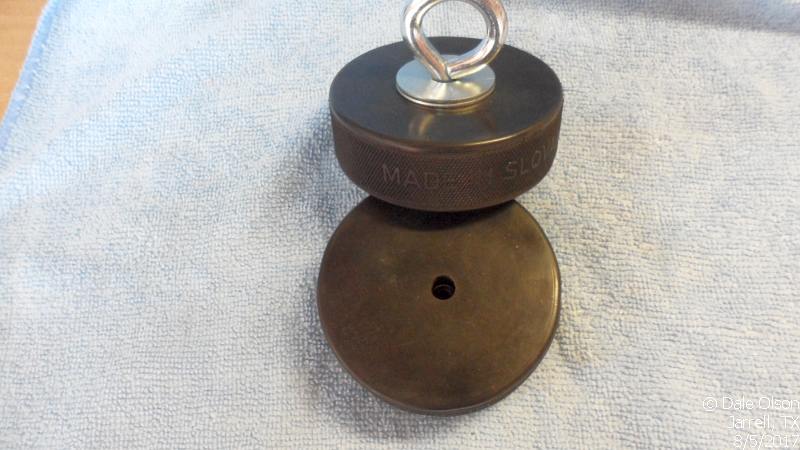
A compltete set.
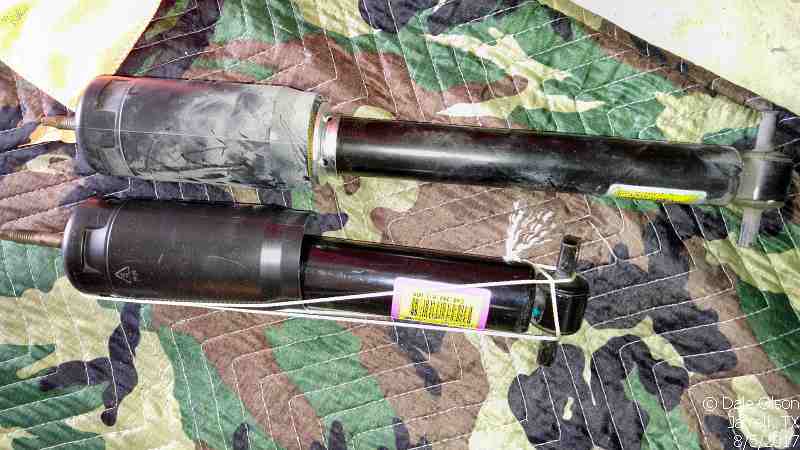
Z06 Shocks Upgrade
The base LS3 suspension is pretty soft compare to the Z51 & Z06 packages. The Z06 shocks are about 2x the size of the stock base shocks. But, you still get a nice smooth ride & they handle the "twistys" a whole lot better than the stock setup. I picked up a complete set of very low mileage Z06 shocks for song on the Corvette Forum.
The rear shocks are a PITA to get out as you have to compress them and use big ass zip ties or some nylon cord to hold them compressed.
The fronts are a piece of cake. Just drop the upper control arm, keep track of the shims, & remove them.
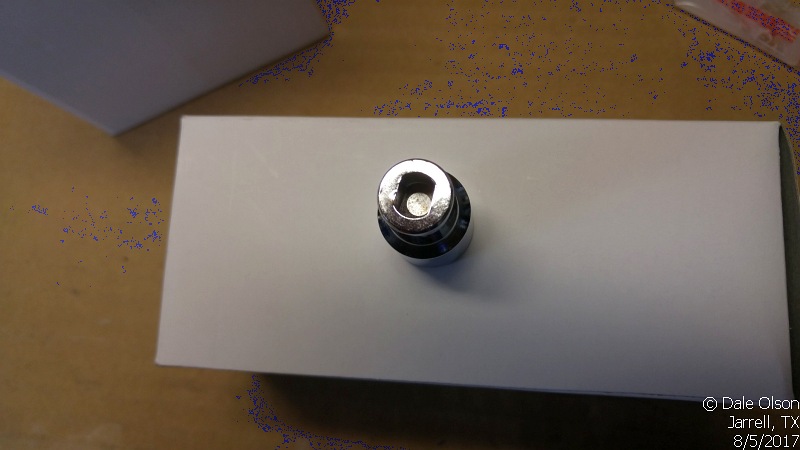
There is one "gotcha" in removing the front shocks. You need a special tool to hold the shock tube shaft when removing the top shock retaining nut. You can get this tool at most auto parts stores or off the internet for about $6.
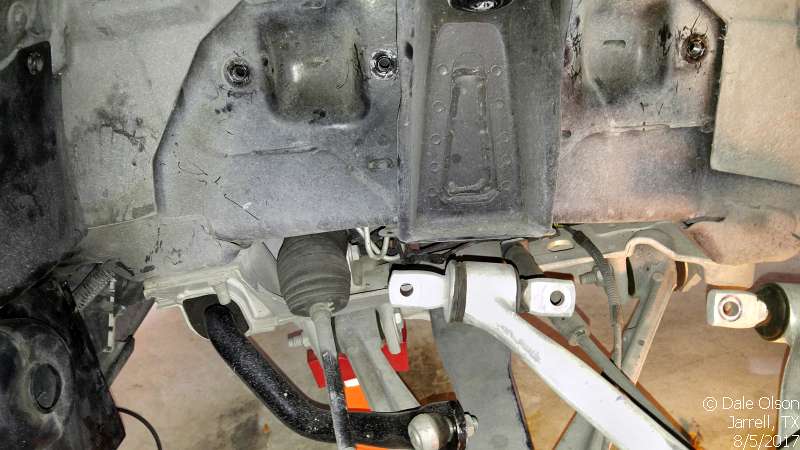
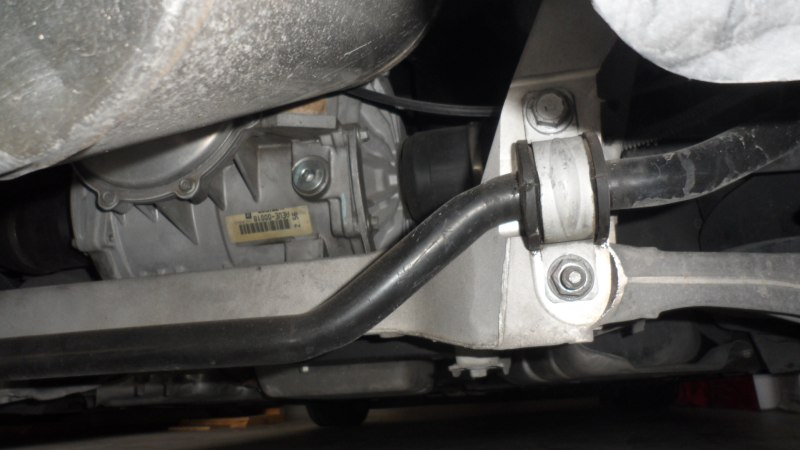
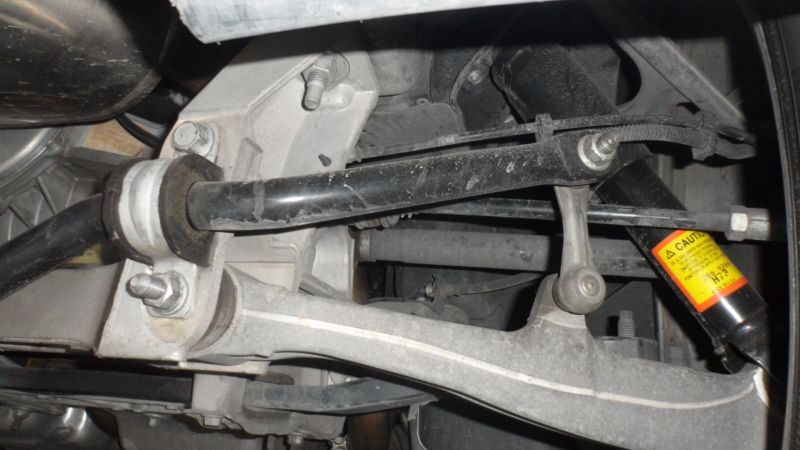
Z51 Sway Bars Upgrade
I got a complete set of Z51 sway bars at the same time I scored the Z06 shocks. Why Z51 and not Z06? Well, the difference is 1 MM on the rear sway bar & the guy I got the shocks gave me a killer deal on them being as I bought the shocks. IE - He only had to ship 1 box.
The sway bars are a piece of cake to install. Just remove few mounting nuts & end link connectors, swap the bars & re-install the mounting nuts/connectors.
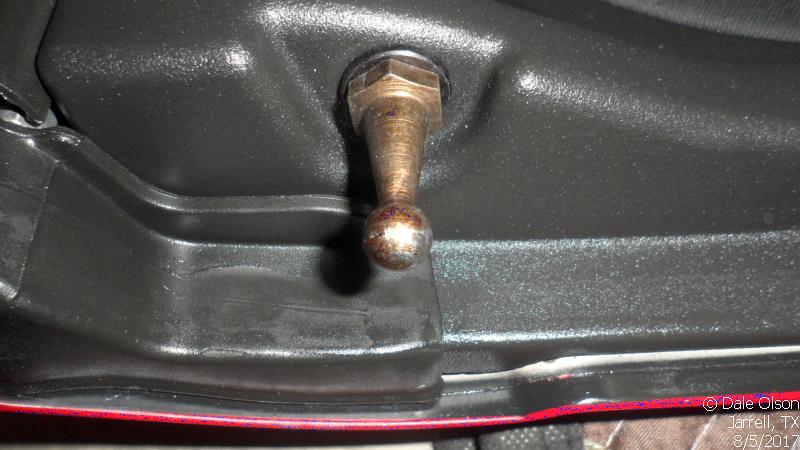
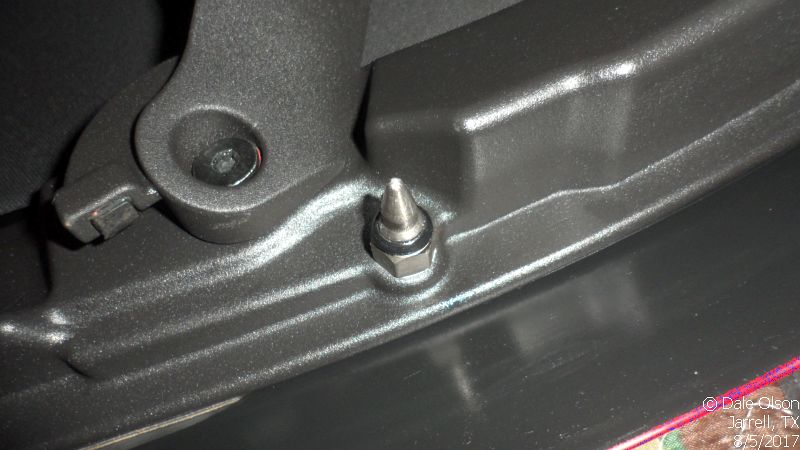
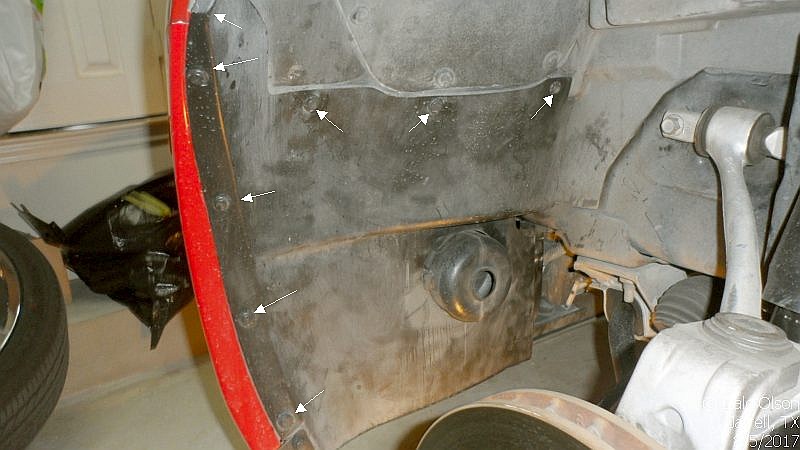
Inner Fender Splash Sheild R & R
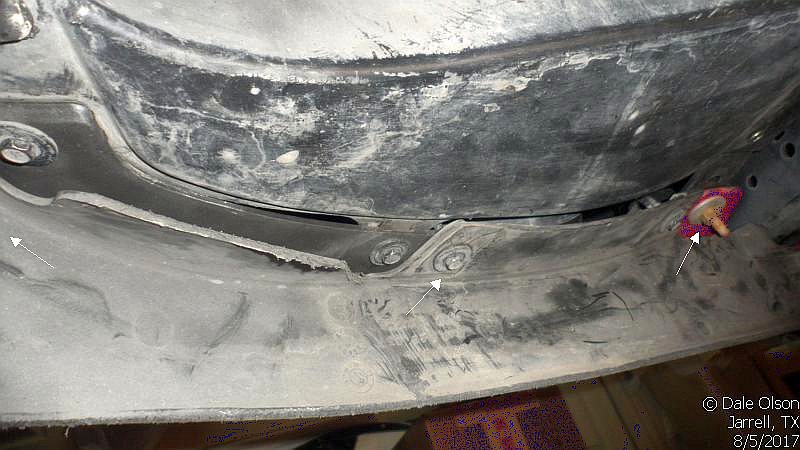
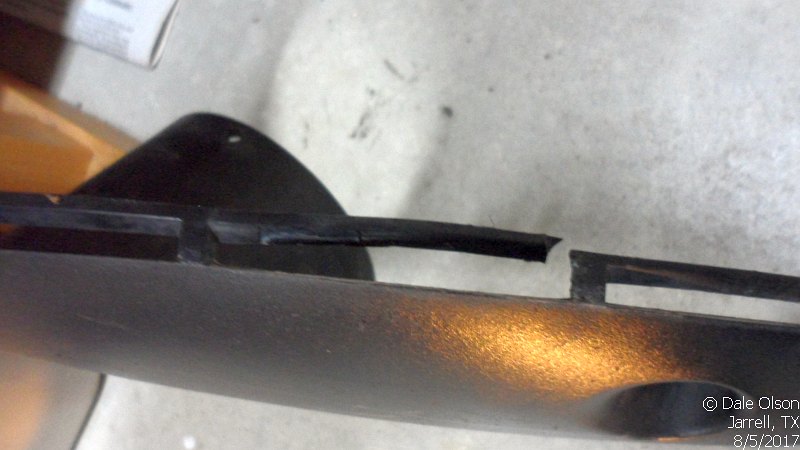
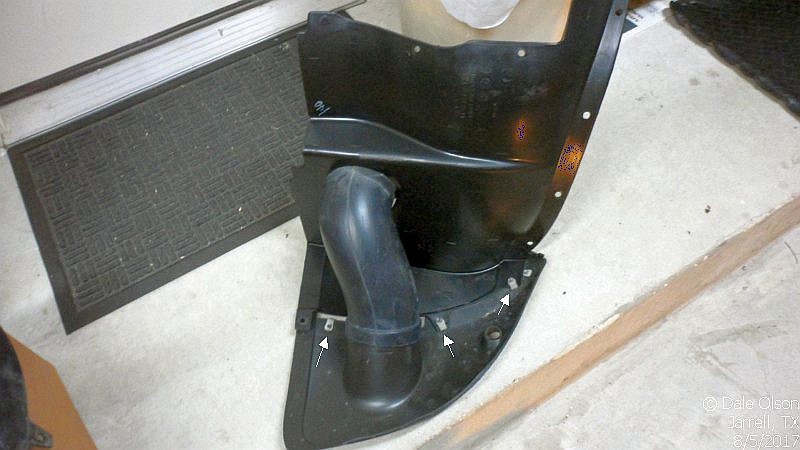
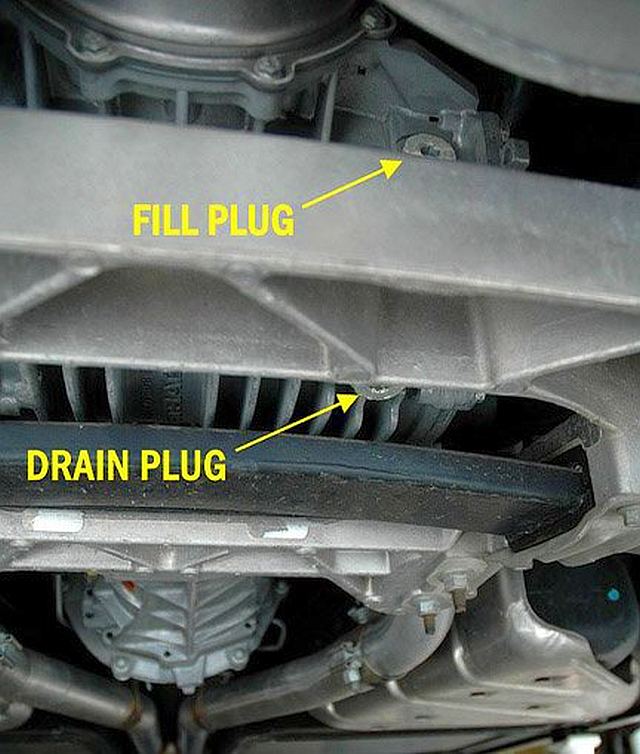
I was cleaning the car & noticed the front driver's side fascia & inner fender splash shield didn't line up correctly. Either it got curb/driveway hit or had been removed & not reinstalled properly. Needless to say, I had to order new parts. It is amazing that these 2 parts are fastened to the fascia with a few screws & some push pins.
Once you get the wheel off (jack & jack stands) you need to remove the push pins, screws & 1 nut (not me!).
The damage.
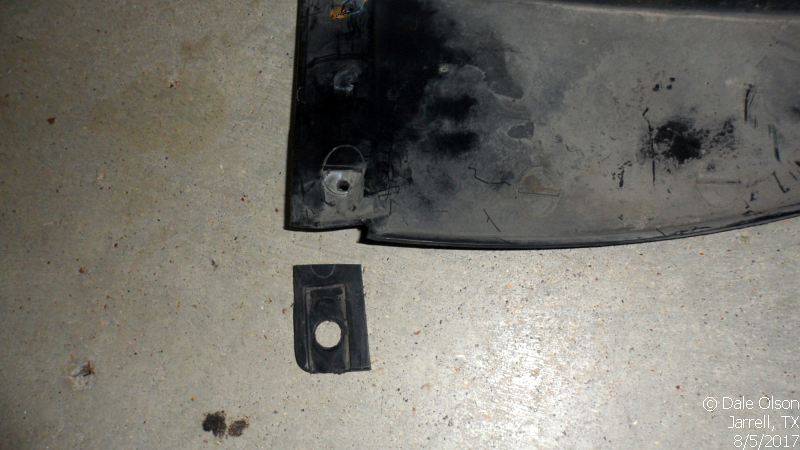
You need to transfer the clips that hold the screws, reassemble the parts & reinstall the brake cooler air tube.
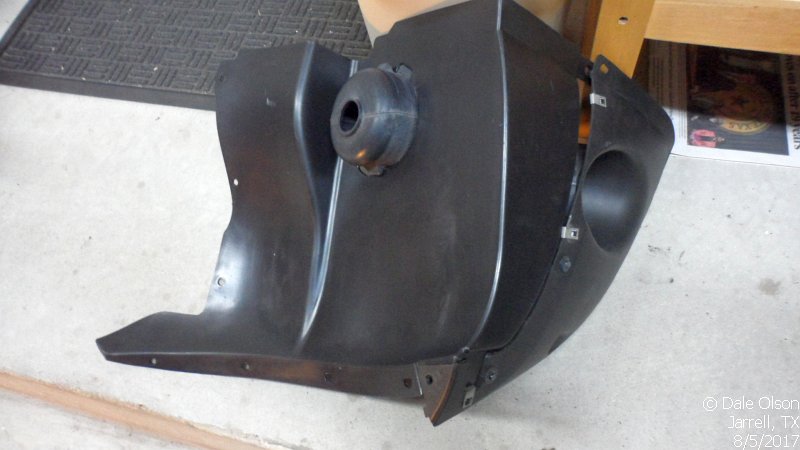
Now just reverse the disassembly, remount the wheel, torque the lug nuts & your done.
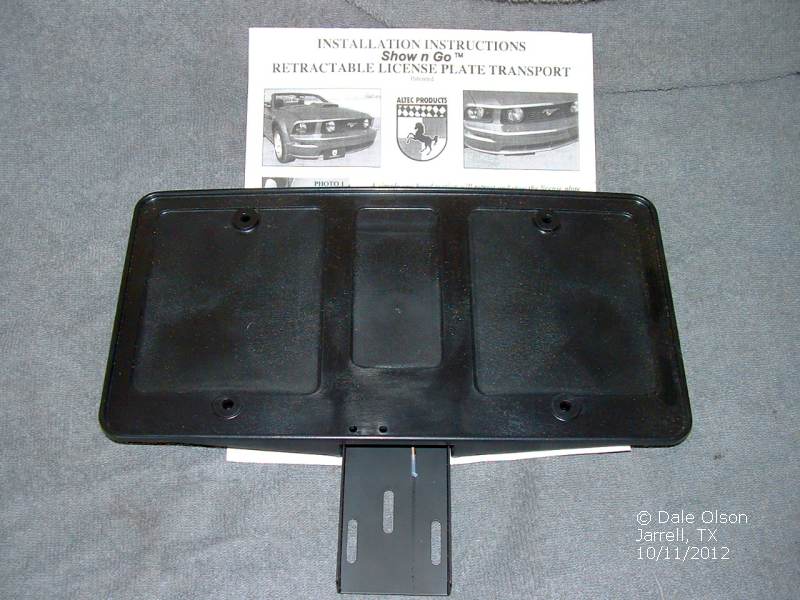
Shown Go
Texas is one of the states that requires a front license plate. I, like most of you hate to drill holes in the fascia to mount the GM-supplied plate holder. So, you can add a Show-n-Go. It comes in two styles, manual & electric. Really easy to install, generally just 3 screws. Mine Corvette had one already mounted.
Show n Go
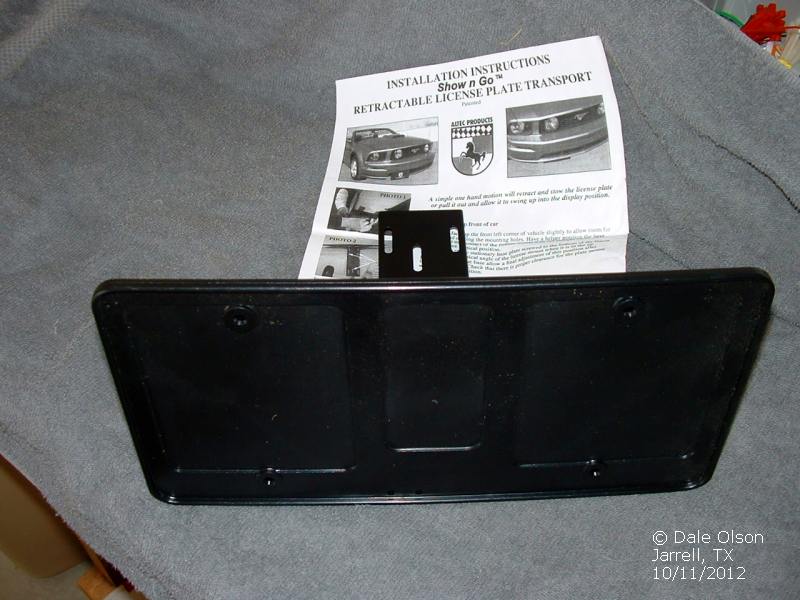
Installed

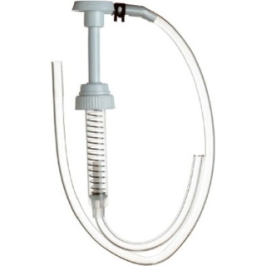
Gear Lube Change
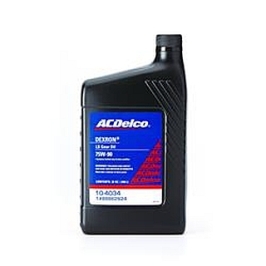
Just when you think you can get in & just drive the car something else pops up. In my case, it was an oil/filter change along with a lube change for the rear differential. Why change the differential fluid? Well, I was starting to hear "funny noises" coming for the rear when I was backing up. Obviously the Limited Slip clutches where talking to me.... I need new lube! So, I checked the Corvette Forum & this is a common problem. Just for grins I checked the Car Fax for the car a saw that differential fluid was changed under warranty for the same issue.
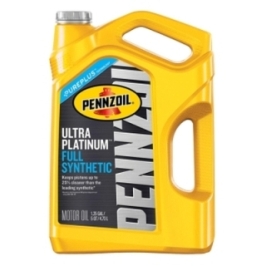
So, off to dealer to pick up 2 qts of GM 75w-90 differential lube (Part # 88862624) that has the limited slip additive. While is was there I got a GM PF48E oil filter to go with the 6 qts of 5w-30 Penzoil Platinum I got at WaMart.

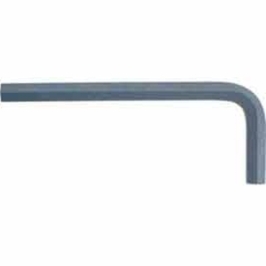
You will need a 10mm allan wrench & lube pump (Harbor Freight).
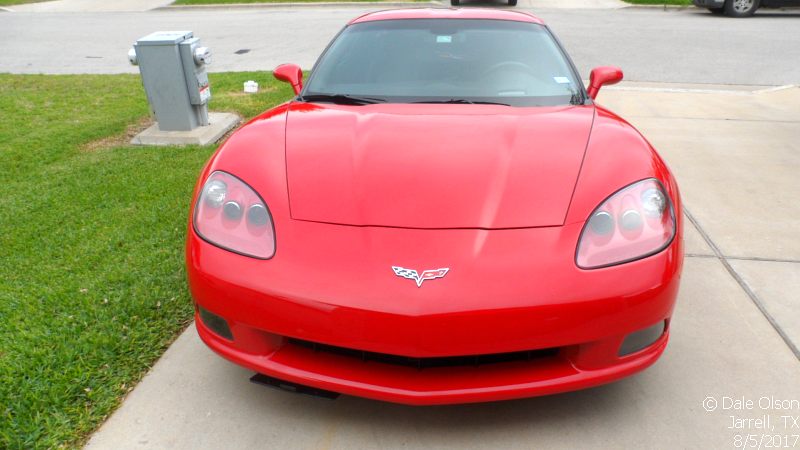
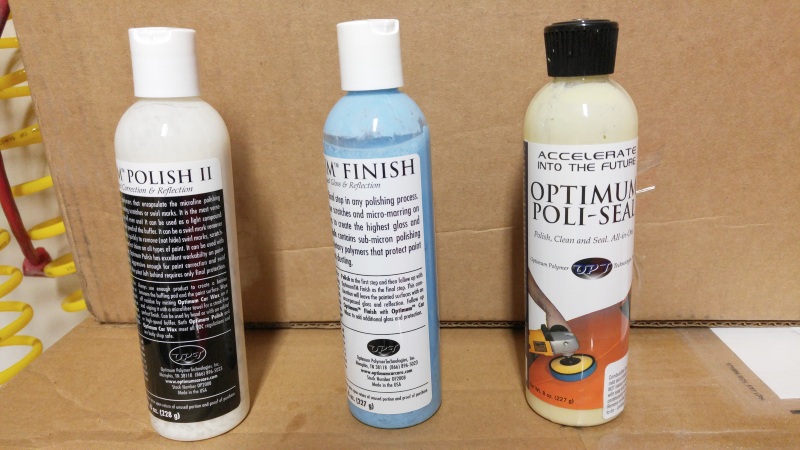
Compound, Polish & Wax
The finish on the car was pretty good for 45,000 original miles. But, I thought just maybe I could bring the shine up a bit. So, I picked up a radom obitial buffer, 3 6" pads, fine cut cleaner, & polish at Harbor Freight. The pads come in 3 flavors, compound, polish & finish.
I also picked up some 5" & 3" pads off eBay for small areas"
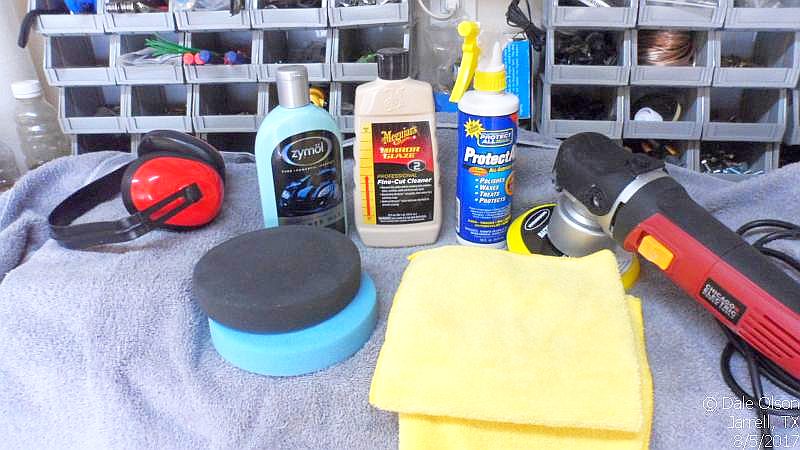
- Wash the car with Dawn to strip the old wax off.
- First pass with compound pad & Meguiars Fine Cut Cleaner for light paint correction.
- Second pass with the polish pad & Meguiars Swirl Remover (light polish).
- Third pass with Zymol wax & buff.
I used 3 or 4 micro fiber clothes to wipe any cleaner, polish or wax off as during each pass. A couple photos of the finshed product. Not the best photos as it was about to rain.
I have changed my slection of polishing chemicals to Optimum. You can get these in 8 oz versions for about $8 to $10. The results are even better that the first go around.
Turn Signal Switch Backs
I really didn't like the Orange turn signal as DRL lights. So, i found guy on the Corvette forum that offers a Plug & Play kit that uses Orange/White leds to switch from white DRL to orange turn signal & back to white DRL lights.
Your DRL lights look like this.
And the turn signals look like this.

Install is not hard even though you have to remove the inner fender liner. If it was just a bulb change it would a 5 min job, so to speak.
NOTE - Inner Fender liner/Splash Sheild R & R is coverd in
Fender Splash Sheild R & R

But, do to the fact you have to add a resistor pack (Plug & Play part) you need to remove the inner fender liner.
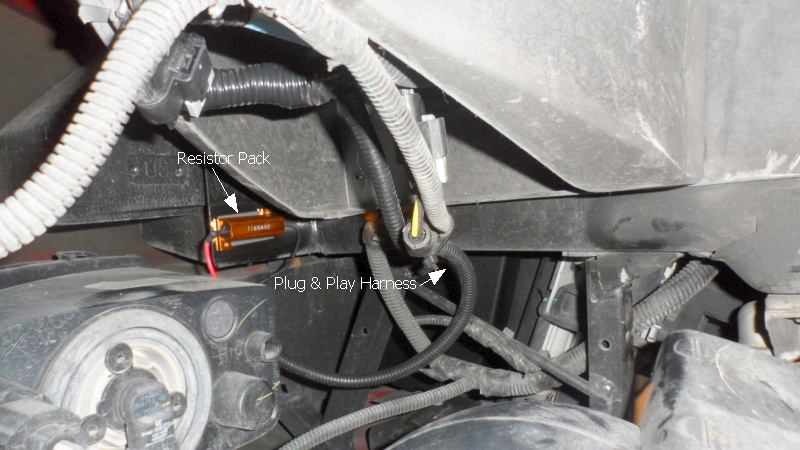
Be sure to test the lights BEFORE replace the fender liner & wheel.
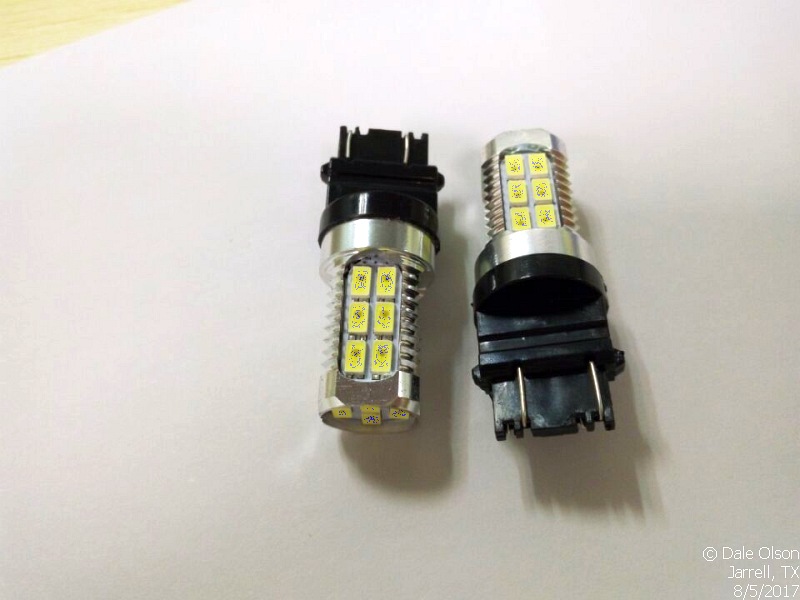
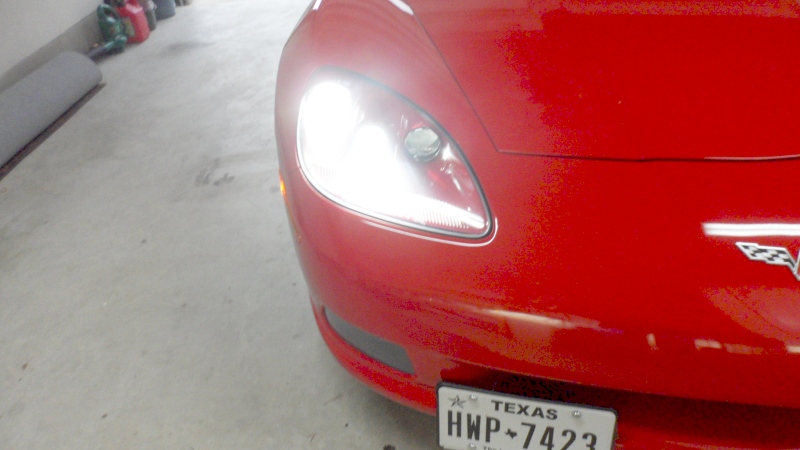
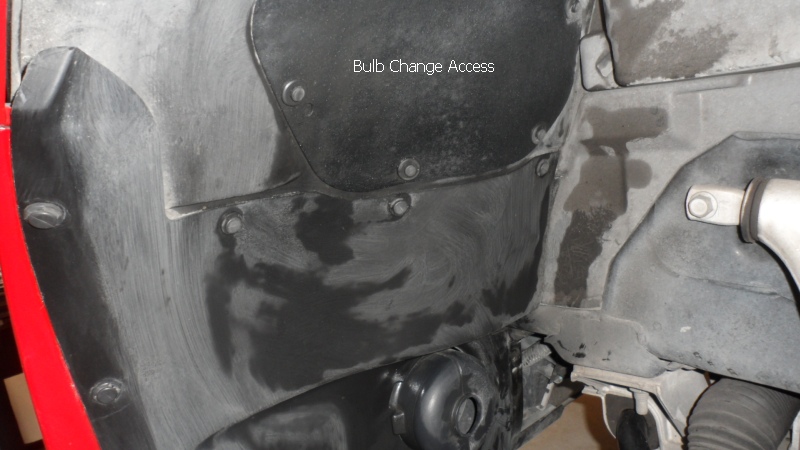
High/Low Beam, & Fog Lights
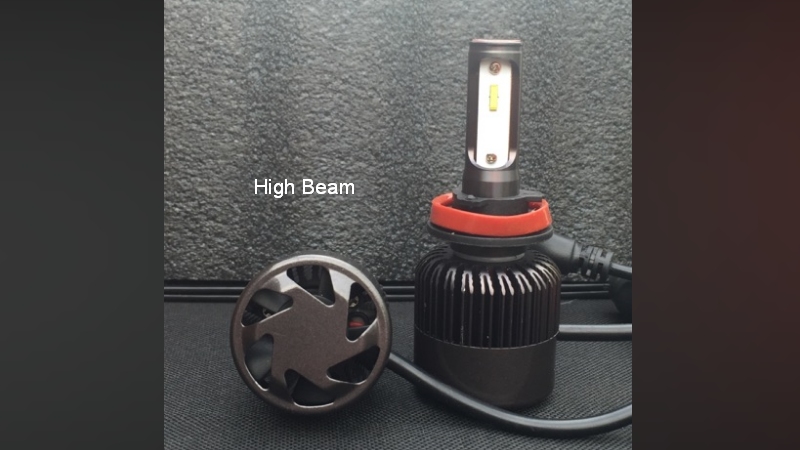
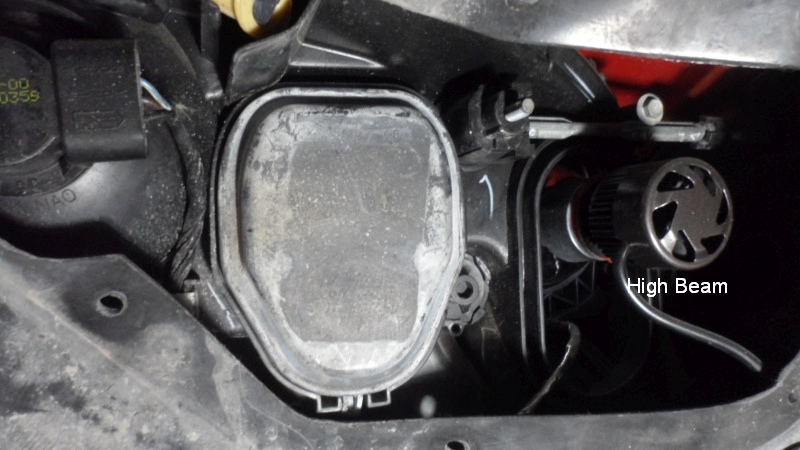
High Beam
To install the high beam bulb, remove the wheel, remove the bulb access panel, remove the
high beam bulb cover, remove the bulb & replace it with the LED upgrade.
NOTE - The high beam cover will no longer fit due to the fan to cool the LED.

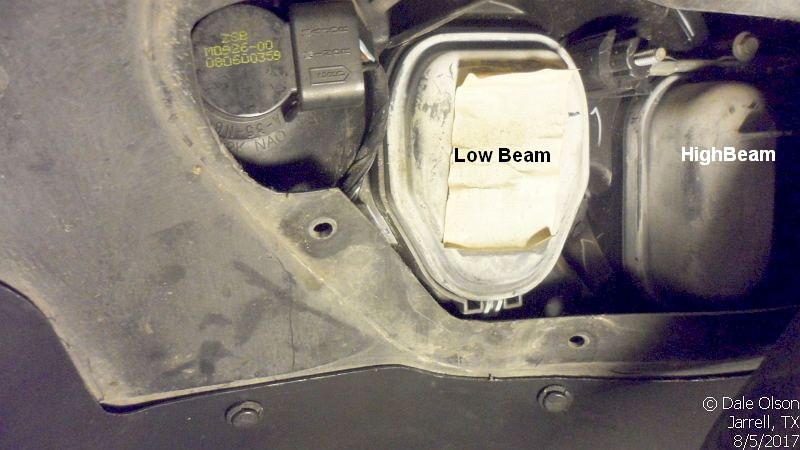
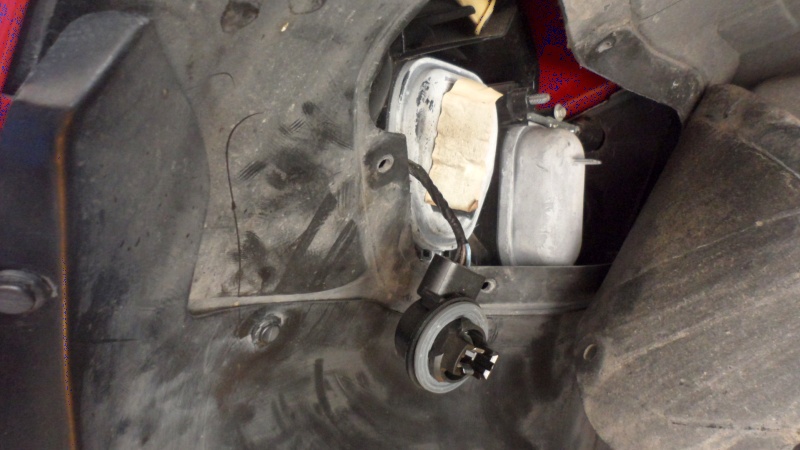
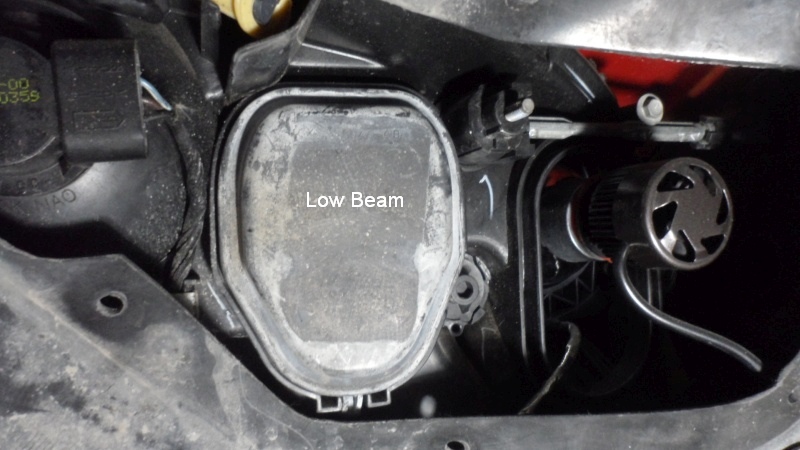
Low Beam
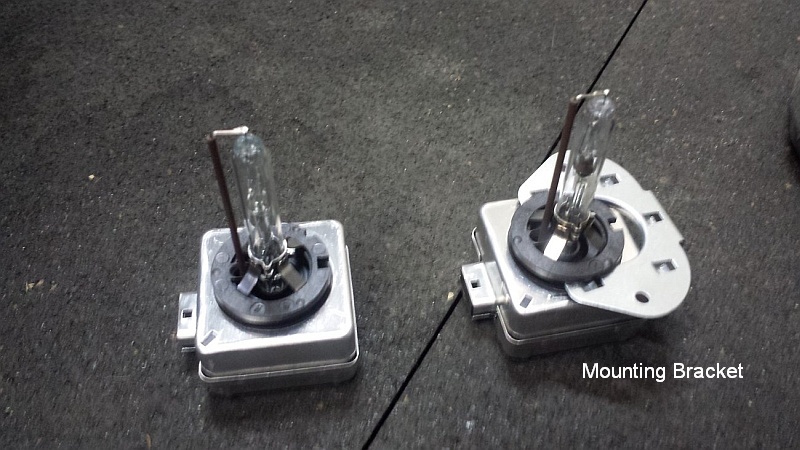
The DS1 bulbs come in 4 flavors 4200K (stock), 5000k, 6000k & 8000K. I installed the 6K version.
To install the DS1 low beam blub, remove the wheel, remove the bulb access panel & remove the low beam bulb cover.
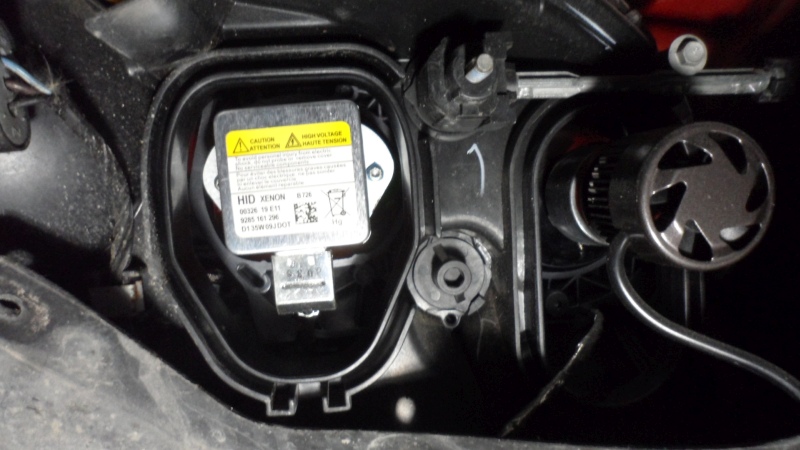
Next remove the 2 DS1 bulb mounting screws with a #10 Torxbit.
NOTE - I pushed shop rag under the DS1 bulb just in case I dropped one of the screws. Don't
lose one as they are generally not avaiable.
Remove the bulb from the wiring harness & transfer the mountining bracket.
Now just reverse the process and your done. But, be sure to test the install before you button everthing up.
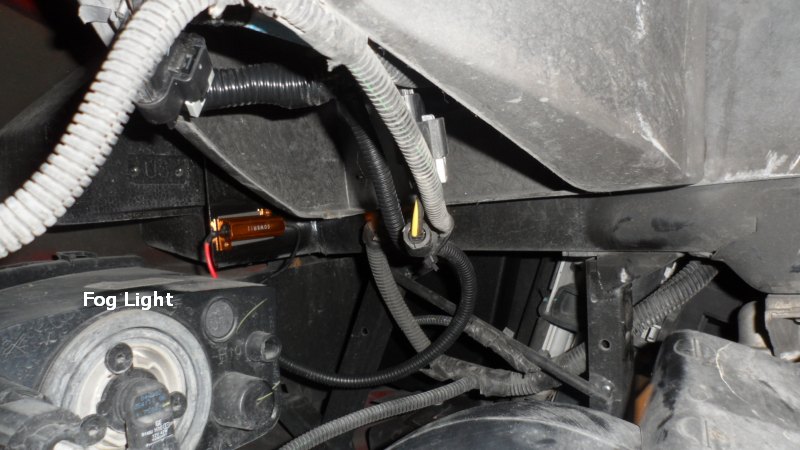
Fog Lights
To install the fog light blub remove the inner splash sheild & remove the bulb.
NOTE - Inner Fender liner/Splash Sheild R & R is coverd in
Fender Splash Sheild R & R

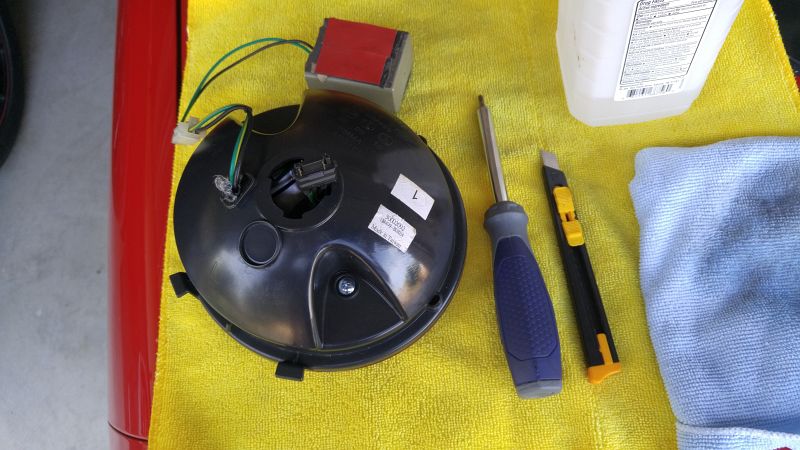
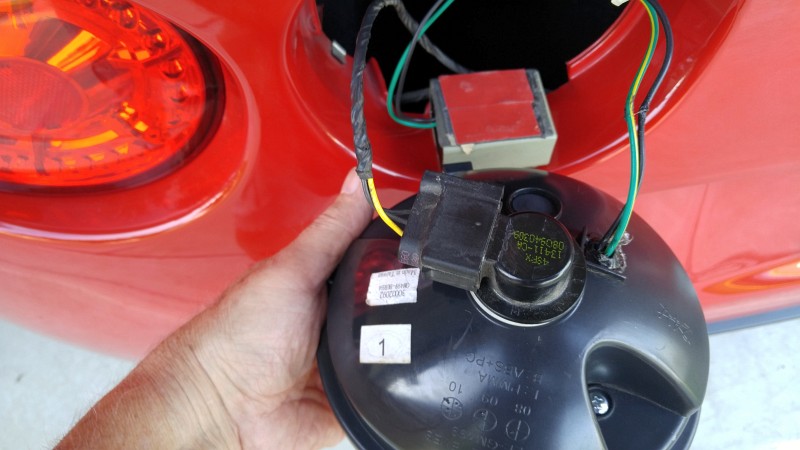
Eagle Eye Tail Lights
One of the first items I saw for the Corvette were Eagle Eye tail lights. Really kool and bright as hell. But, the catch is they are expensive $400 &in limited supply. Every now & The you would see a set in the For Sale section of the Crovette forum. I was able score a set $200 shipp to my door.
Now install is a piece of cake. Take all of 30 mins, some alcohol, a rg & #15 Torx screw driver. But,there are a couple gotcha's.
- You have to ID the right & left lenes. Ther are marked but you have to look for them.
- You have to make sure that the plug orientaion is correct so the BLACK ground wires match up.
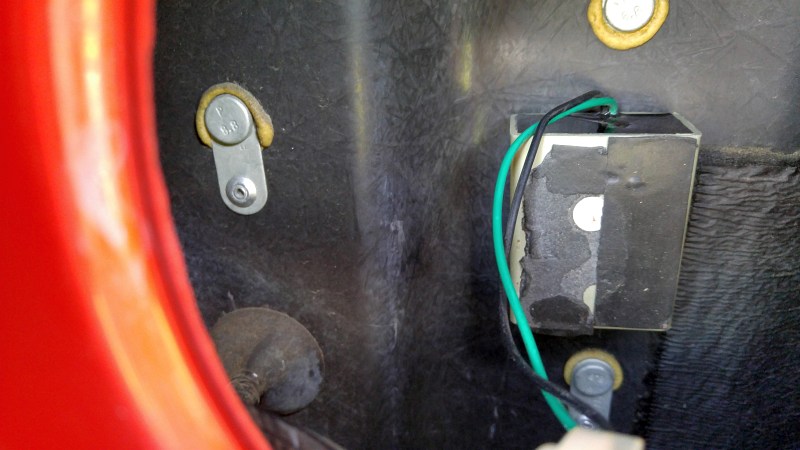
- You must have a CLEAN area to mount the resitor packs. This is where the alcohol & rag gets used.
I tested each tail light BEFORE I mounted the resistor pack. Once mounted they
are a real PITAto remove as the 3M tape really sticks.
NOTE - The razor
knife is used to peel the 3M tape backing off.
Short video of the Eagle Eye tailights.
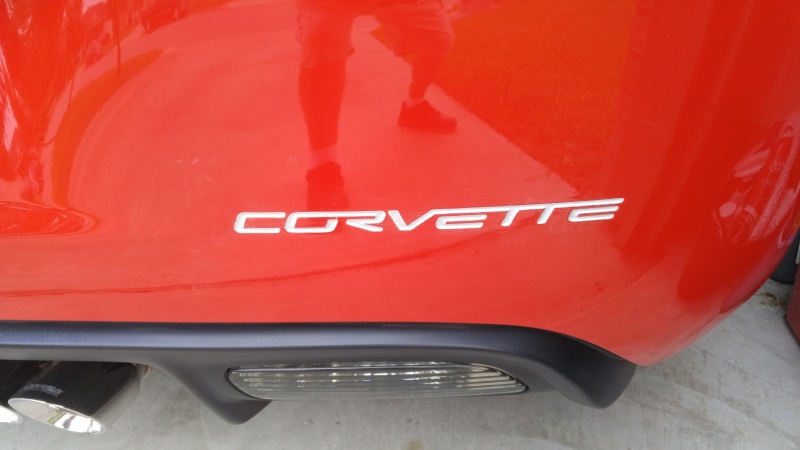
C6 Rear Fascia Paint Mod
The C6 rear fascia has the Corvette logo embossed into it. There is a chrome overlay that you can buy but it really does not look right. Got a tip off the Corvette Froum on how to paint it using Krylon spray paint.