Scat Pack Mods - Exterior
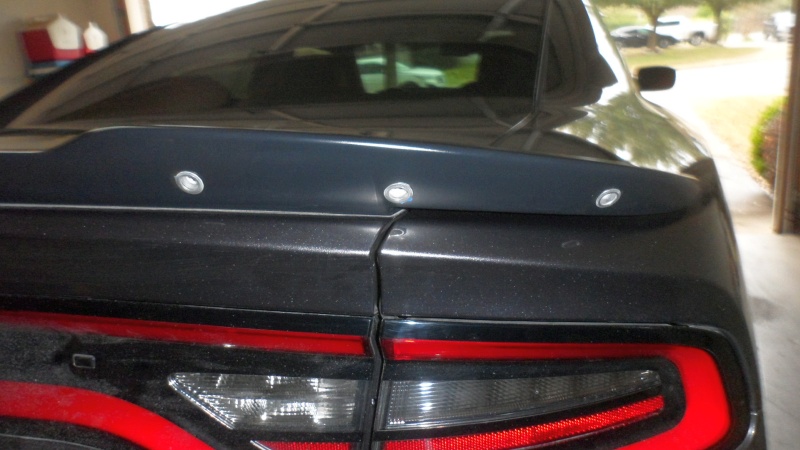
Wickerbill Install
I have been waiting for a nice day... but all I got was cold and rain. But, I got off my lazy butt and installed a wickerbill on my Scat Pack.
I looked at the ZL1 & BJ's Garage wicker bills.
ZL1:
- 2-piece Lexan
- 2 Styles - Standard & Stealth
- 3 Edge Finishes - Standard/Standard Dark Tint/Polished
- Uses 1/4"x20 Rivnuts
- Hardware
Standard - Black Phillps Head Screws
Optional - Stainless or Black Stainless - No adjustability
- No bending
- Need Rivnut install tool.
BJ's:
- 1 piece aluminum
- Uses 3/8"x16 Rivnuts
- Hardware
Standard - Stainless Allen Head Screws - Slotted mounting holes - adjustable
- You must bend/form the wickerbill to fit the spoiler
- Need Rivnut install tool.
- Most kits do NOT have the large 3/8" mandrel.
- I made my own Rivnut tool
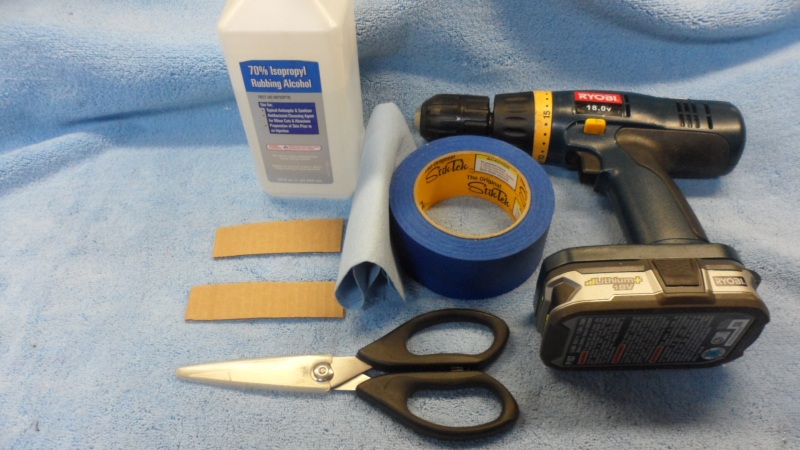
Tools & Supplies
- 9/16" Socket & Box End Wrench
- 3/4" Box End Wrench
- 7/32" Allen Wrench
- 3/16" & 1/2 drill bits - at minimum
- Step drill in lew of the 1/2" bit
- Drill - corded or cordless
- Rivnut tool - Kit/DIY
- Painters tape
- Alcohol
- Shop Towels
- Sissors
- Cardboard
- 1 Son-in-law for a 2nd pair of hands.
How To
- Start by cleaning the area to be taped with a shop towel & alcohol otherwise the tape probably will not stick.
- Apply tape to both the trunk lid & the stock spoiler.
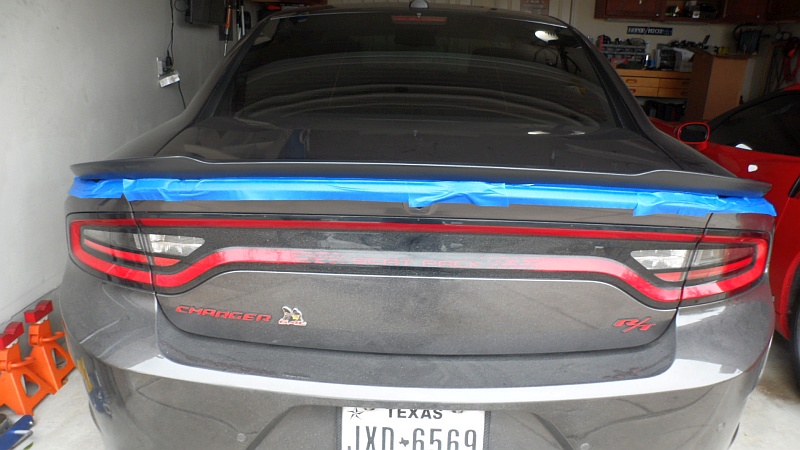
- Cut some spacers out of cardboard & tape them to the trunk lid. This will hold the wickerbill off the trunk lid.
- Form the wickerbill to match the curves of the stock spoiler & test fit.
- Center the wickerbill on the cardboard spacers & mark the 2 center holes.
- Drill the pilot holes.
- I used the step drill to make the hole fit the rivnut. It needs to be a tight fit if you are using the DIY Rivnut Tool.
Note - The rivnut is .52" OD & most drill bits are .49" to .50" in diameter. - Install the rivnuts. I used my DIY tool.
- Re-mount the wickerbill with the 2 supplied bolts & washers with the 7/32" Allen wrench &mark the next 2 mounting holes.
- Remove the wickerbill, drill the next to holes & install the rivnuts.
- Repeat steps 9 and 10 for the rest of the rivnuts.
NOTES
- Remove the tape before installing the rivnuts.
- Be aware of the drilling angles, especially on the corners.
- 3/8"x16 bolt of appropriate length
- 3/8" nut
- A flat washer & a star lock washer.
- 2018 #'s Small Grill Openings
- 68280492AA - Right
- 68280493AA - Left
- 2019 #'s Large Grill Openings
- 68417498AA - Right
- 68417499AA - Left
- Ratchet/Short Extension
- 16 MM Socket
- 15 MM Socket
- Blue Threadlocker
- The side markers I bought were NOT tinted. I opted to have my tint guy do them as his tint and workmanship are El Perfecto.
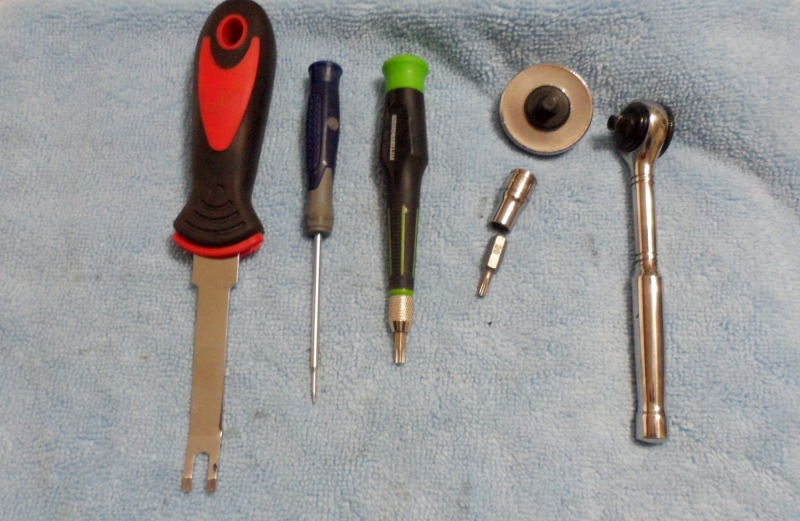
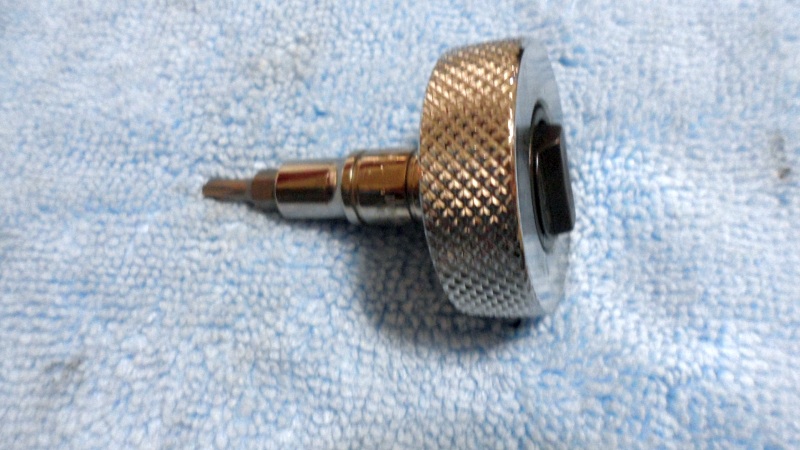
- The side markers do NOT come pre-treaded. So, you need to thread them using one of the screws you removed from the original side markers. Be sure you start them straight and don't over-tighten them as you will break the plastic. Also, run the screw in/out a couple of times as it will make the installation easier. Here is where the Torx bit screwdriver comes in handy.
- I used a small strip of painter's tape to hold the Torx bit in the socket.
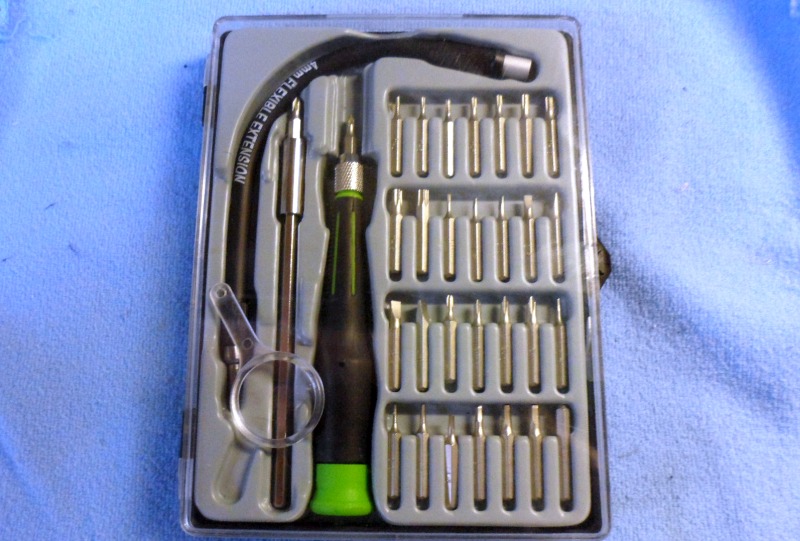
- The Thumb ratchet and Mini Screwdriver are Harbor Freight specials.
- Panel Push Pin Tool
- 1/4" Thumb ratchet or Standard/Flex head ratchet
- #20 Torx bit
- 1/4" socket to hold the Trox bit
- Screwdriver to hold a Torx bit
- Thin blade screwdriver to release the harness clip
- The temp needs to be 70° or better
- The taillight lens needs to be CLEAN.
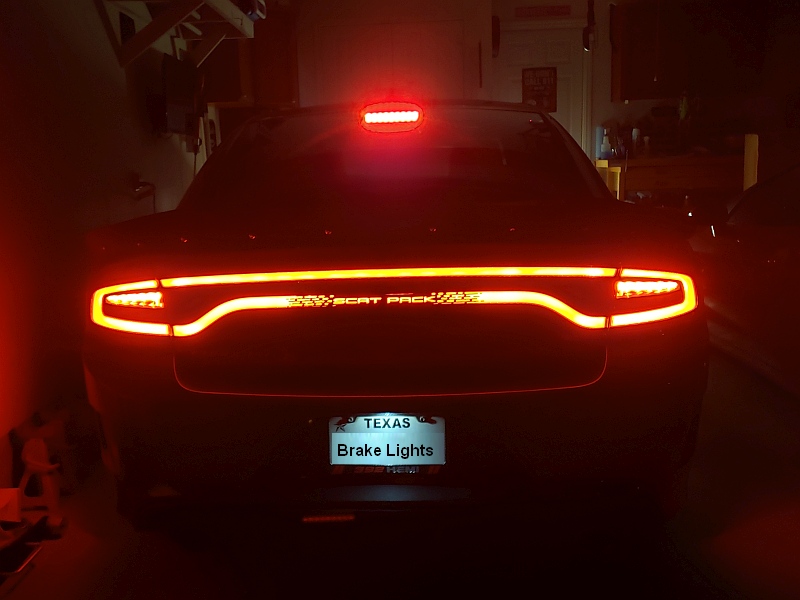
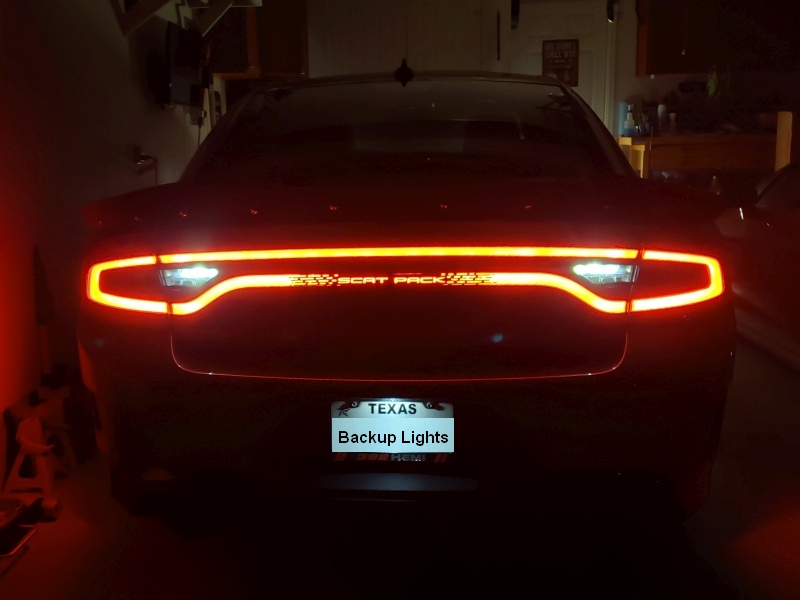
- The brake light and turn signals are almost as bright as they were without the tint.
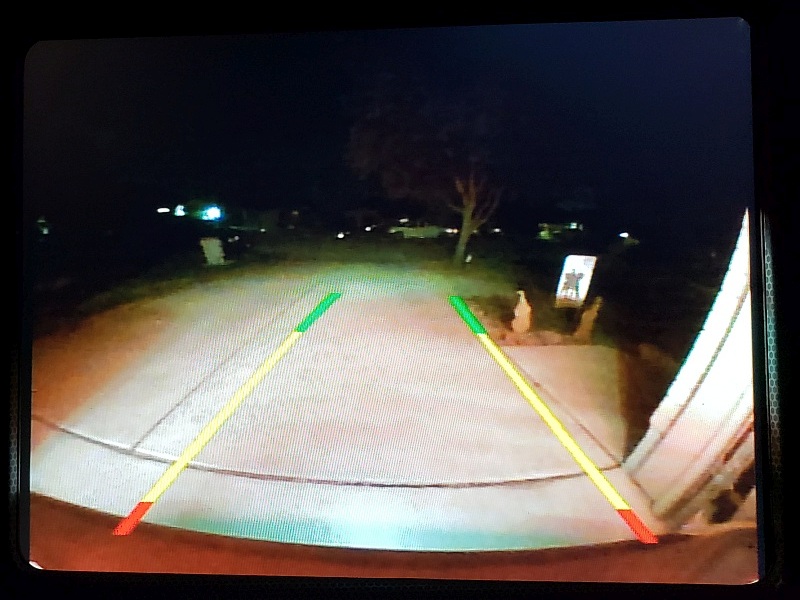
- The backup lights still provide more than enough light for backing at night.
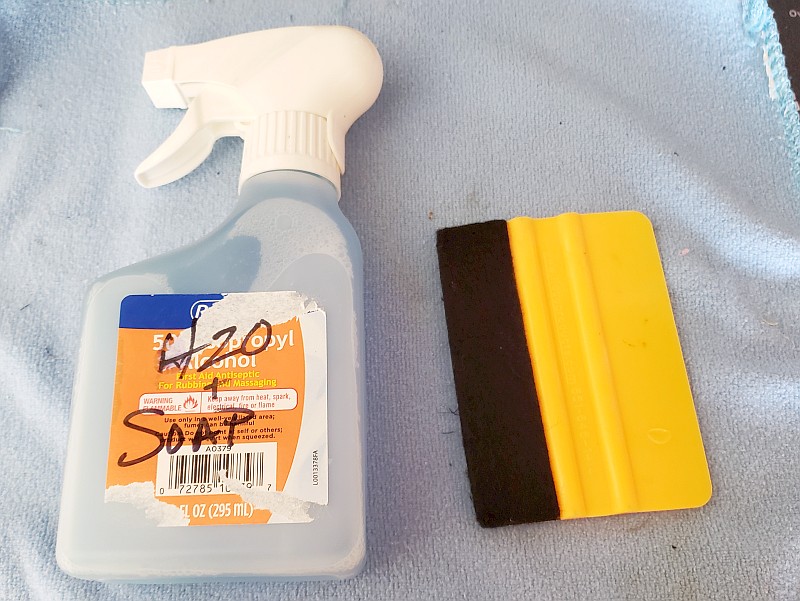
- A spray bottle with water and a few drops of dish soap
- A cloth-covered squeegee
- Maybe a heat gun or hairdryer
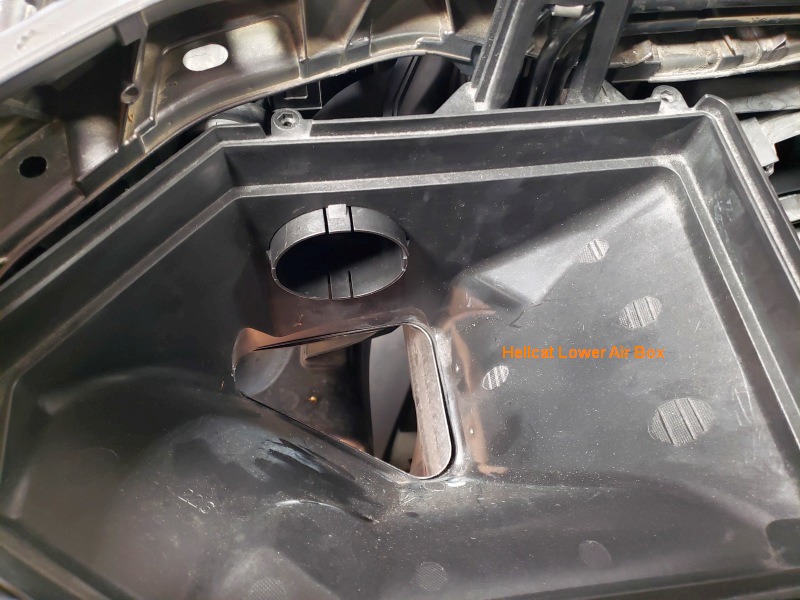
- 68175164AC - Lower Air Box
- 68228902AB - Air Tube
- 68240171AA - Air Intake Shield
- Flat blade screwdriver & Philips head screwdriver
- 8mm socket, long extension & ratchet
- HD scissors and utility knife
- Panel tool
- Some push pins
- Drill and bits
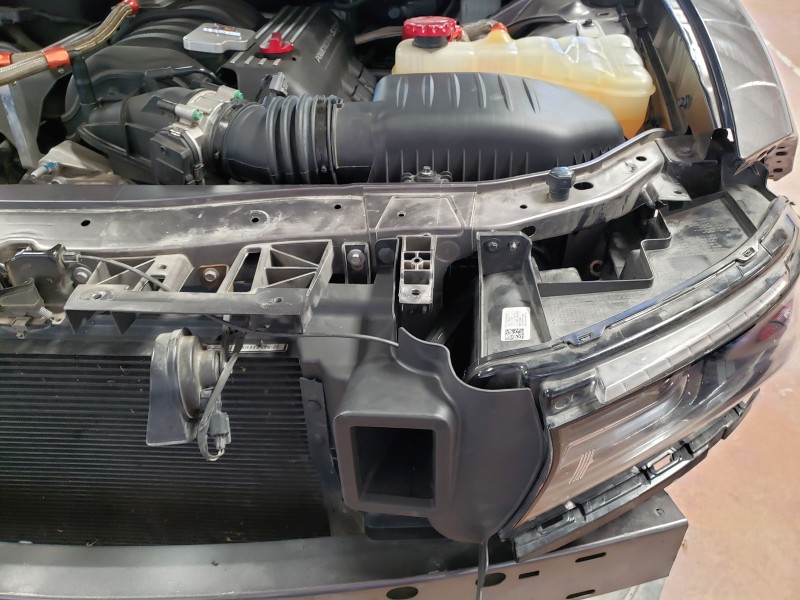
- Remove the front bumper. There are a number of YouTube videos on how to do this. But, according to my body man, you need to remove the wheels and the complete fender liner for better access.
- Remove the Headlight. It is held with 5 8mm bolts.
- Remove the original Air Intake Shield. It is held on with 3 pushpins.
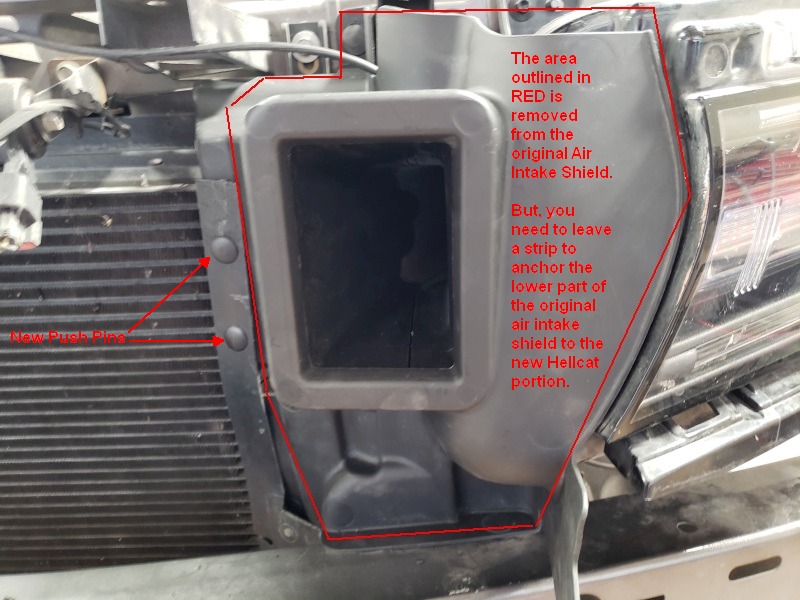
- Remove the Original Airbox. You will need to transfer the hold-down bushing and the rubber
fender bumper from the original airbox and transfer them to the Hellcat airbox. Now install the Hellcat airbox.
- Install the Air tube and secure it with a New pushpin.

- Install the Hellcat Air intake shield and the modified original lower portion of the Air Intake Shield.
Note - Be sure to check the hood release cable routing.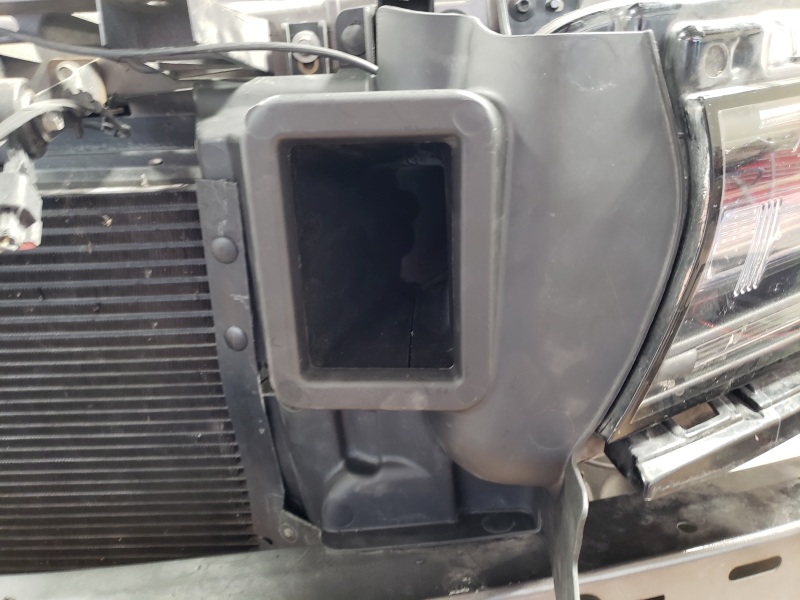
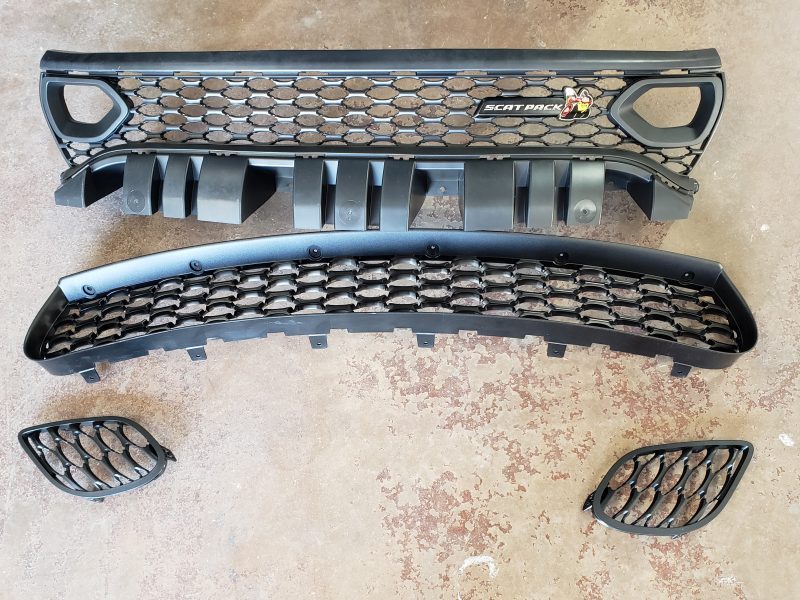
- 68417502AA - Grille Upper
- 68394592AA - Grille Lower
- 68417504AB - Bezel
- 68417505AB - Bezel
- 68394595AA - Bezel Seal Driver Side
- 68424623AA - Air Duct
- 68417499AA - Cover Lamp Opening Right-side
- 68417498AA - Cover Lamp Opening Left-side
- 68463715AA - 2019 SRT Hellcat Grille Badge
- 68463714AA - 2019 Scat Pack Grille Badge
- 68420463AB - Daytona Grille Badge
- Remove the front fascia/bumper. Lots of How-To videos on YouTube.
- R&R the upper grill, lower grill, and fog light covers. Just some clips and bolts.
- Replace the fascia/Bumper.
Before

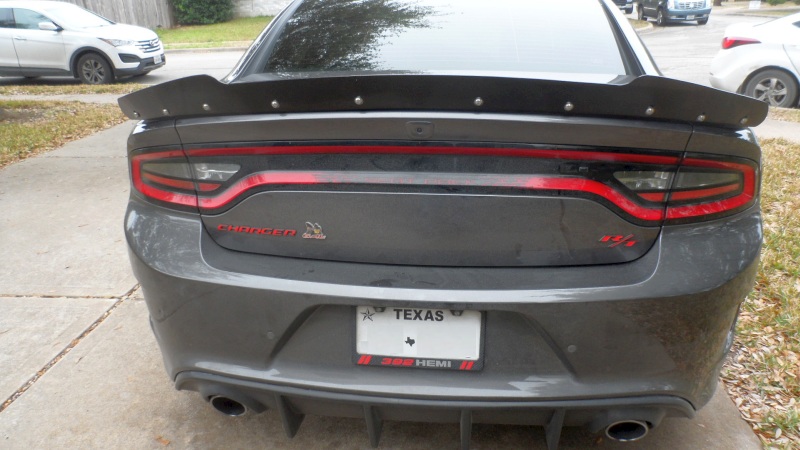
After
DIY Rivnut Tool
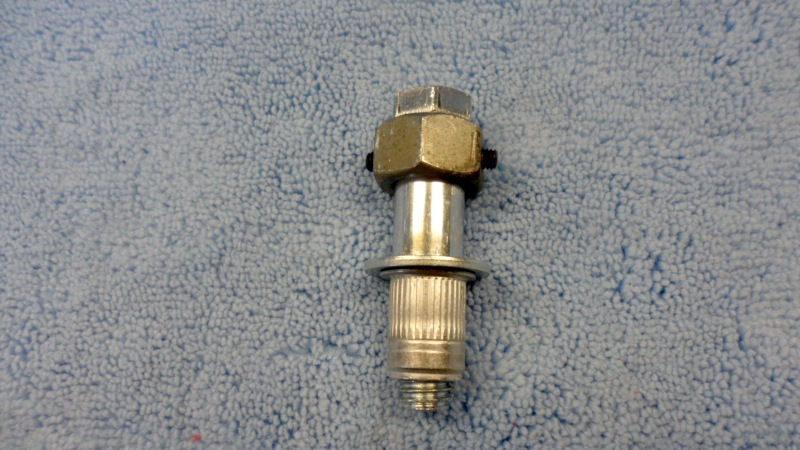
A Rivnut is nothing more than a fancy pop rivet with a threaded removable install mandrel. So what does it take to make a DIY version?
The simplest form consists of:
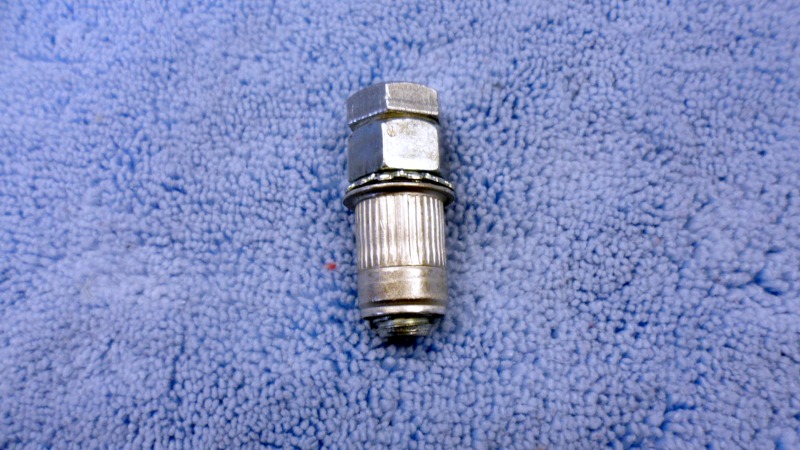
The bolt needs to be long enough to accommodate the nut, 2 washers, and the rivnut that is fully threaded onto the bolt. Being fully threaded on the bolt is to ensure that you don't rip the threads out when you set the rivnut.
The nut needs to be drilled out so it spins freely on the bolt.
The star lock washer keeps the rivnut from spinning should you drill the hole too large. The flat washer just provides a flat surface for the nut.
My first tool was over-engineered. lol
That's a 3/4" nut drilled to accept a steel sleeve. I wanted to make sure that nut didn't move on the sleeve so I drilled and tapped the nut for 2 set screws. You still need a flat washer and a star lock washer. This version just moves the working area away from the installation point.
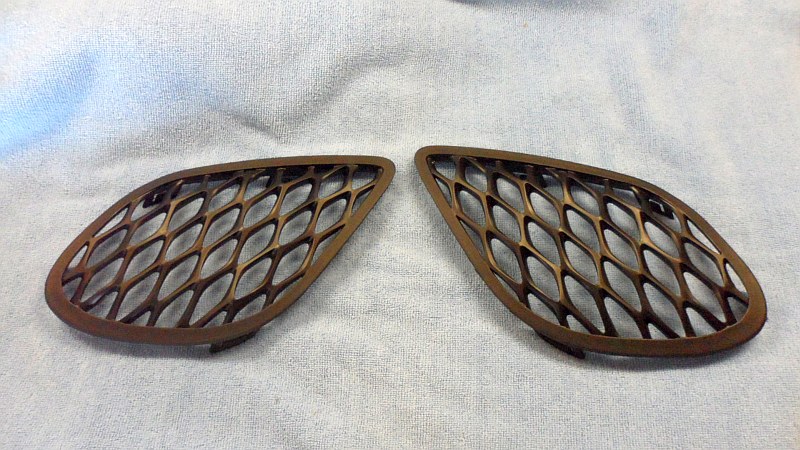
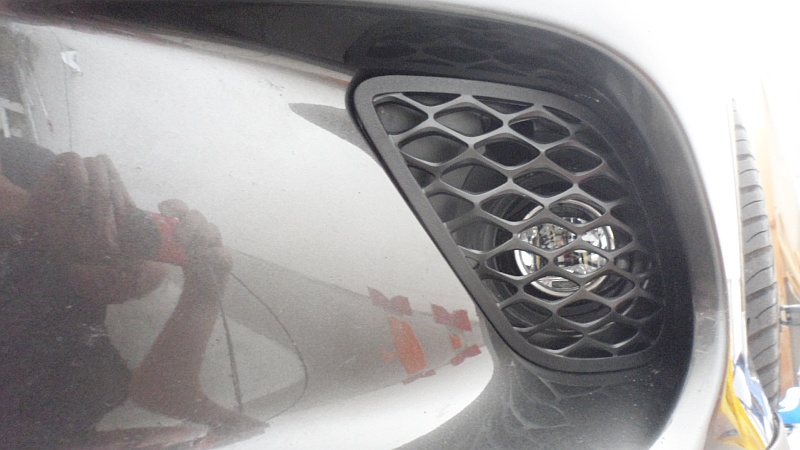
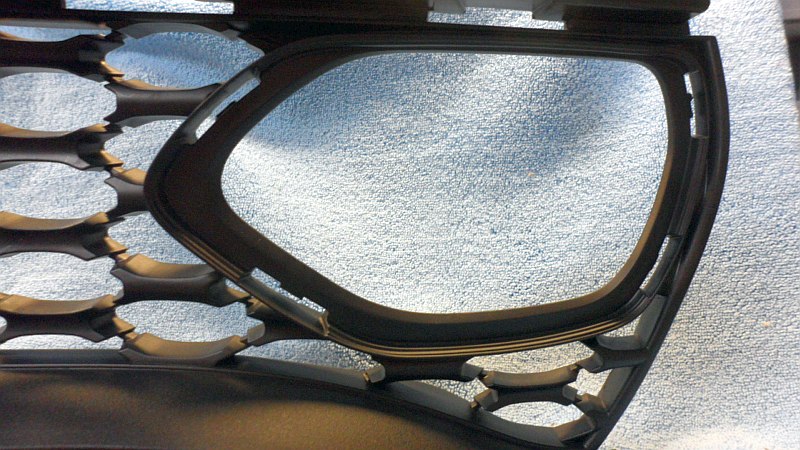
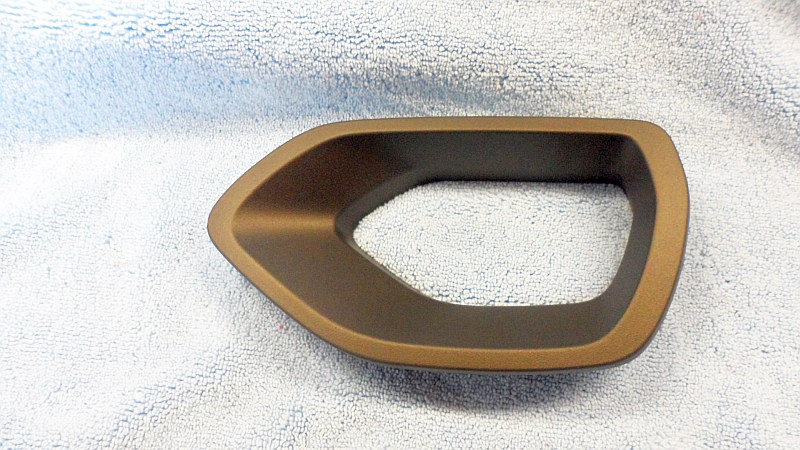
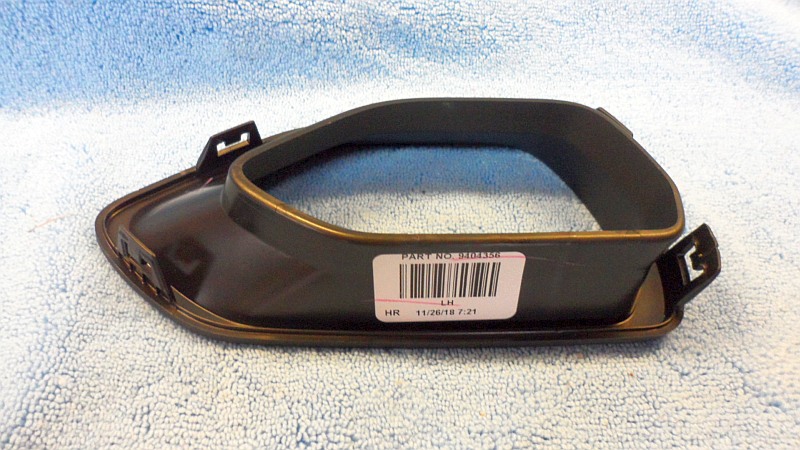
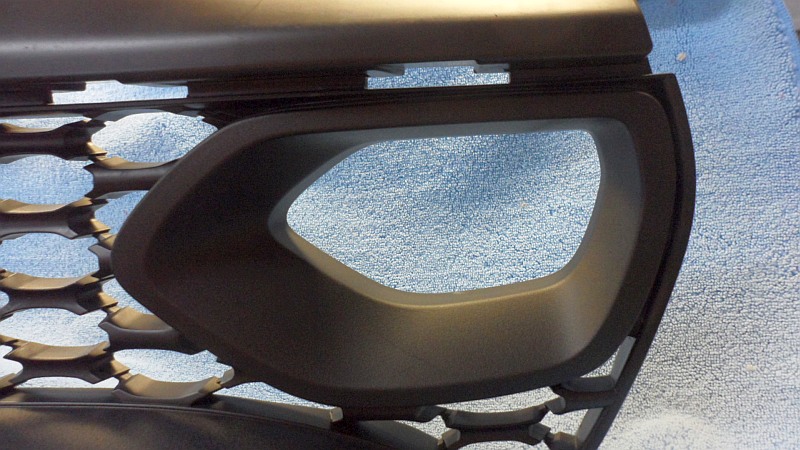
Fog Light Grill Covers
The Scat Pack does not have fog light covers. But, the Hellcat does and they are interchangeable.
PARTS
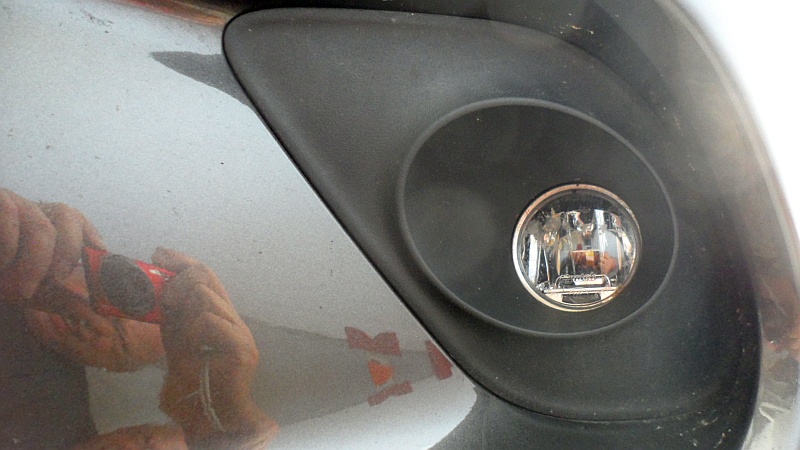
INSTALL
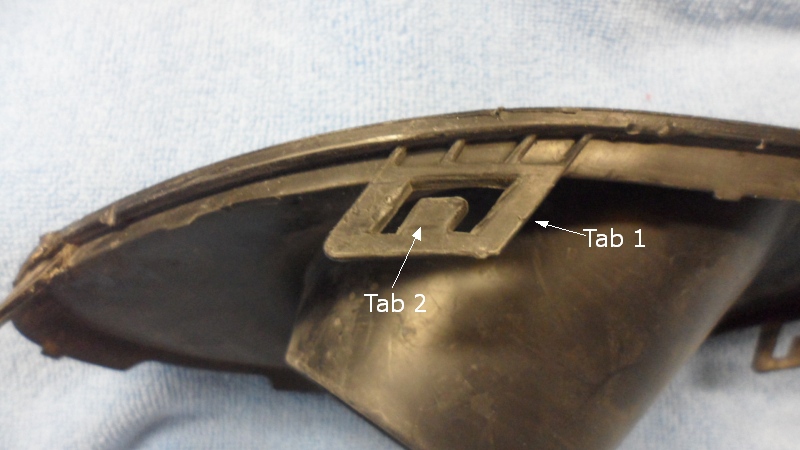
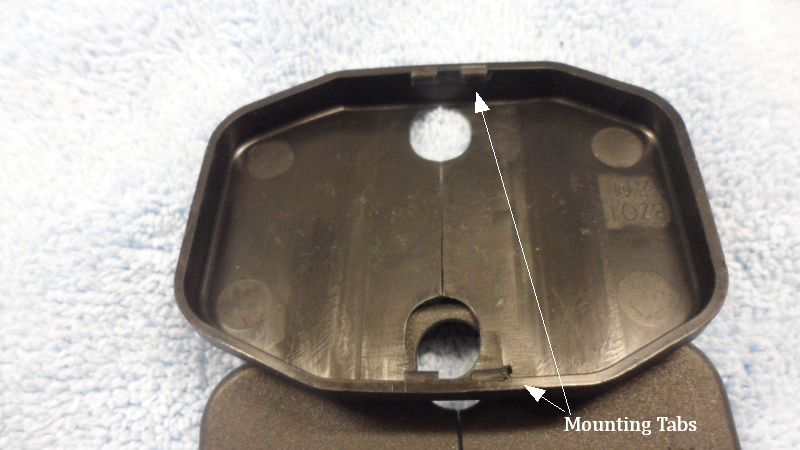
First you need to remove the stock fog light bezel. I used an interior trim tool to release the clips that hold the bezel. This can be a real PITA.
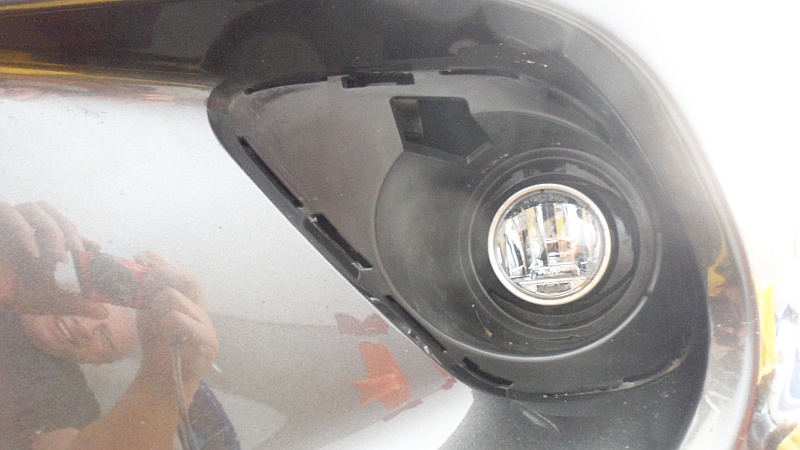
The new covers just dropped in. But, they were loose as the retaining portion of the mounting tab didn't catch. So, I had to slightly mod the mounting tabs.
I heated the mounting tab (Tab 1) and bent it out so the cover would snap-in. Then I heated it up again and bent the retaining tab (Tab 2) so it was just out passed the mounting tab.
OBTW - I used a Harbor Freight heat gun on the low setting.
NOTE - I did not snap any photos of the replacement grill... But, using the original as a model.
Now just snap the new one in and repeat for the other side.
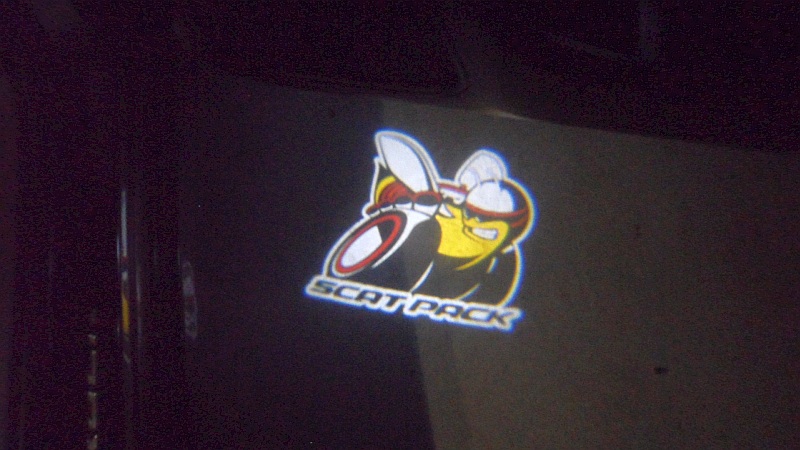
Door Puddle Lights
I picked up a set of Scat Pack door puddle lights. It takes all of 10 minutes a side to install them.
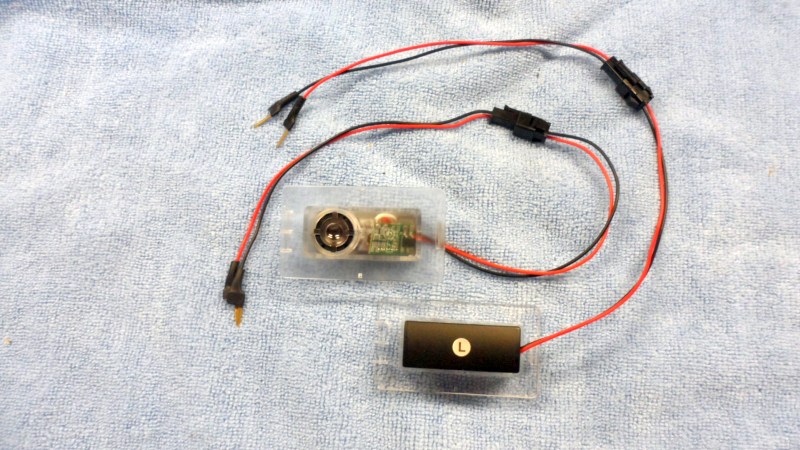
WARNING - Incandescent bulbs are HOT so I suggest you disconnect the holder from the harness before doing anything.
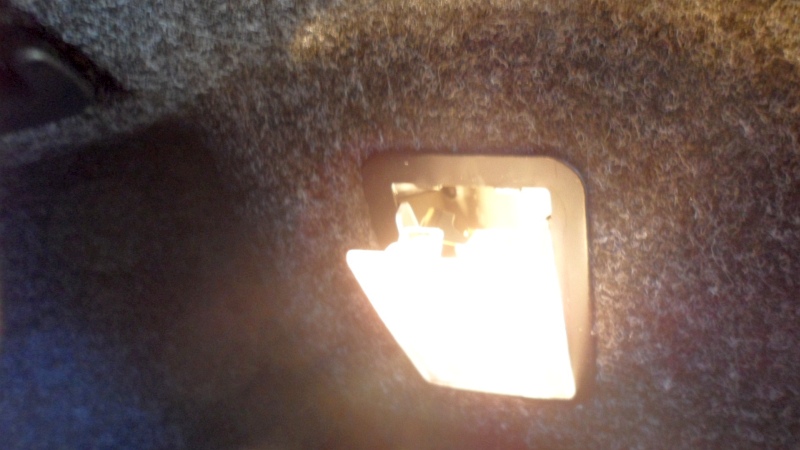
First remove the bulb holder.
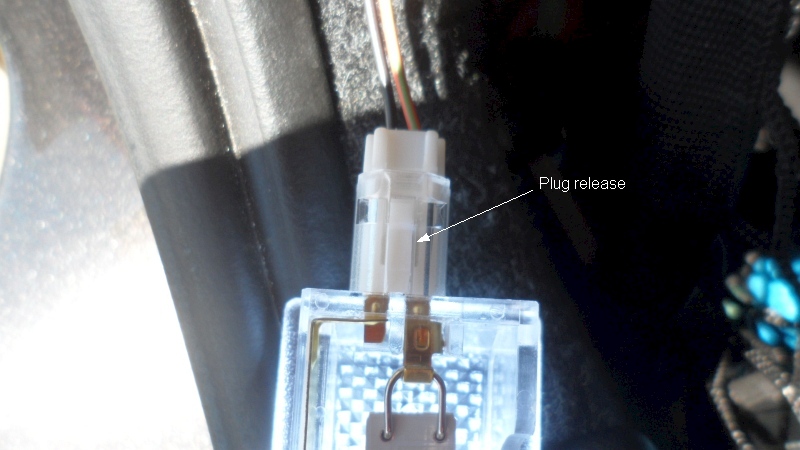
Now all you have to do is plug the pins in the harness plug & re-install the puddle light in the door.
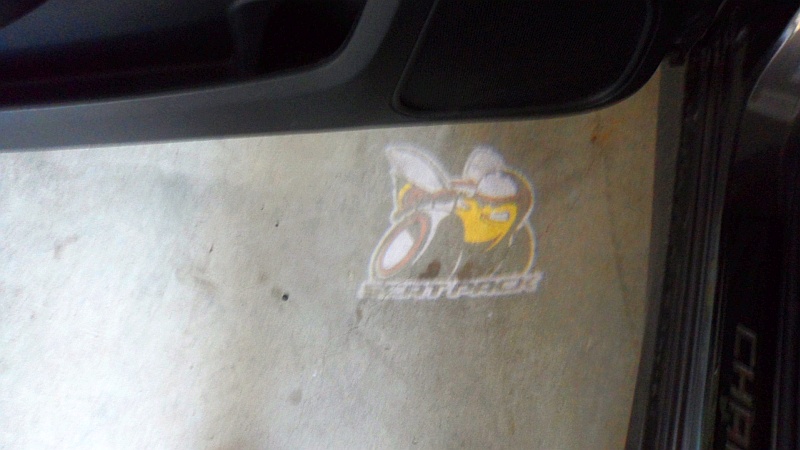
OBTW - The puddle lights are NOT like the OEM's for fitment. But, they will work & not come loose.
Wiper Blade Refills DIY
After 3 years I decided that I needed new wiper blades on my 17 Scat Pack. So, off to my local O'Reilly's Auto Parts. Dang, $29 a pop for non-OEM blades that may or may not work. I just happened to be in Wally World with my wife and went to check out their wiper blade selection. They had a bigger selection price-wise but still a universal fit. IE - You have to use the right adapter. So, now I am down to searching the internet. I found a Dodge dealer in Grapevine, TX, just north of me, that had OEM versions for $20 apiece. I ordered them, had them in 2 days and installed in 5 mins.
OEM Wiper Part Numbers
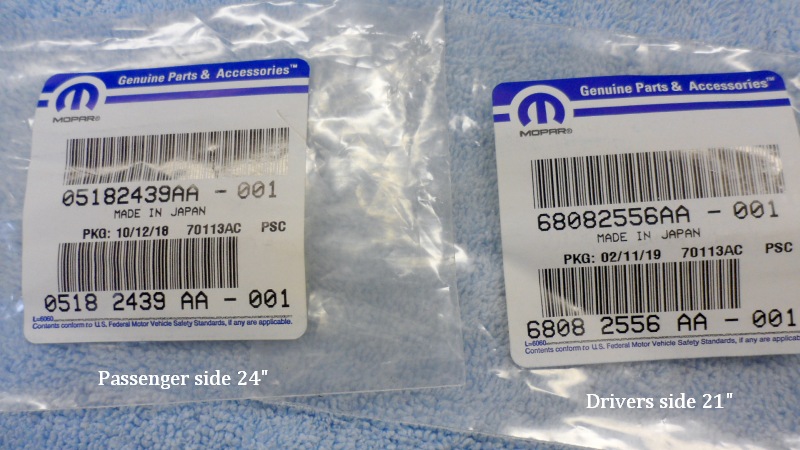
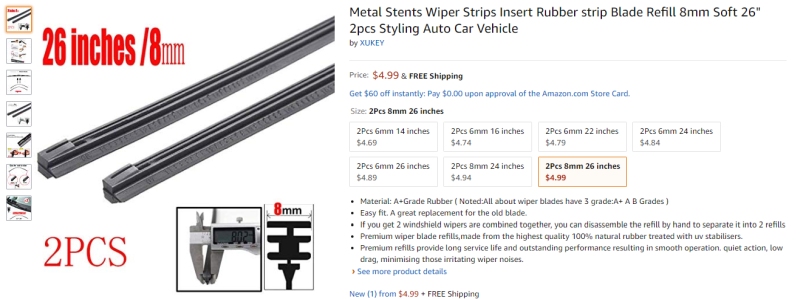
Now that I had the new blades I decided to see if I could find replacement rubber refills. Low and behold I found them on Amazon. Yes, they are made and shipped from China. But, the real deal here is a pair of 28" 8mm wide only costs $4.99. I ordered 1 set to test. Shipping is really slow. Why did I order the 26" version? The Scat has a 24" passenger side wiper and a 21" driver's side wiper. Remember they come in pairs and the cost difference is like 20 cents.
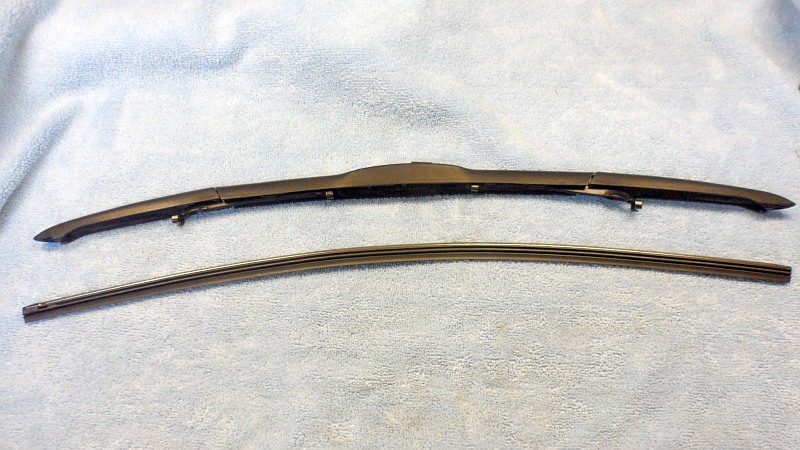
Replacement Wiper Refills
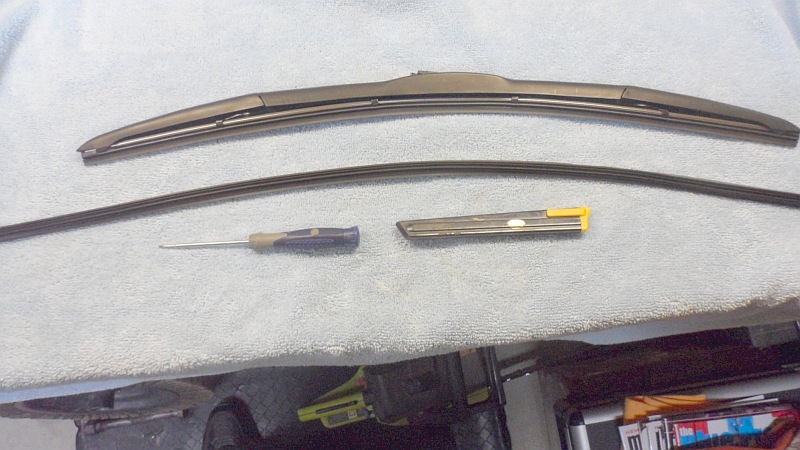
It takes all of 30 minutes to remove the old wiper rubber and replace it with new rubber. You just need a small screwdriver to release the rubber from the blade and a razor knife or side cutters to cut the new rubber to length.
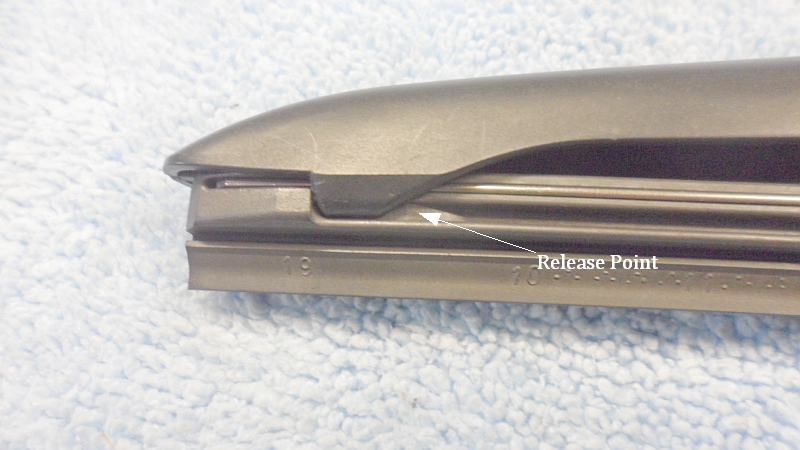
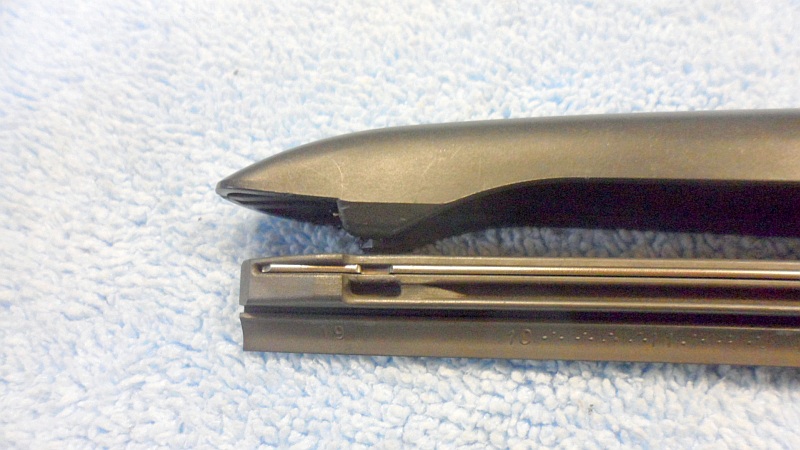
Step 1 Remove the old rubber with a small screwdriver.
Step 2 Remove the metal mounting rails and cut the new rubber to size.
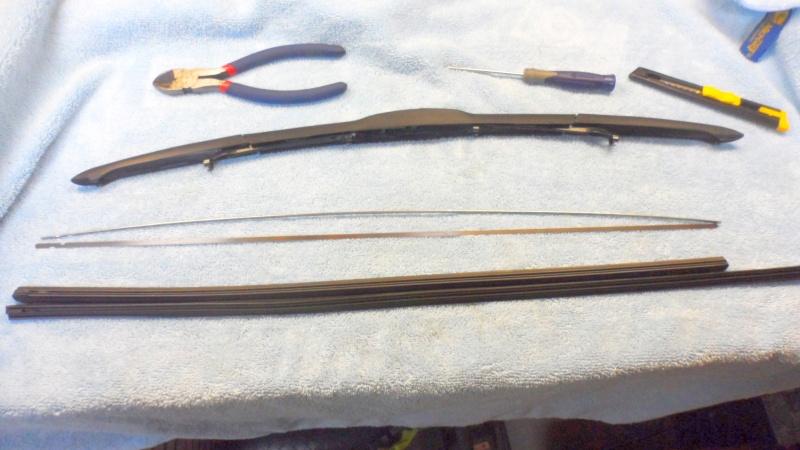
Step 3 Insert the mounting rails in the new rubber and re-install in the wiper blade.
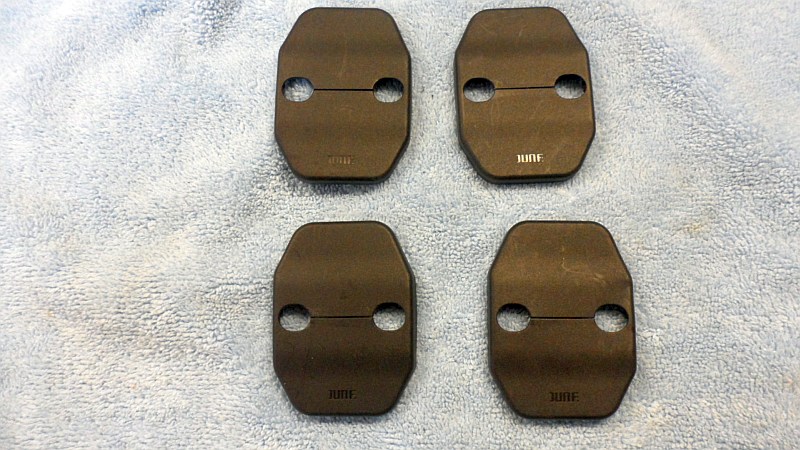
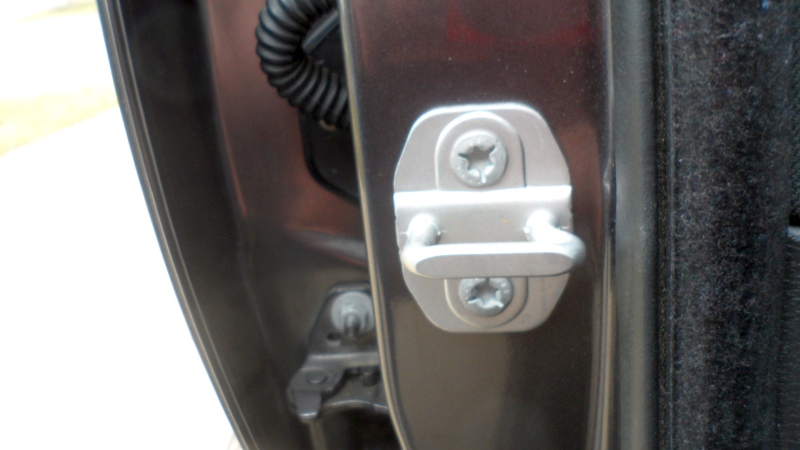
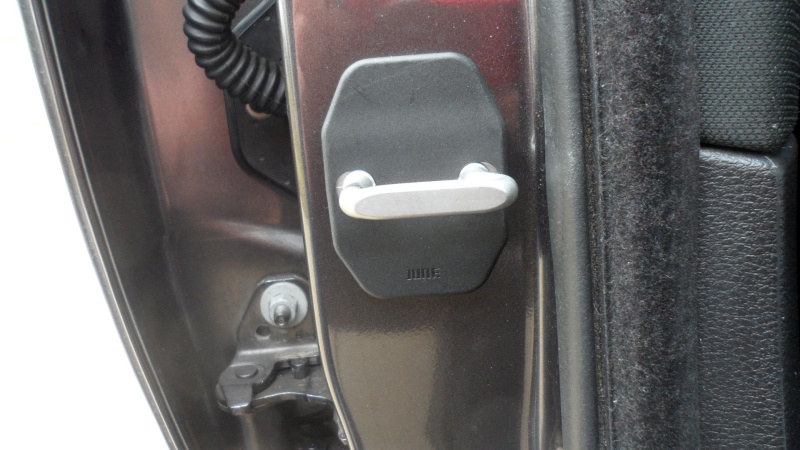
Door Striker Cover
One of the LX Forum guys found these on Amazon. They are more bling than anything. But, they cover those butt ugly mounting screws and they just snap in place.
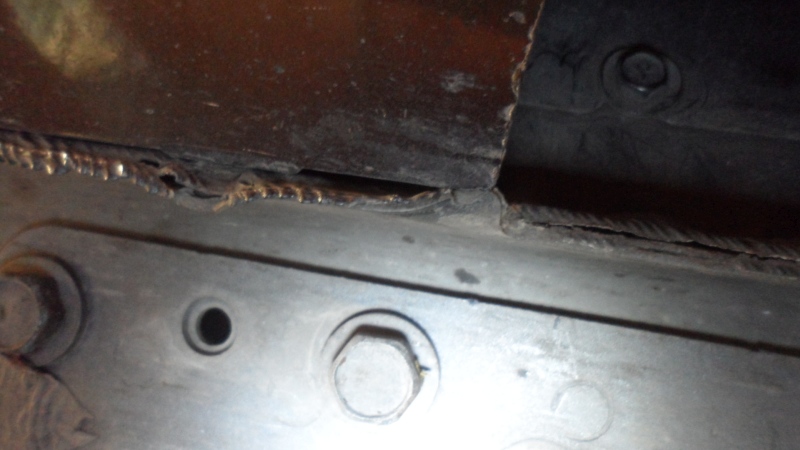
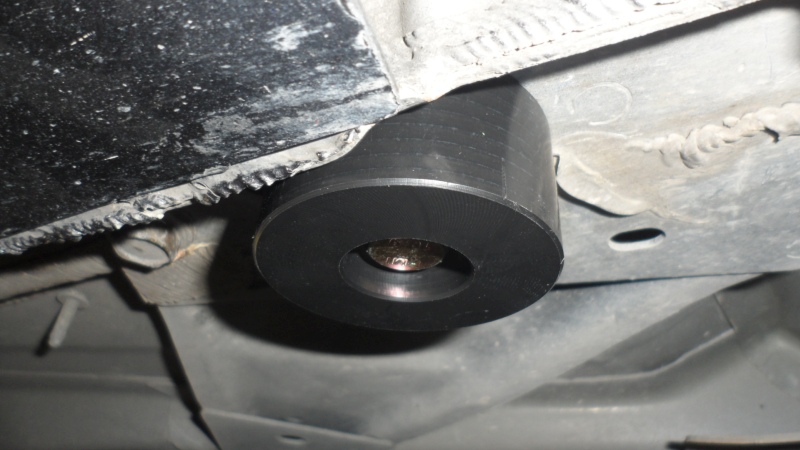
Front Jack Pads
The Scat Pack has rear jack pads installed from the factory. But, there is nothing for the front. So, I ordered some from Lift Pads Pros for $24.30 and $8.45 S/H. It takes all of 10 minutes per side to remove a bolt, add some Blue Threadlocker to the new bolt and bolt in the pad.
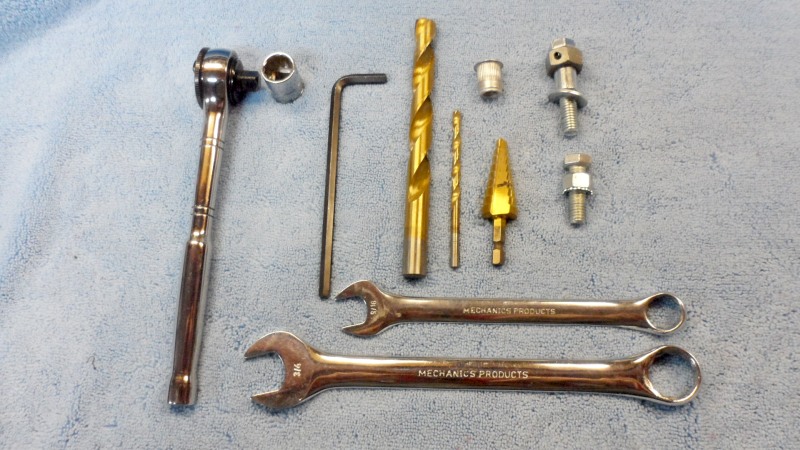
Tools
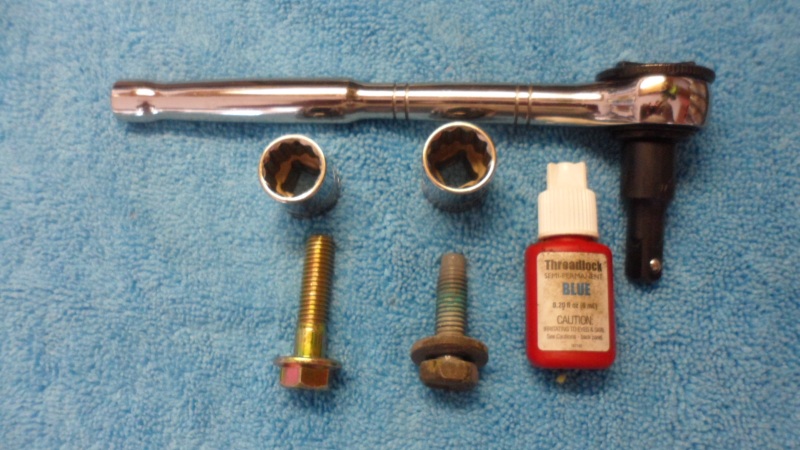
Parts

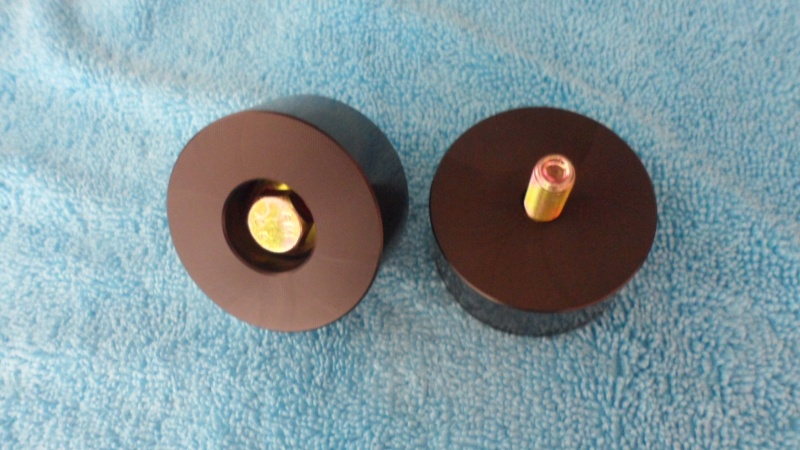
Install
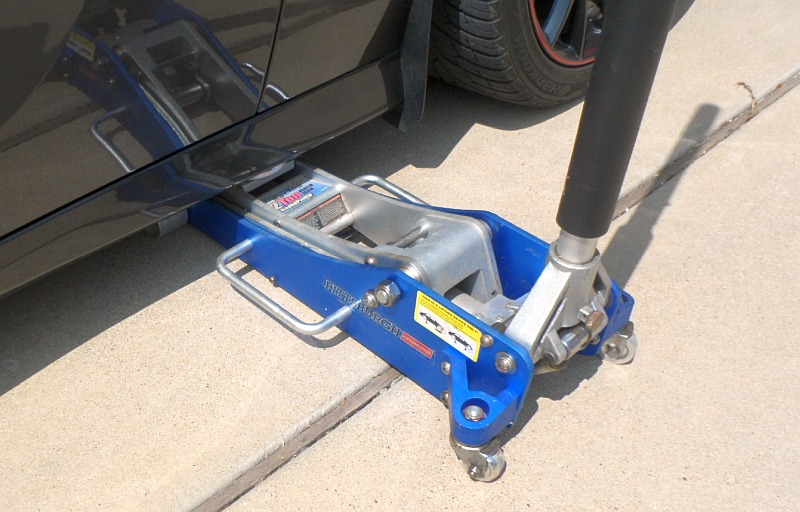
OBTW - My Harbor Freight 2 Ton Low Profile Jack slides run under the car with no issues.
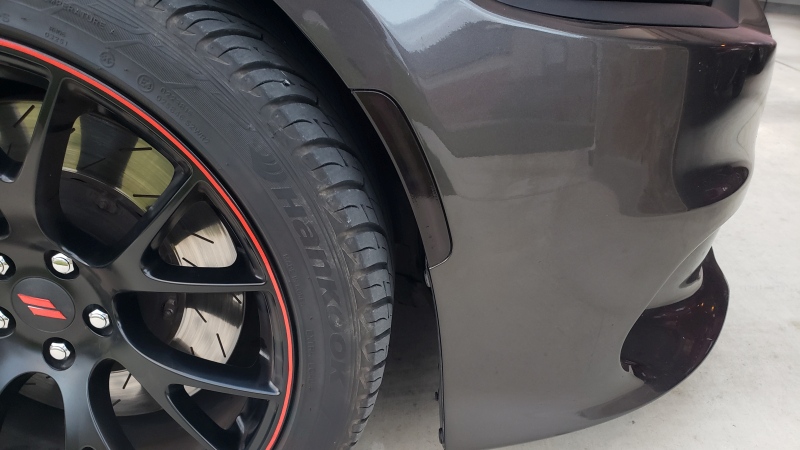
LED Side Markers
Well, I got off my dead butt and swapped out the oem side markers. If you watch any YouTube videos on how to do this most will do it with the wheels on. At my age, if I did that I would have more bruises than you could shake a stick at. So, I took the wheels off, peeled back the fender liner and R∓R'd the side markers.
Notes:
Tools
LED Side Markers
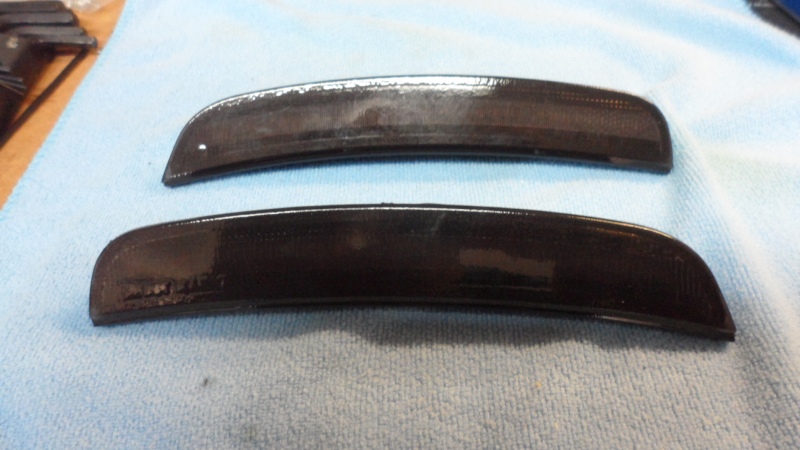
Before
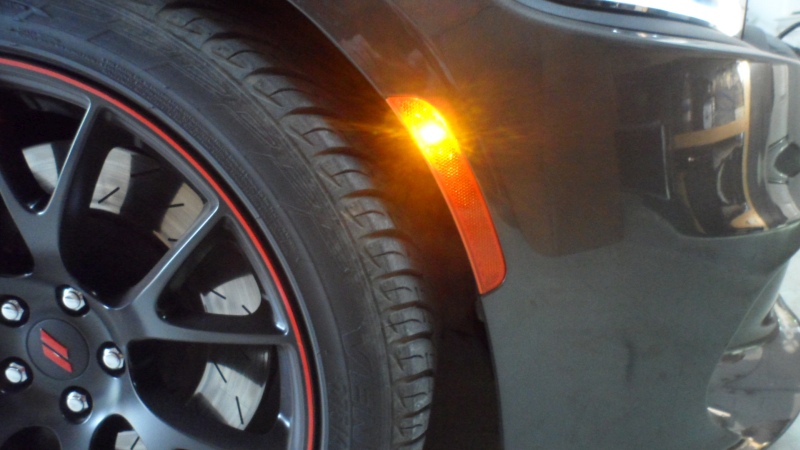
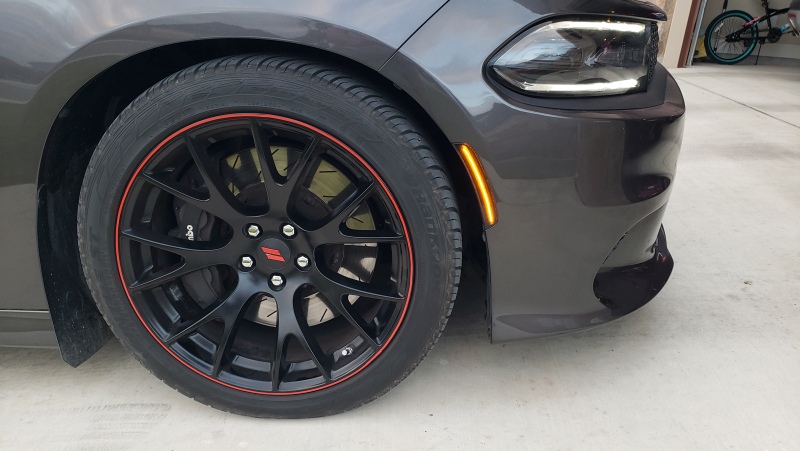
LED After
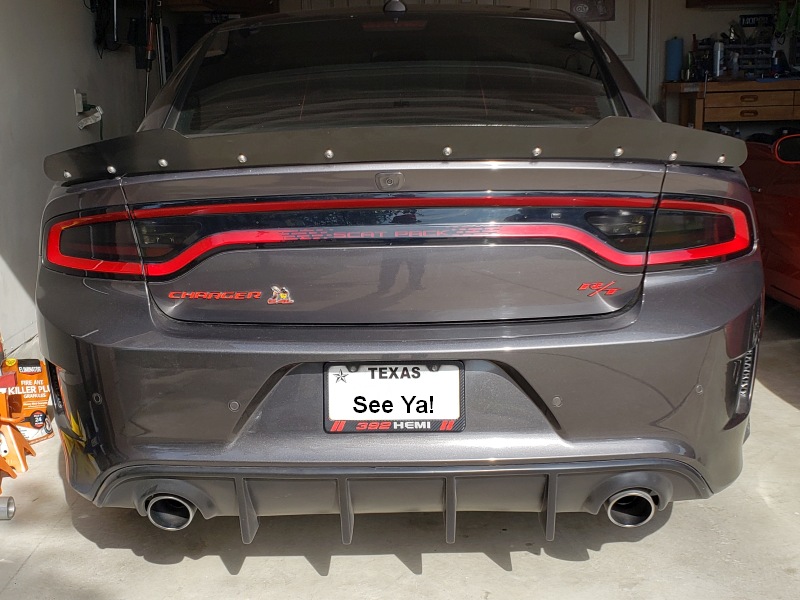
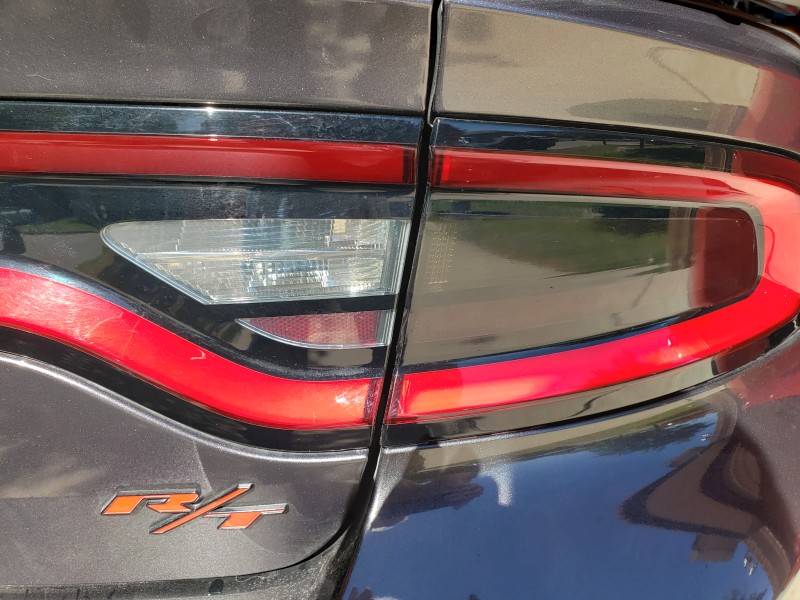
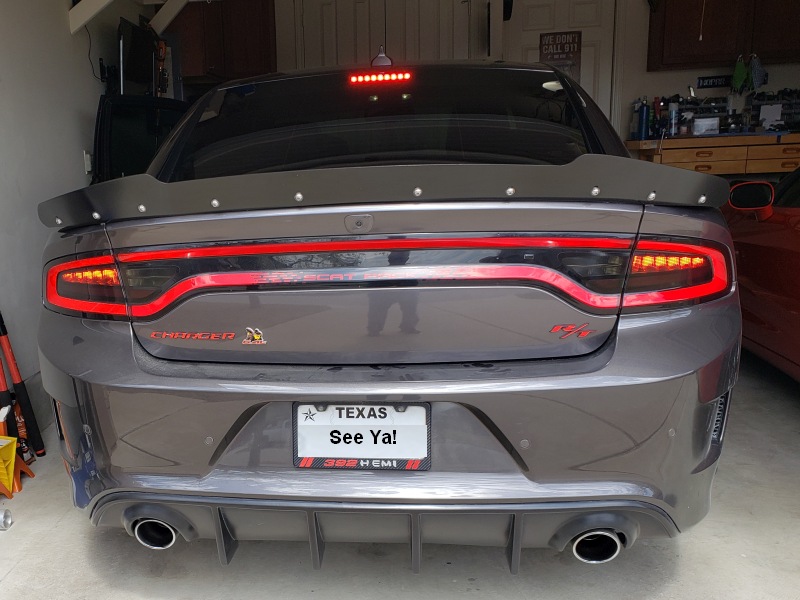
Taillight Tint
This is a $20 eBay special and about 30 30-minute job if you have ever done decals and tint.
Notes:
Tools:
Before
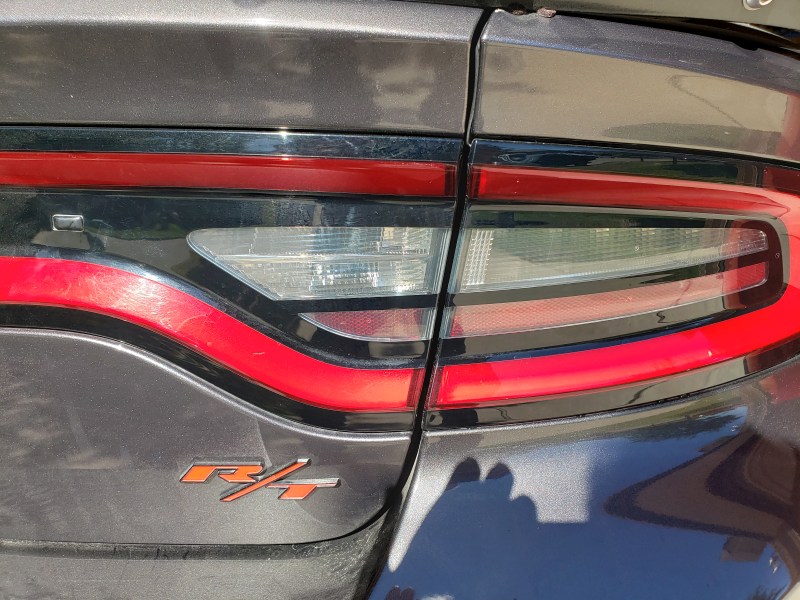
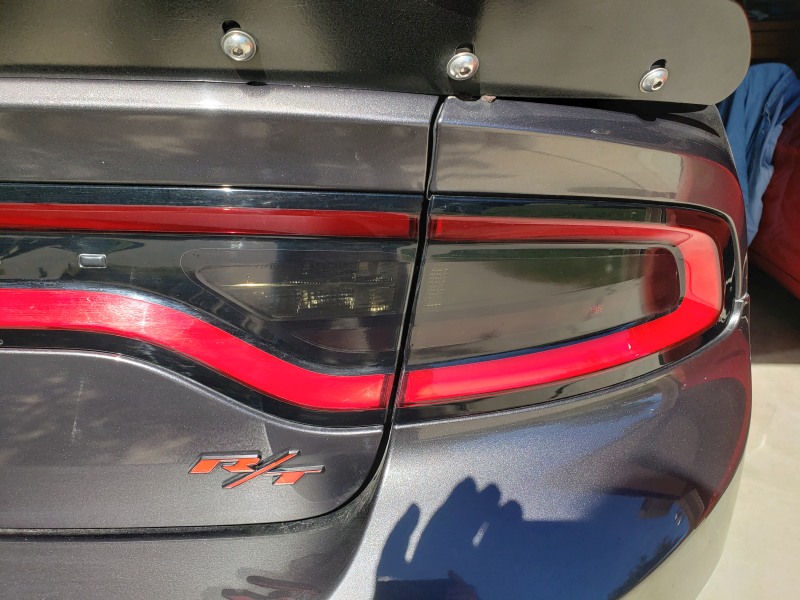
After
Install
Night Shots
Daytime
Backup Camera
Hellcat Air Box
Well here is another project knocked out. I have been putting this off for the better part of a year. I got these parts from another forum member and had planned to install them at the same time I installed my 2019 Scat Pack Grill.
I had the car in the body shop to get the splitter repaired. Obviously, I can't drive as I must have hit one of the curb stops and cracked the splitter. I found this out the other day when I put the LED Side Markers in. The bodyman says easy fix. So, while he had the bumper off I had him install the 2019 Scat Pack Grill.
The body shop let me do the airbox install for a few bucks shop rent.
Parts
Tools

Installation
You're Done
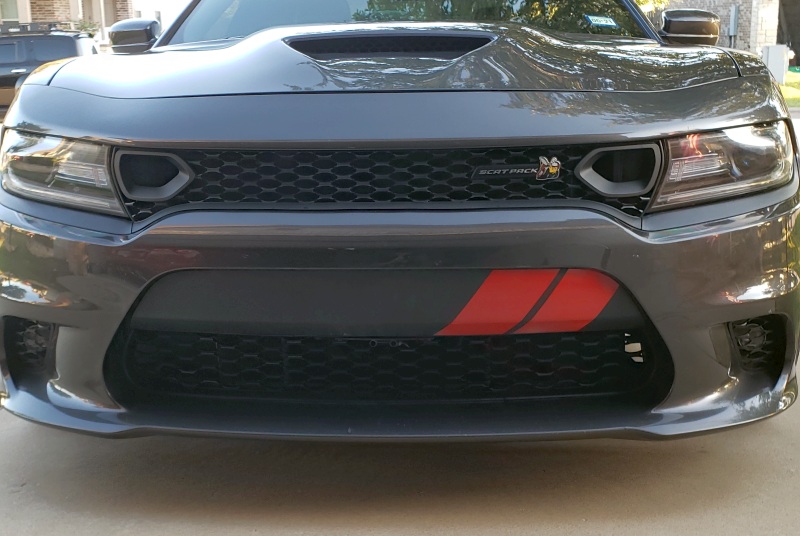
2019 Hellcat Grill Update
In 2019 Dodge put a new grill in the Charger Hellcat with 2 air intakes, 1 on either side inboard of each headlight. Of course, the driver's side matches up with the Hellcat lower airbox air intake tube. This grill can be retrofitted to 2015 and up Chargers. But, there is a catch. The honeycomb pattern is larger and slightly different. So, this means you need to replace the lower grill section and the fog light covers if you have installed those.
Parts
Note - Steve White Auto has these parts in a kit, minus the grill badge, for about $150 on eBay
Before
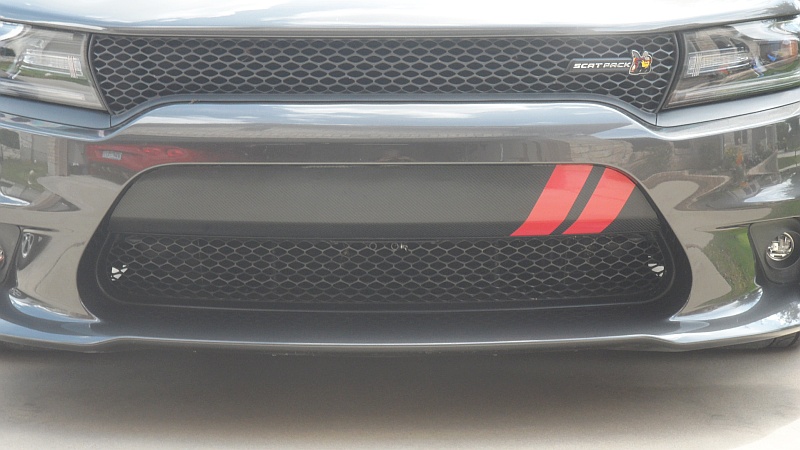
After
Install
Some Assembly Required
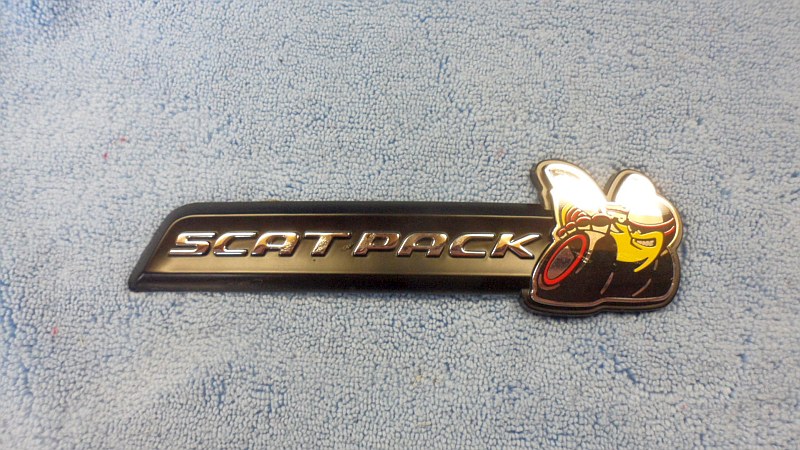
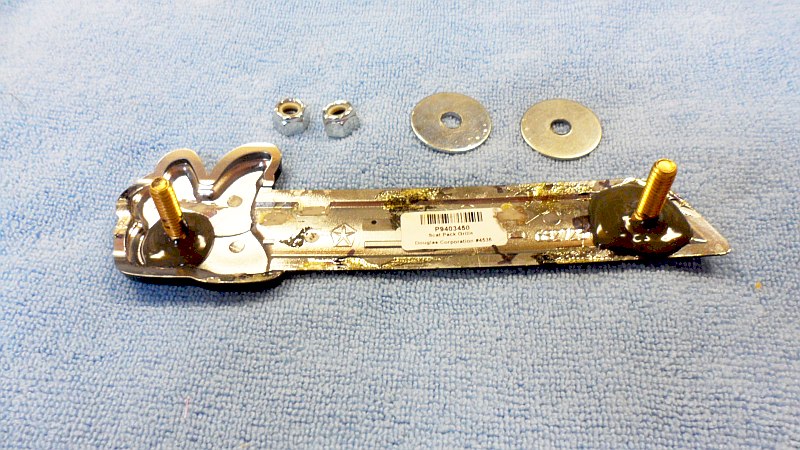
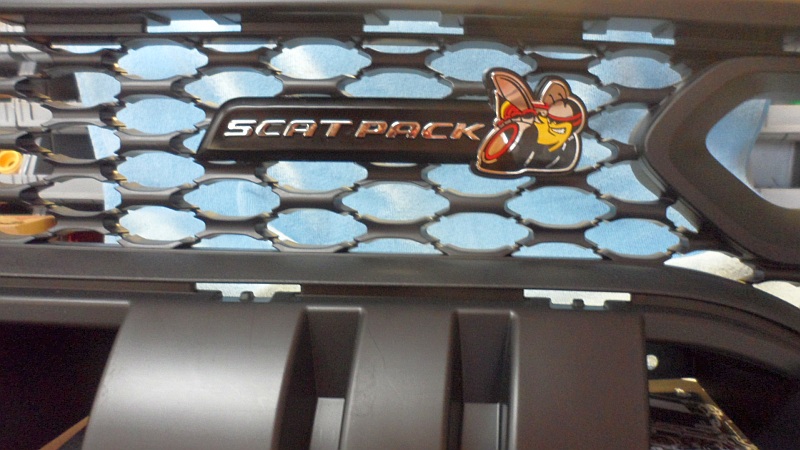
Scat Pack Grill Badge
The OEM Scat Pack badge is listed as high as $190! So, I picked one up off eBay. But, I had to mod it to make it work. A couple of bolts, some JB Weld, a couple of washers, and a couple of nylock nuts.