Scat Pack Mods - Exterior
Wheel & Brake Upgrade
This isn't an upgrade per se, as it is more about information on the factory wheel & brake package. The standard wheels are 20"x9" with 245/45x20 tires, the brakes are 14.2" front rotors & 13.8" rear with Brembro's front & rear.
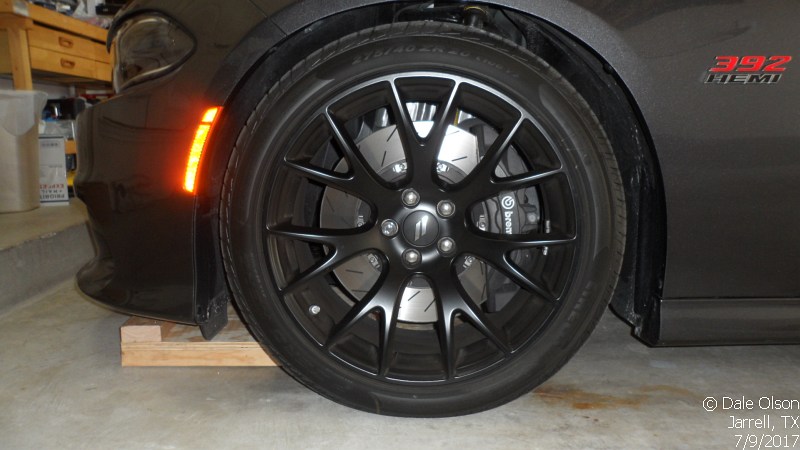
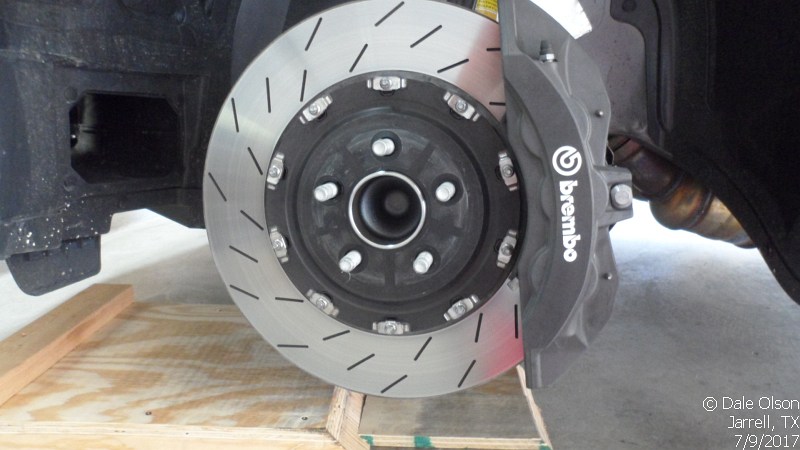
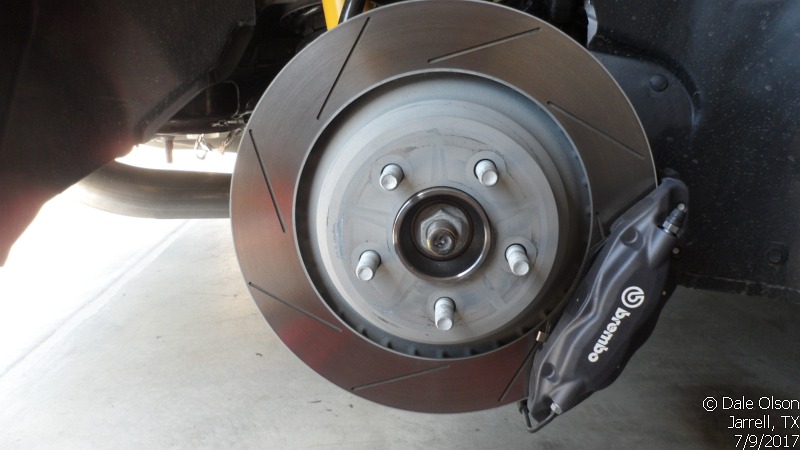
If you add the Dynamics Package (Hellcat wheels & brakes) you get 20"x9.5" lightweight wheels, with 275/40x20 Pirelli P Zero's, 15.2" 2 piece front slotted rotors, 14.2 rear slotted rotors with 6 piston Brembro's upfront & 4 piston Brembro's in the rear.
Wheel Changes
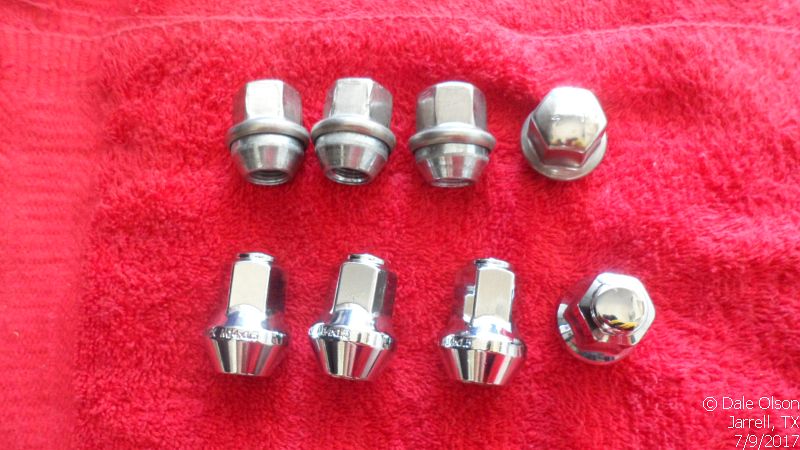
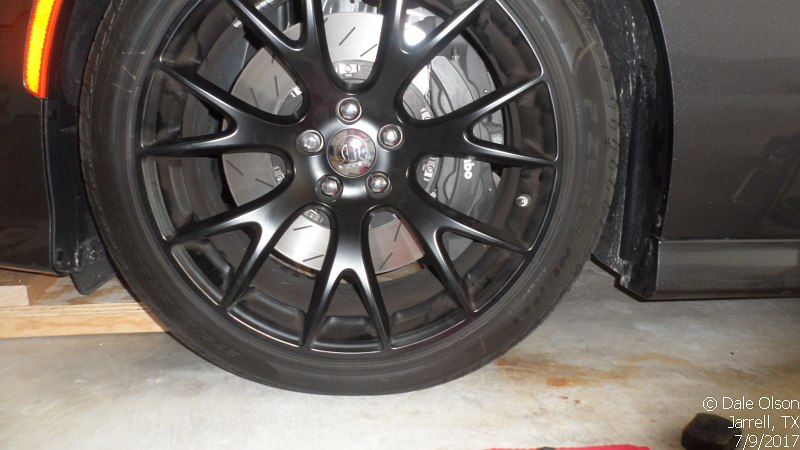
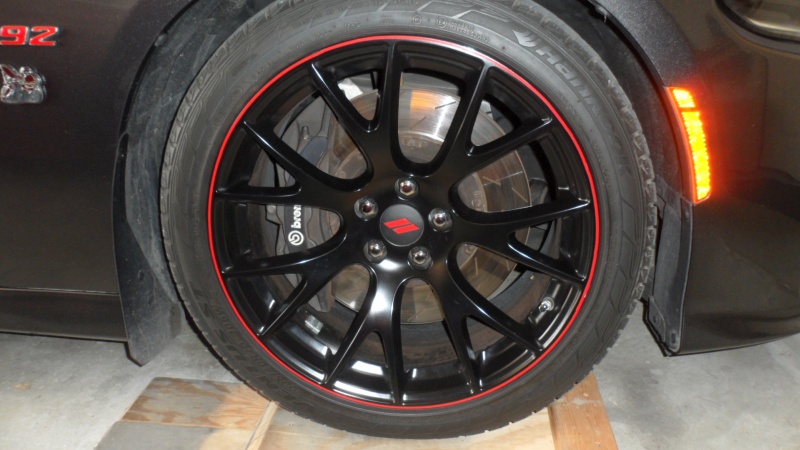
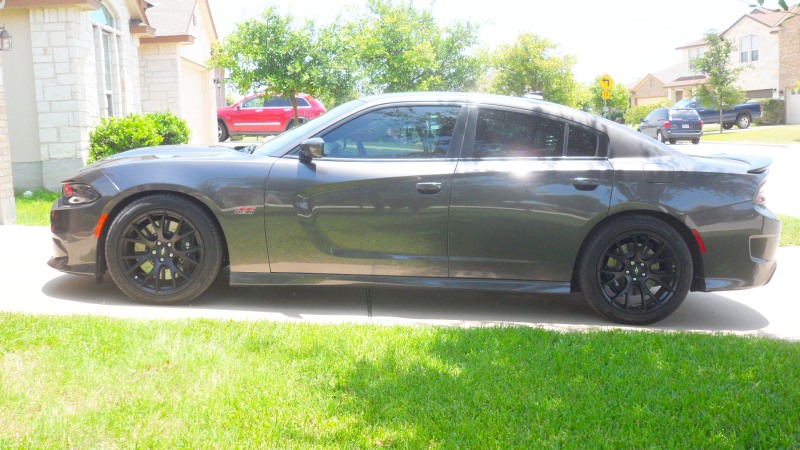
I am not a black-wheel type guy. I am old school.... chrome! That being said I wasn't about to shit can a set of lightweight Hellcat wheels for some after-market chrome.
Before
So, I thought I would do a couple of small upgrades. The first is to get rid of the shitting tin-plated
covered lug nuts. I swapped them out for a set from Gorilla.
NOTE - The factory supplied a set of Gorilla lug nut locks.
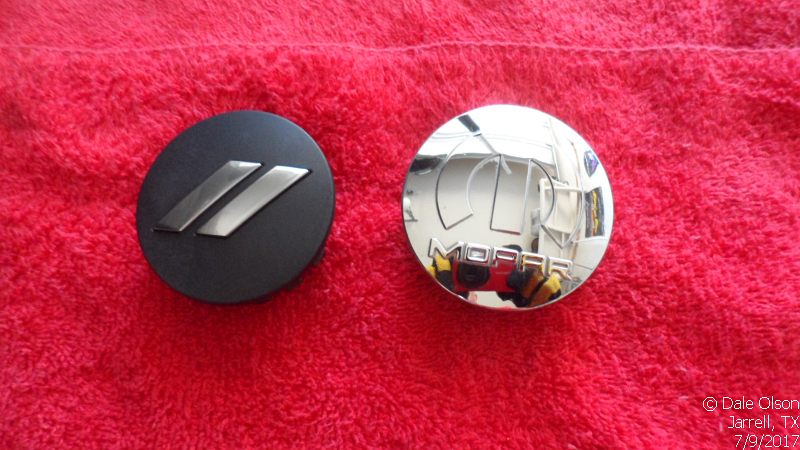
Next I thought I would replace the center cap with a chrome MOPAR logo ones I took off my 2010 Challenger.
After
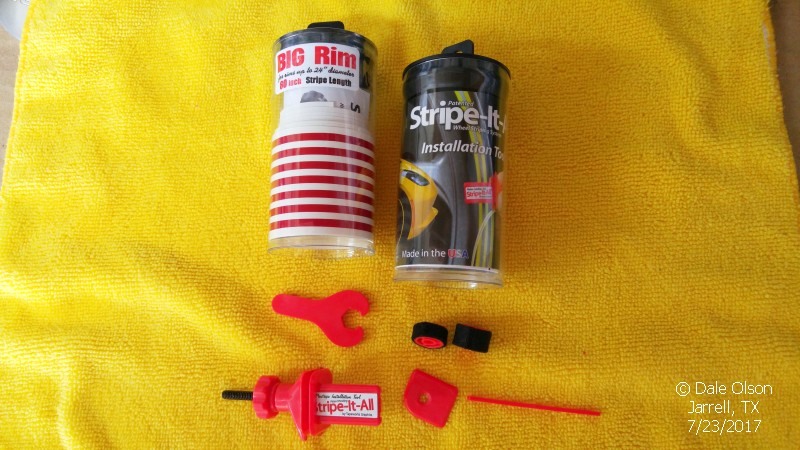
Tapeworks - Rimstripes
If you want to add a rim stripe then get the Tapeworks tool. It takes longer to remove the wheels than it does to install the vinyl. I bought both the tool and vinyl. There is enough vinyl to do 4 wheels and even a couple of screw-ups. LOL But, I think you can use vinyl-striping tape that you can purchase at any auto parts store or even Wal Mart.
Although you can turn the front wheel & install the rim stripe it really takes 2 people. So, if you're doing it alone, remove the wheels.
Parts
Before
After
Demon Wheel Upgrade
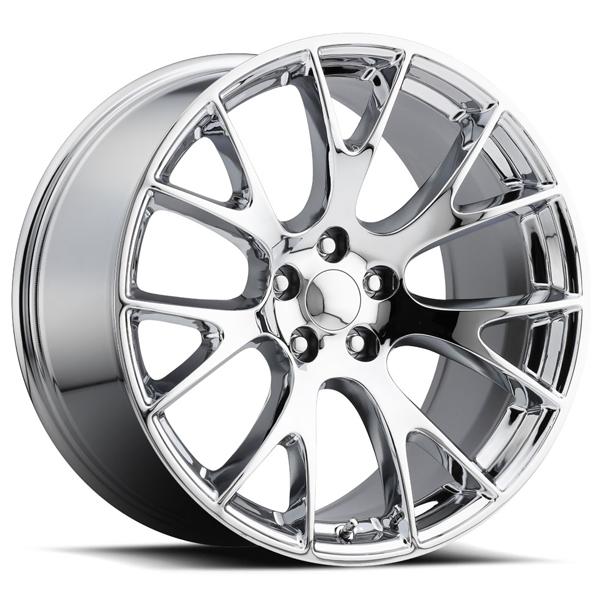
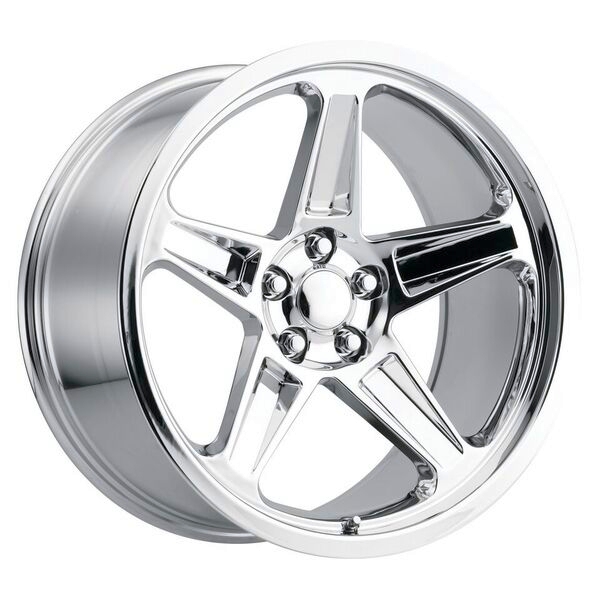
The Dynamics Package with the Black Hellcat wheels are great if you like the "blacked out" look. Me, I am an old-school chrome guy. To that end, I was originally going to get Factory Reproductions chrome Hellcat-style wheels. But, Factory Reproductions came out with the Demon-style wheels in chrome and I was hooked. They also have them in 4 or 5 different color & finish combinations.
Hellcat Black Hellcat Chrome Demon Chrome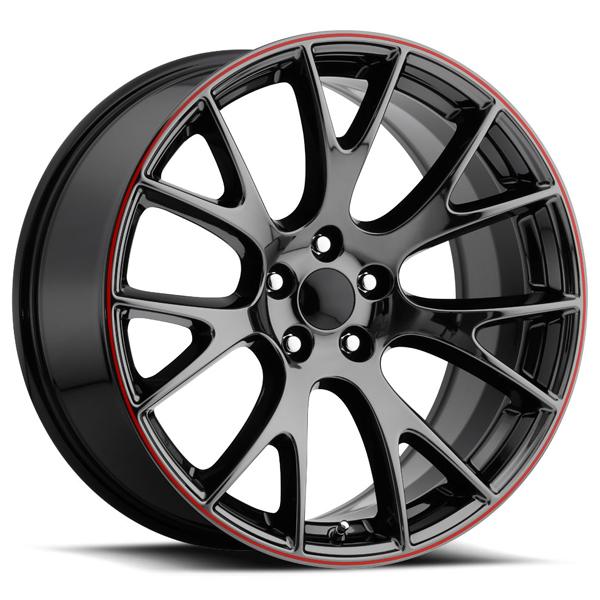
Before
After
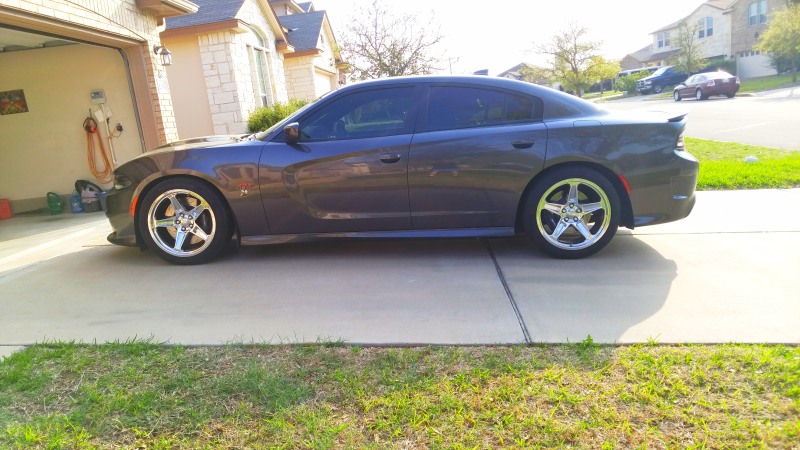
Fractory Reproduction wheels come in 2 sizes 20x9.5 with a 15 mm offset & 20x10.5 with 22 mm offset. The 20x9.5s are fine if you have the standard 4-piston Brembo calipers front & rear. But, if you have the Dynamics Package with the 6 piston Brembos up front you will need to run a 3 mm hub centric spacer. Not a big deal as there is sufficient stud length to accommodate the spacer. But, be aware that some tire shops, like Discount Tire, will mount the tire with the spacer installed and allow you to drive out of their shop. You bring in the rim/rims & they will mount & balance with no problem. I got my hub-centric spacers from UPR products.
If you want to run a staggered wheel setup with 10.5 wide rims on the rear & want to run a 315 wide tire you will probaly need 3 mm hub centric spacers or the tire will rub.
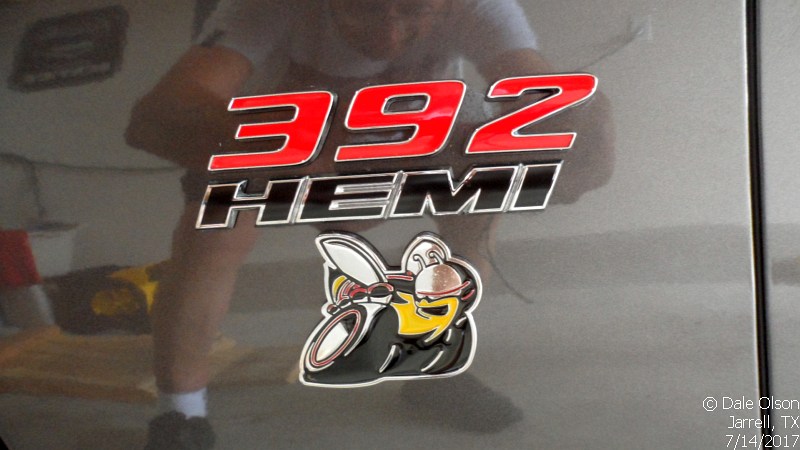
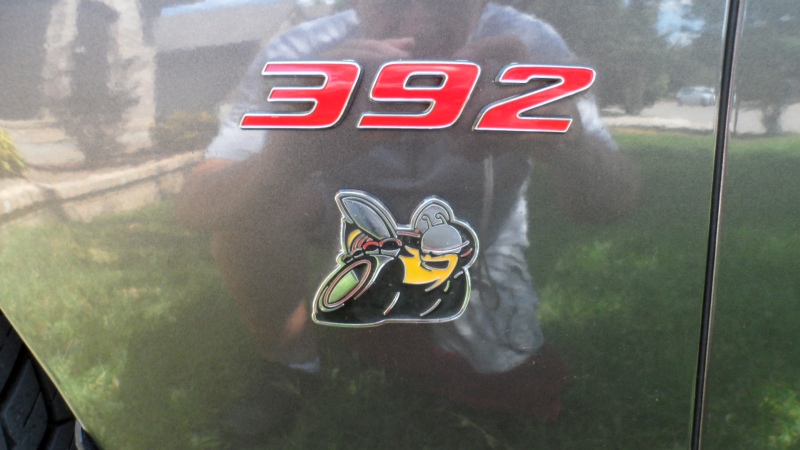
Bee Badges
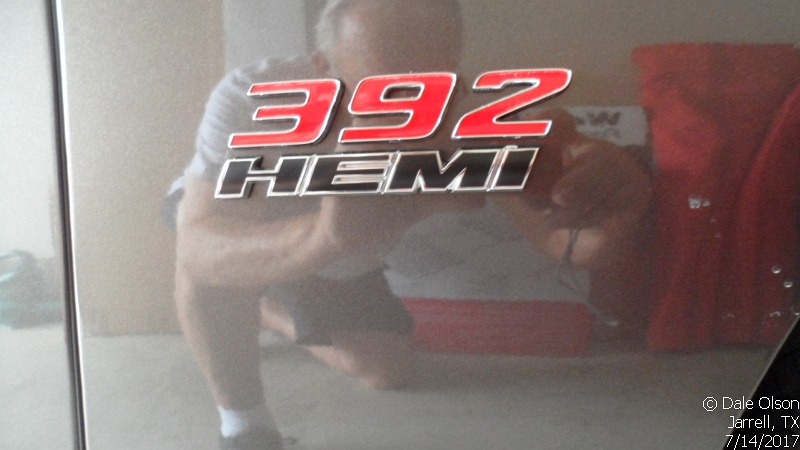
The Scat Pack has the 392 Hemi fender badges but there seemed to be missing something... the Scat Pack Bee! Back to eBay and my Chinese vendors.
Before
After
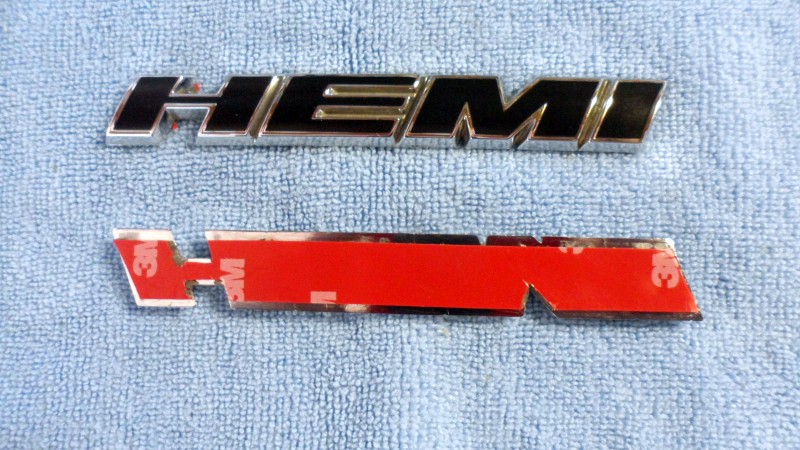
The HEMI badge just looked out of place so I took it off. I may have to replace the Bee badge and move it up.
Once I had the HEMI badges off and didn't destroy them in the process I thought I would try to refurb them. I used a razor knife, some Brake Cleaner, a shop rag and some 3M Double faced tape. It takes a while to get the old tape off. So, don't be in a hurry. Go easy on the Brake Cleaner. Use just enough to soften the old tape and remove the residue. Once you have to old tape off, add the new tape a trim as necessary.
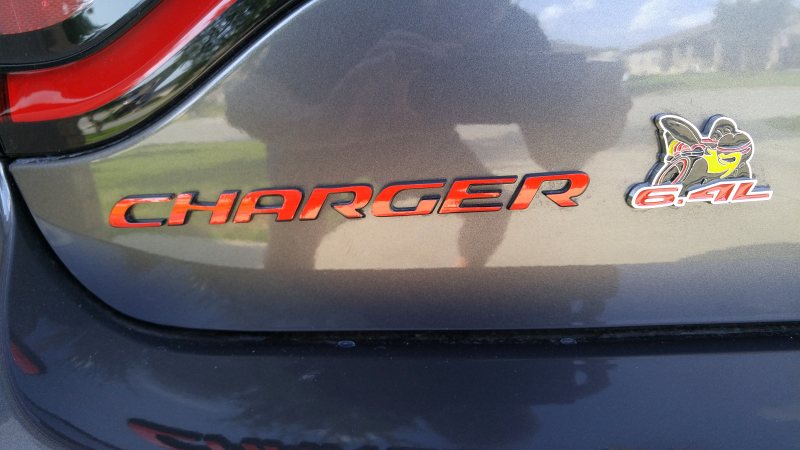
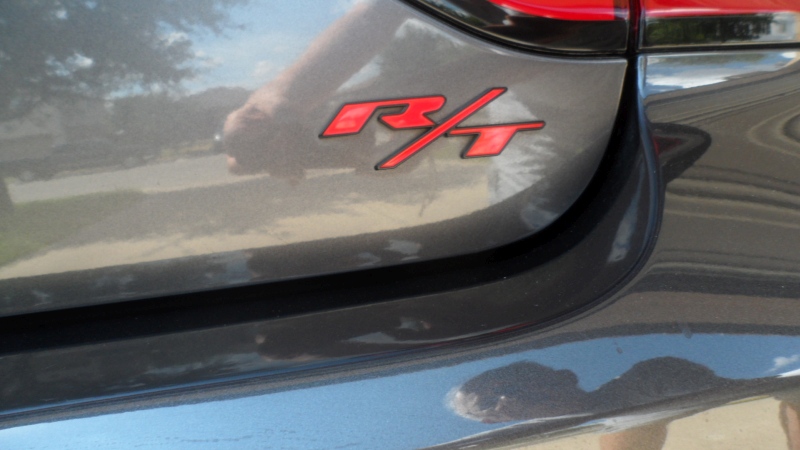
The trunk has a Charger & R/T badge... but it was also missing the Scat Pack Bee!
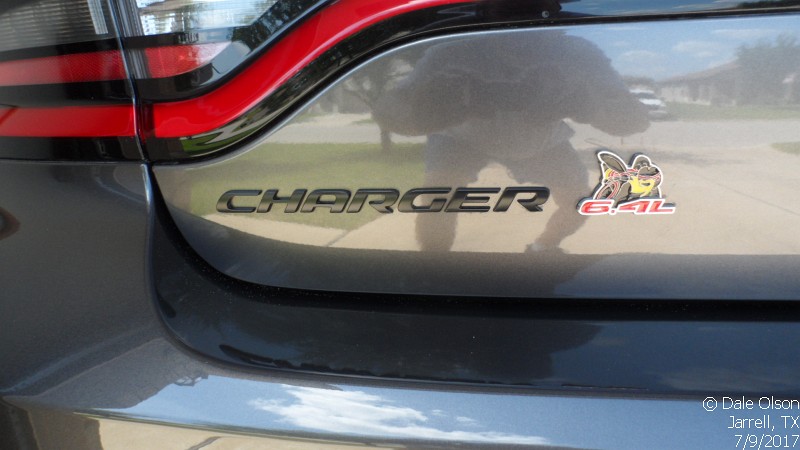
Once Scat Pack Bee was added the Charger Logo was kinda dull looking. So I added some red overlay letters.
Had to update the black R/T badge also.
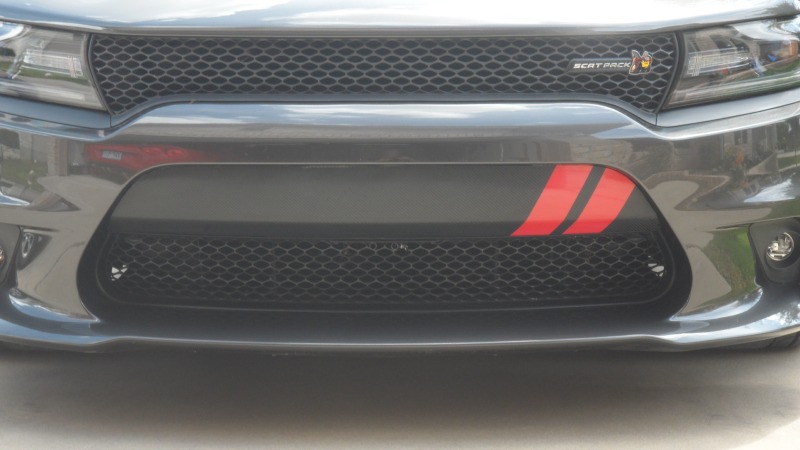
Grill Carbon Fiber & Stripes
Got bored one afternoon & decided to dress up the lower portion of the grill with some carbon fiber vinyl. Not really difficult if you get GOOD vinyl. The carbon fiber looked OK but something was missing. Ah Ha... the Charger Scat Pack Stripes. So, off to the sign shop to get some red vinyl. I cut a 12"x2.5" strip off the small piece of FREE vinyl the sign shop gave me. That was enough to do both stripes. The nice part of this is, it is removable.
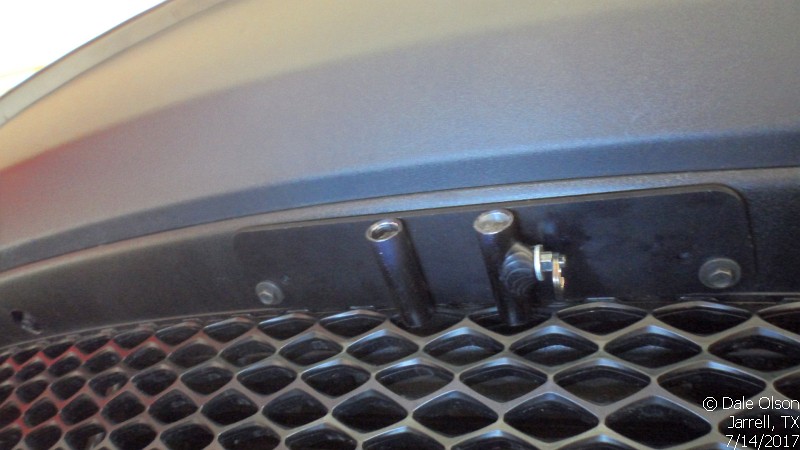
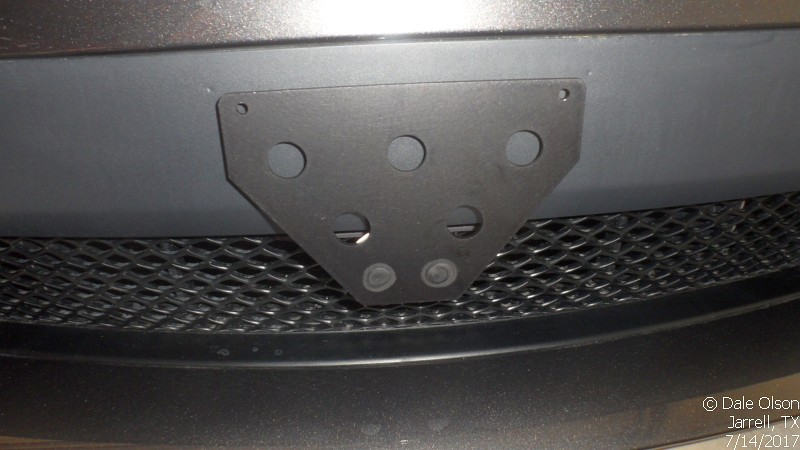
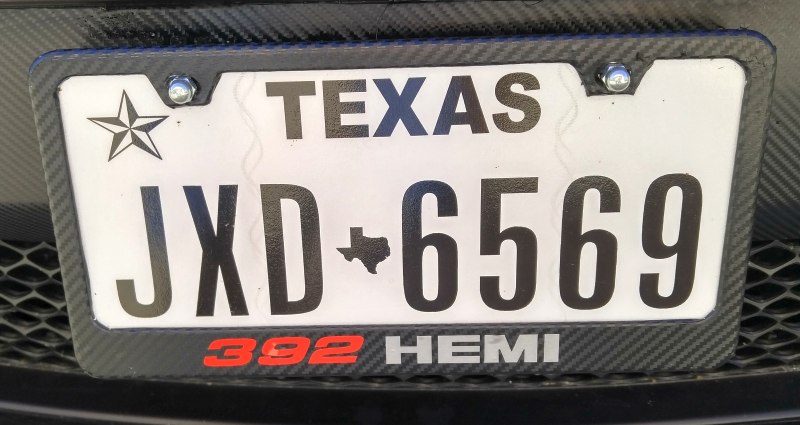
Front Plate Adapter
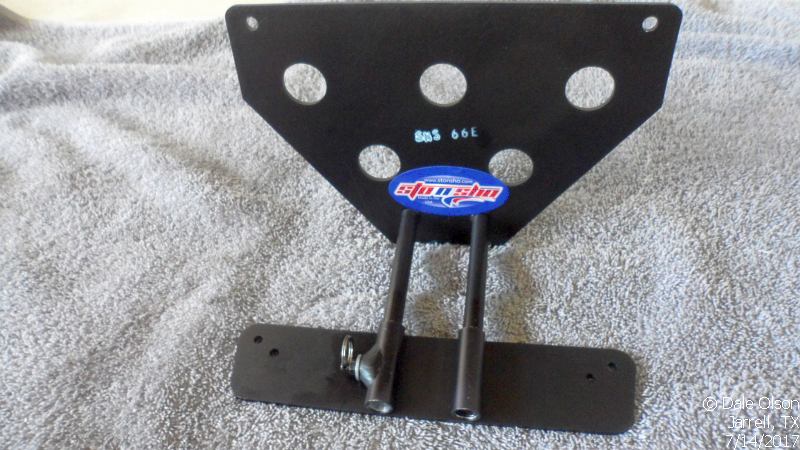
Texas requires a front license plate. But, I like most of you who also must have a front plate just hate to drill holes in the front fascia. I have a spare Hide A Plate but it still requires drilling to mount it under the splitter. I found a perfect fit on eBay ZIC Motorsports. This adapter uses existing screws to mount the adapter. Once mounted you just slide the plate mount into the adapter and make sure the locking pin is in place.
Parts


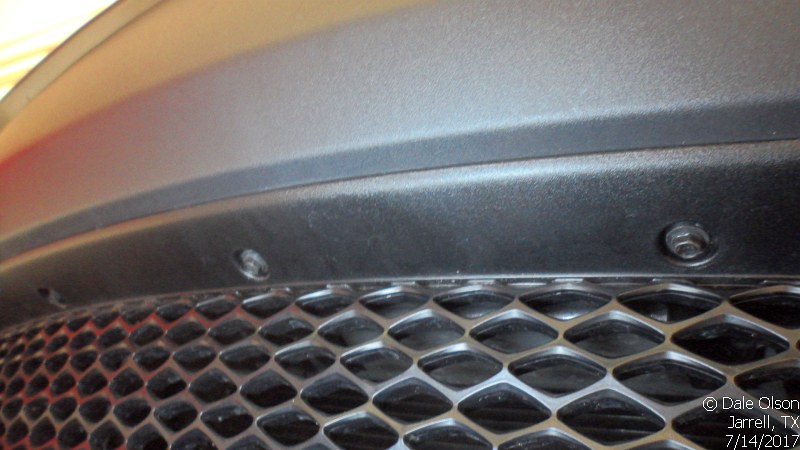
Mounting
Finished
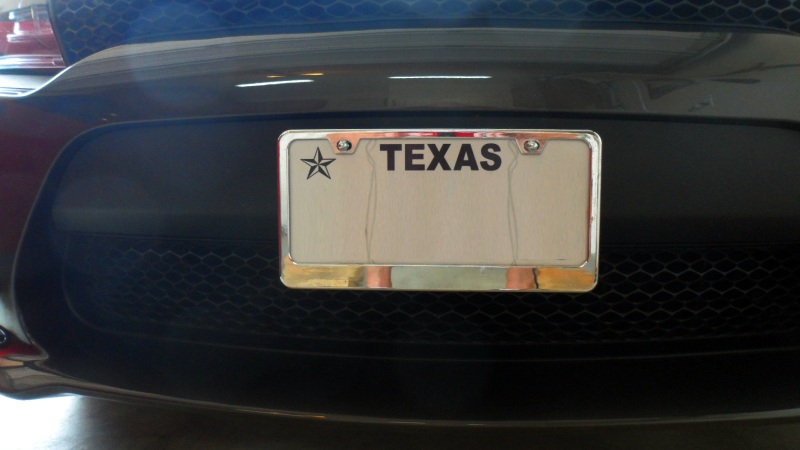
License Plate Frame Mod
The chrome license plate frame was just a bit much.
So, I thought I would tone it down a bit with some carbon fiber wrap and decals. The front & rear decals differ due to the fact that I have a carbon fiber overlay & red hash marks on the grill.
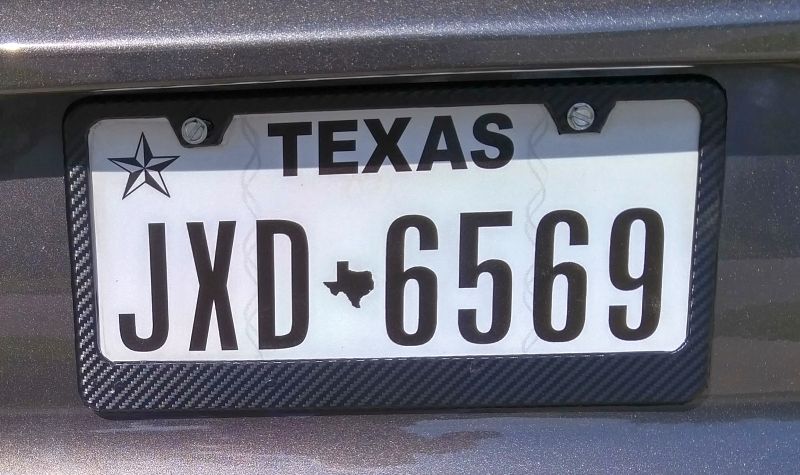
Front
Rear

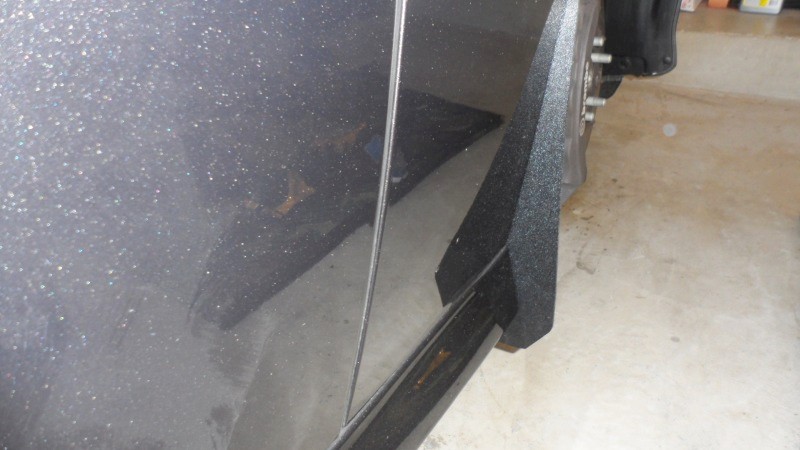
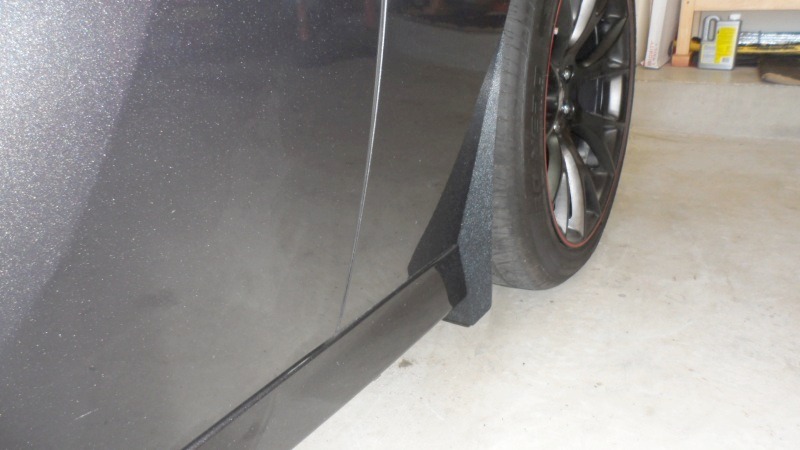
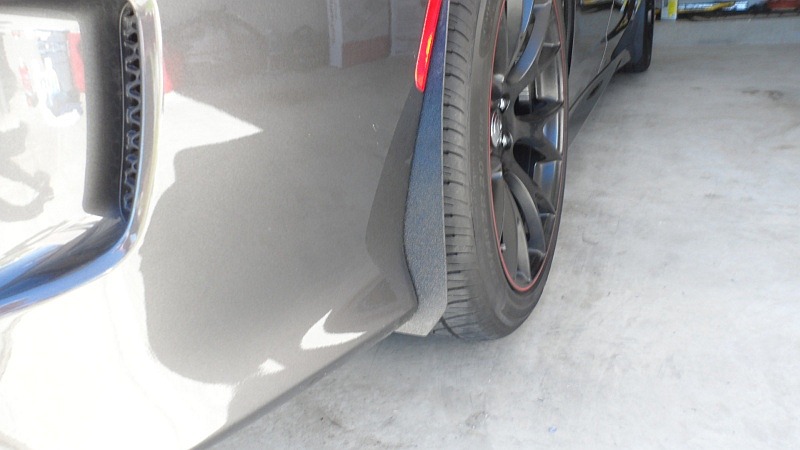
Splash Guards
Splash guards add a little protection for rock chips. I got these from JLT Performance.
Installation is easy. Remove the wheel, remove 3 push pins, install the splash guard with the supplied
longer push pins, the fender clip for the fronts only & remount the wheel.

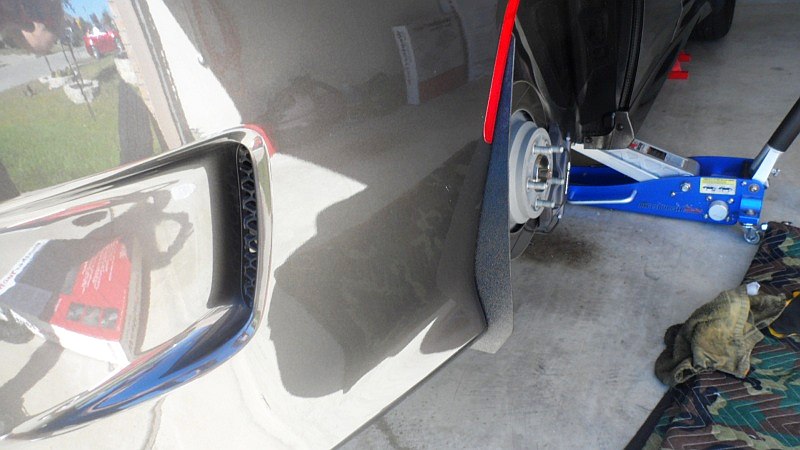
Splitter Guards
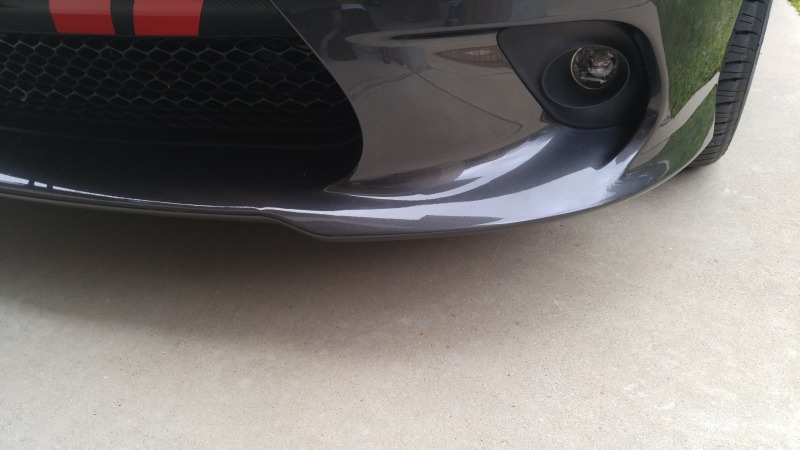
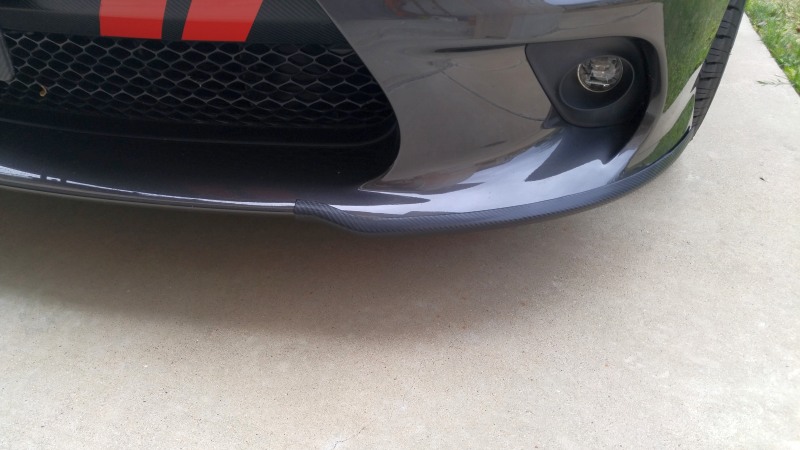
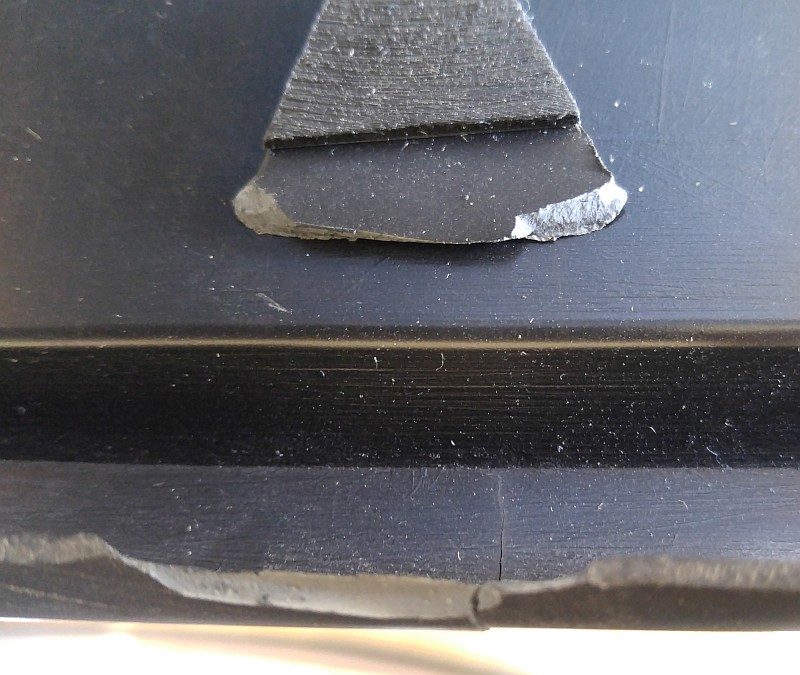
I should have done this mod the day I bought the car & leave the splitter protective cover in place. But, who what's a BRIGHT YELLOW cover? I could have painted them to match. But, that was not on the menu so to speak. It took a major scrape to wake me up. Oops, too late. I talked to a body shop guy and he said he could fix it but I would most likely be back in to get it fixed again.
My answer was to sand the shipping protectors down & add some carbon fiber wrap to cover the visible portion & paint the rest of the cover black. I also added some "mole skin" to the underside of the shipping protectors to eliminate the possibility of scratches to the upper portion of the splitter. This way if I scrape them up again all I need to do is peel off the carbon fiber wrap and recover.
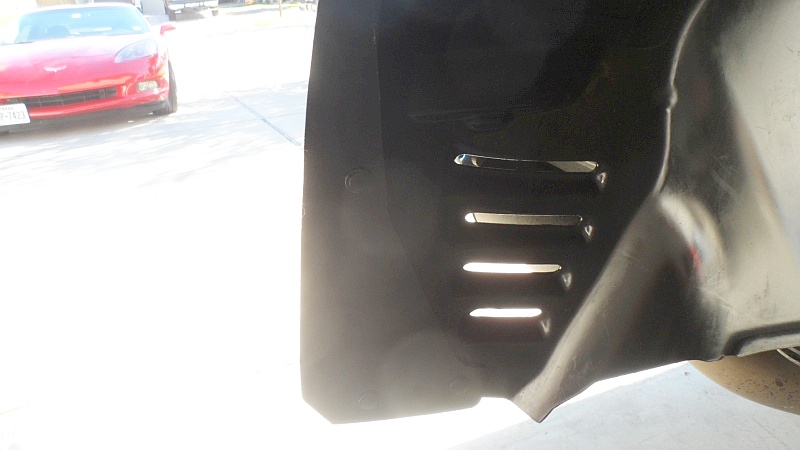
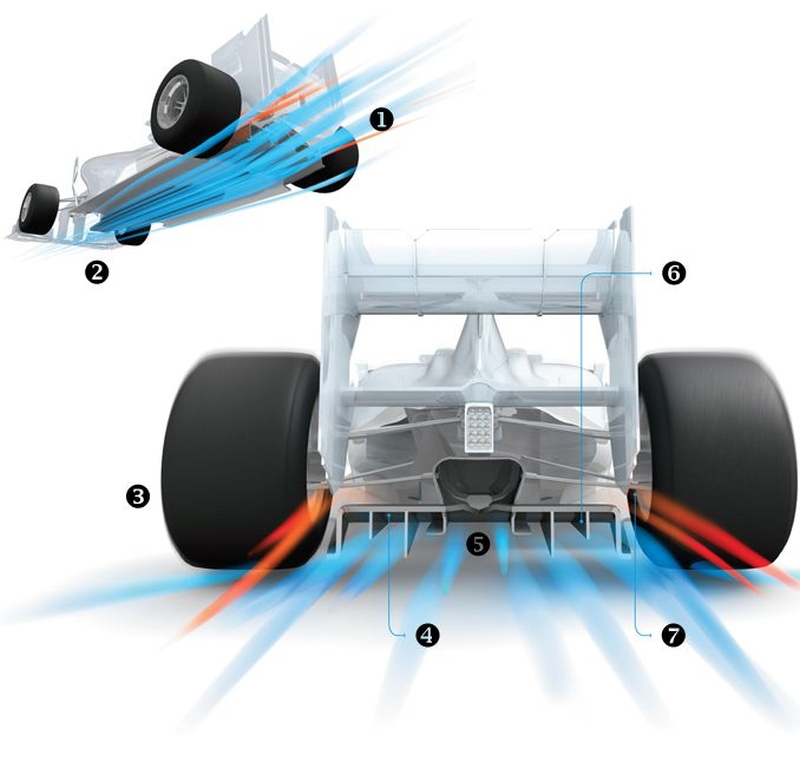
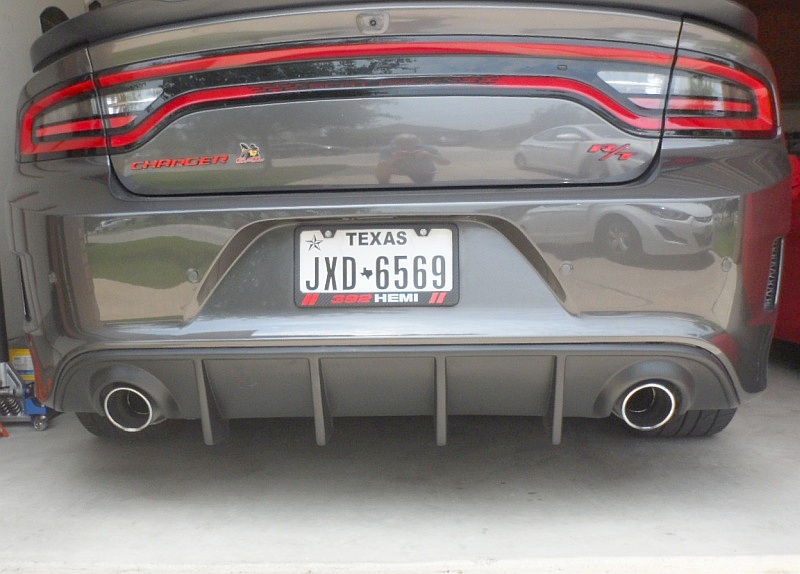
Rear Diffuser
In the racing world a rear diffuser is an asset. But, in the stock world, it's more for looks than anything else. Someone on the LX Forum found a low-cost version that fits the 2015 - 2017 Chargers. It is available from Ikon Motorsports.
The Good
The dam thing looks kool.
The Not So Good
The original cost on the Ikon Motorsport site was $79.99 shipped IIRC. Hell of a deal. But, the problem was they
were sold out & there was a big demand on the LX Forum. According to Ikon another shipment from China
was due any day. Shipment arrives and clears customs. Now the price goes to $129 on eBay. I got my order in at
$129.99. Wow, 62% increase. About 2 hrs later the price goes to $139.99 on Amazon IIRC. Next, it goes to
$149.99 & finally to $179.99. I understand the law of Supply & Demand. But, this is just price gouging
& being greedy IMHO. Update - 6-14-2018 the price is now $249!
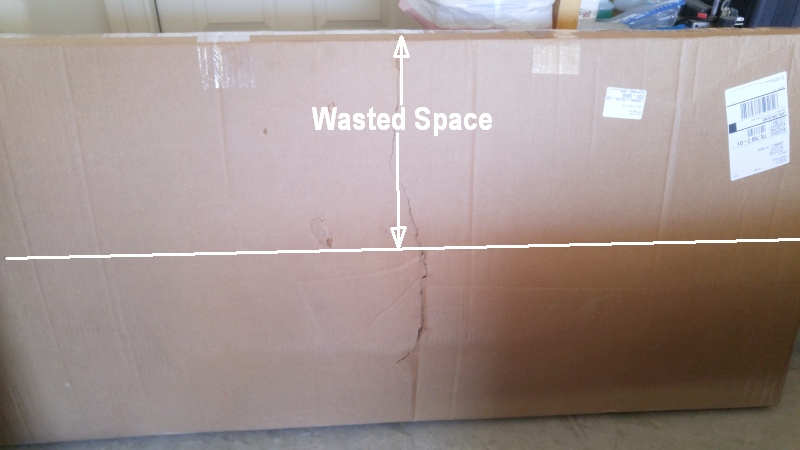
My order was accepted & the next day I got a shipping notice. I received the box 3 days later. The box is huge (over 50% of wasted space) & has a big rip in the side. I open the box & there is no packing per se other than a plastic bag covering the diffuser. There are no instructions & the hardware bag with its parts (screws) is open and laying at the bottom of the shipping box.
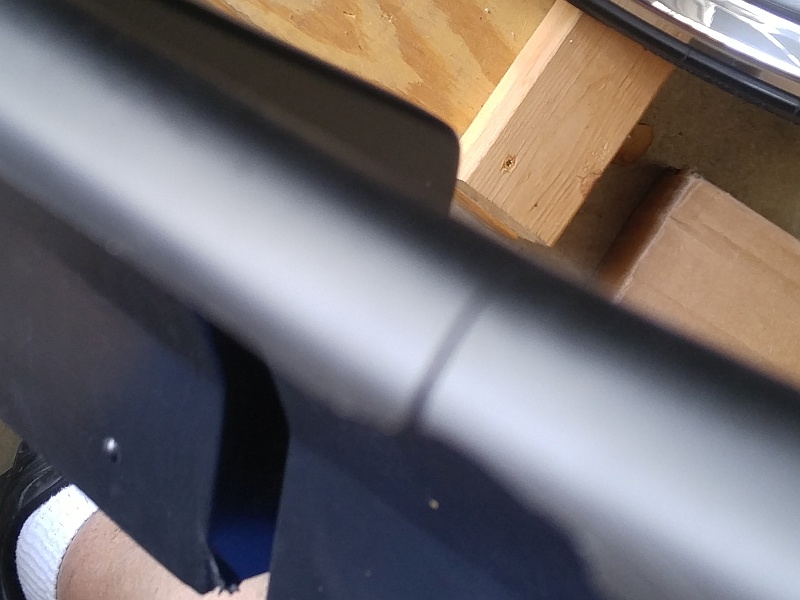
I remove the plastic bag & one of the plastic retaining clips falls out on the floor. I inspected the diffuser & find it is also cracked where the clip is attached.
I decided I would return it & submitted an eBay return. But, I saw the prices going & knew that another order would take months. So, I canceled the return figuring I could fix the broken clip. I called Ikon & asked for a partial refund back to the original $79.99. It was approved & I received credit back.
I removed the stock fascia panel. It comes with 2 push pins, 4 screws & a dozen clips. I used a plastic panel tool to pry the panel loose from the rear fascia.
- Clip repair is not possible due to design.
- Only half the clips as the OEM
- Made of Polypropylene - not very flexible
- Premarked hole locations don't line up very good.
- Clip alignment is off. I broke another clip during the installation. But it was one close to the push pin location.
- The supplied screws look to be the same as the OEM. Didn't use them.
Bottom line, would I buy it again? Yes, but only if it was under $100 shipped.
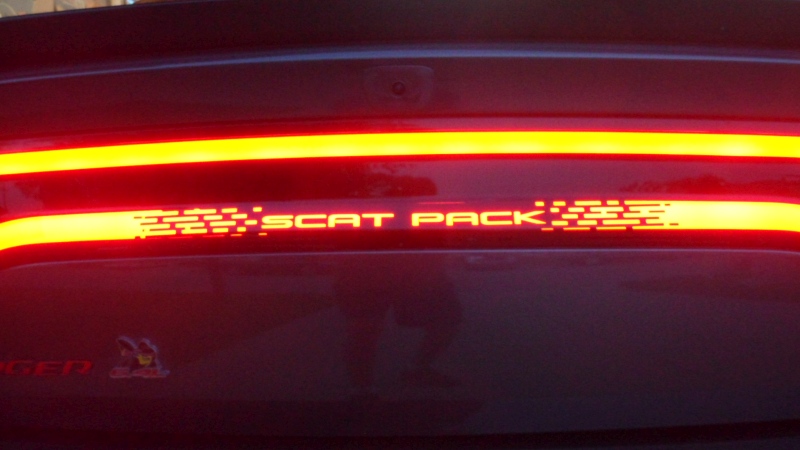
Tail Light Decal
One of the LX Forum guys found this and I thought it was pretty cool. It is sold by Luxe Auto Concepts. The product is called Racetrack Tail Light Decal.
Install can be a PITA if you have never done any decal/graphics installs. Watch the video on the website & turn your tail lights on to help line up the decal. The kit provides all the necessary items to do the installation, even the microfiber cloth.
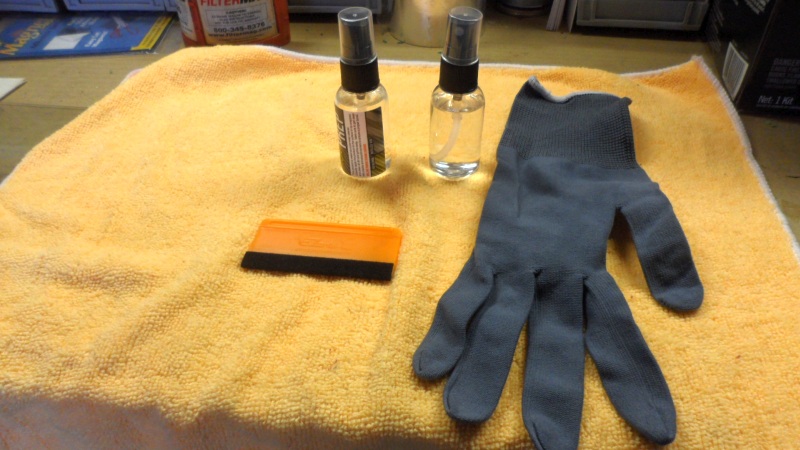
DIY Polish & Buff
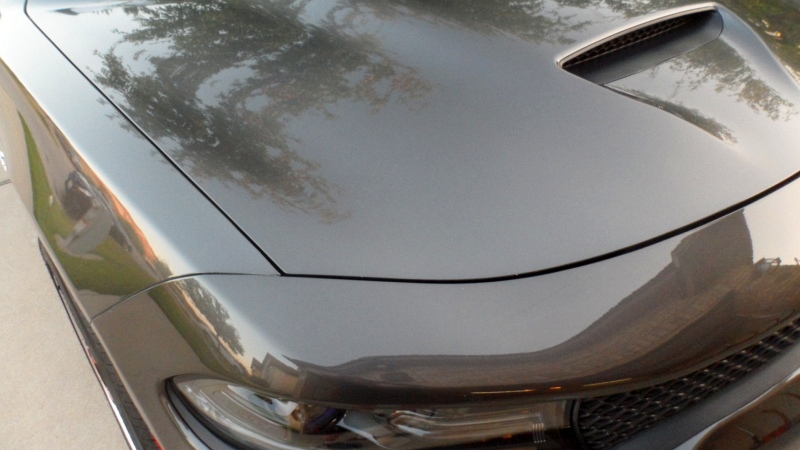
Washed the car the other day & when I was drying it I noticed a little bit of grit on the finish. Grit can be almost anything from dust/dirt to tree sap. So, I figured it was time to clay bar & wax. What's required? The simple solution is a clay bar, soap/water spray, some towels of your choice, wax of you choice & a wax applicator. The complex solution is Random Orbital buffer, buffers pads, microfiber towels, various levels of compound polishes, waxes & sealers.
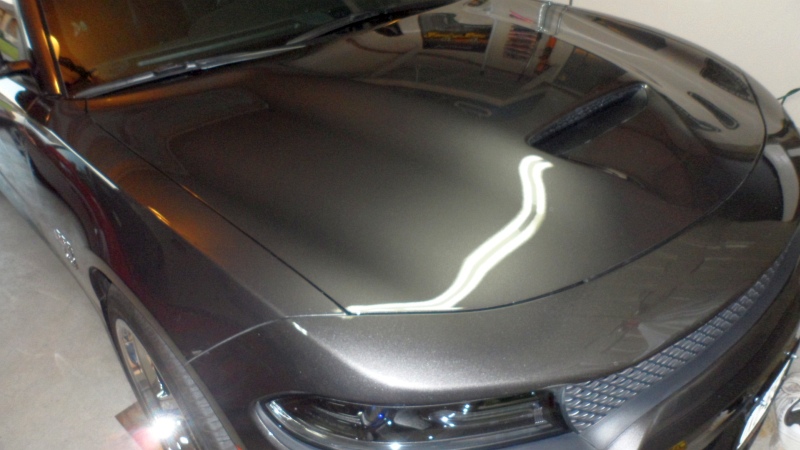
Results from clay bar, Zymol Cleaner/Wax & Palm DA Buffer
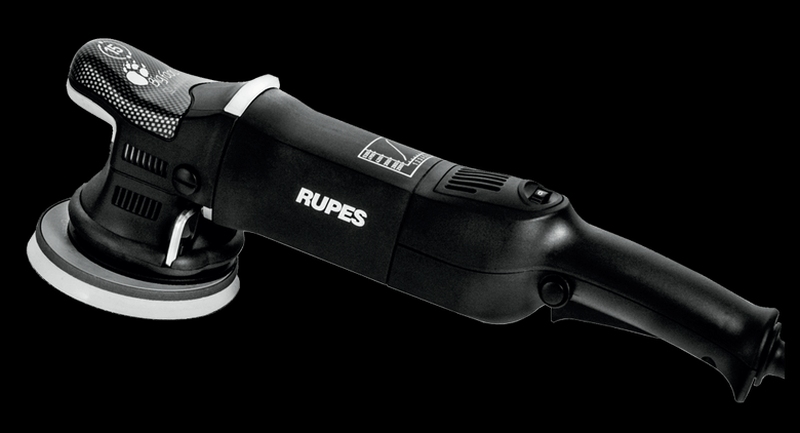
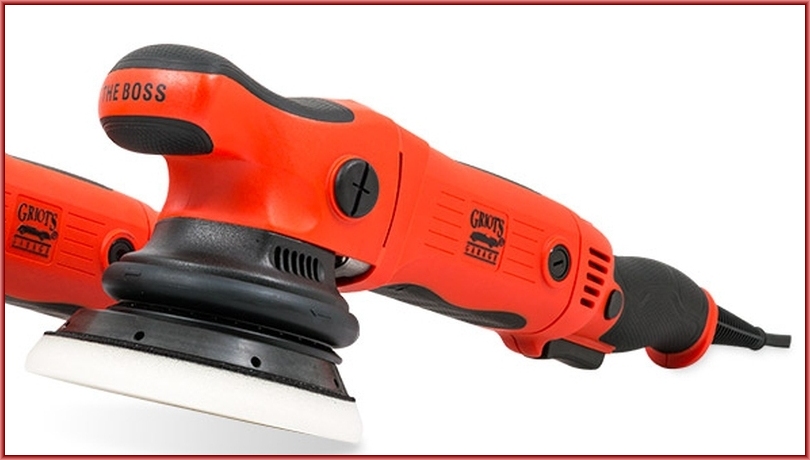
Random Orbital Polisher/Buffer
Rupes - $250 to $400 or Groit's Garage $89 to $225
Harbor Freight - $49 or Compact Plam Type -$18
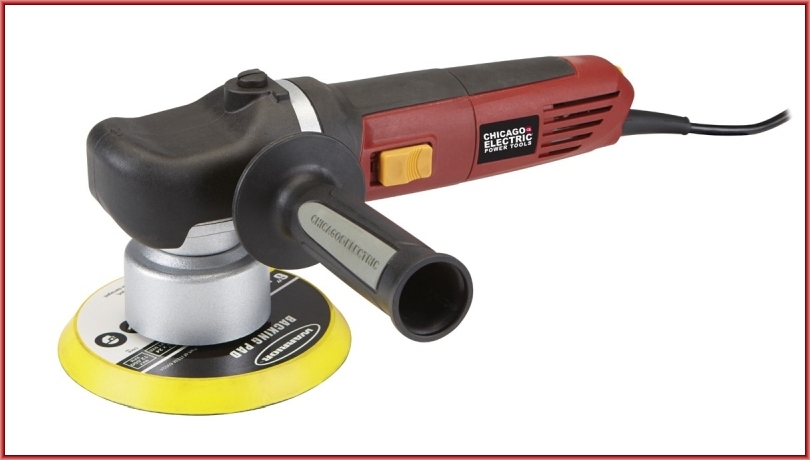
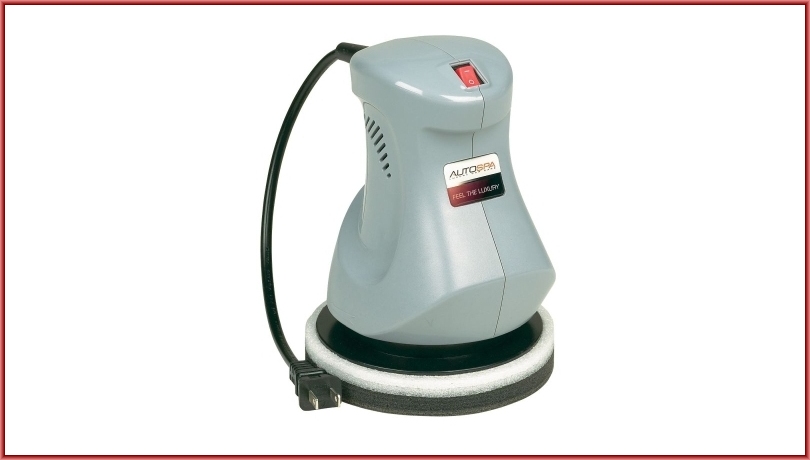
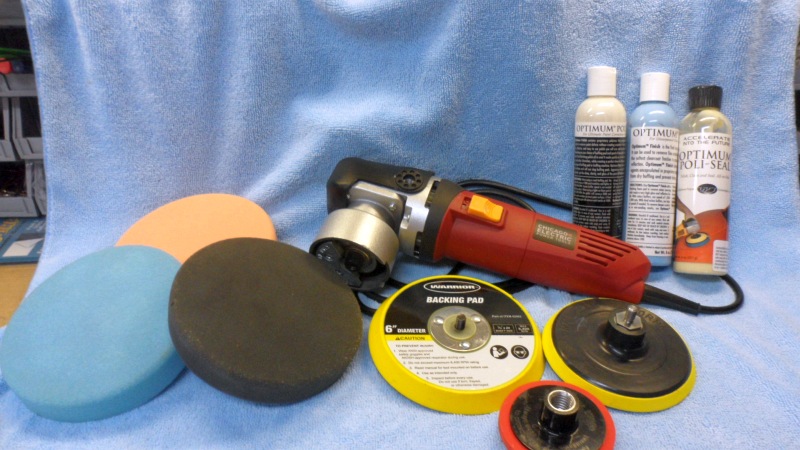
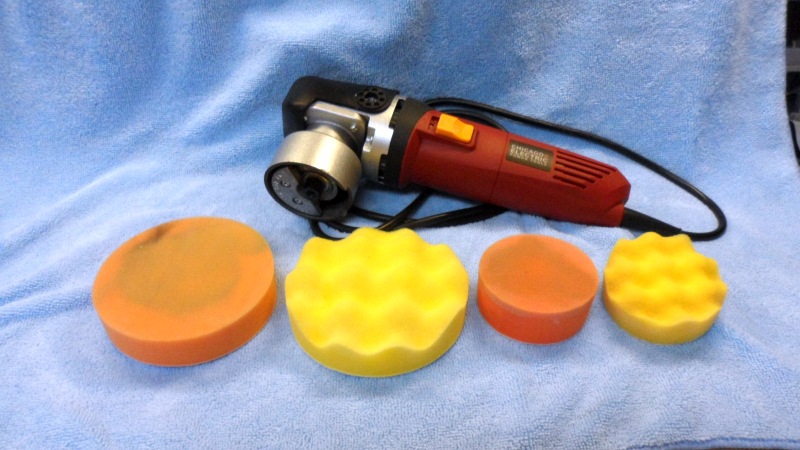
My days of Wax On & Wax Off by hand are done. I really don't want to invest big $$$ in a Dual Action buffer that I may only use 2 or 3 times a year. So, I opted for the Harbor Freight 6 "Dual Action Variable Speed Buffer & Compact 6" Palm Dual Action buffer for quick Wax on/Wax Off.
Here is my Quick & Dirty setup. Usually, less than 3 hours to wash, dry, clay bar, wax & polish. I had to get Hook & Loop adapter for the Palm Buffer. You can these at Home Depot or other online sources for under $5. Clay bars are also not really expensive either, $3 per to $18 for a kit. I opted to buy the bars and use a solution of soap & water as a lubricant.
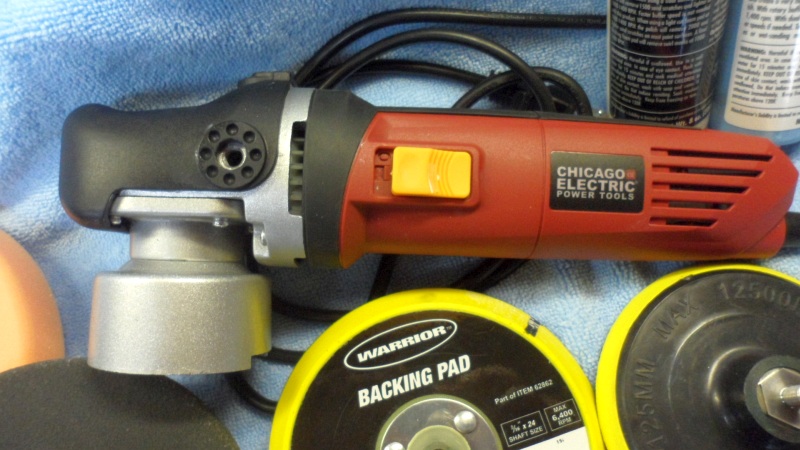
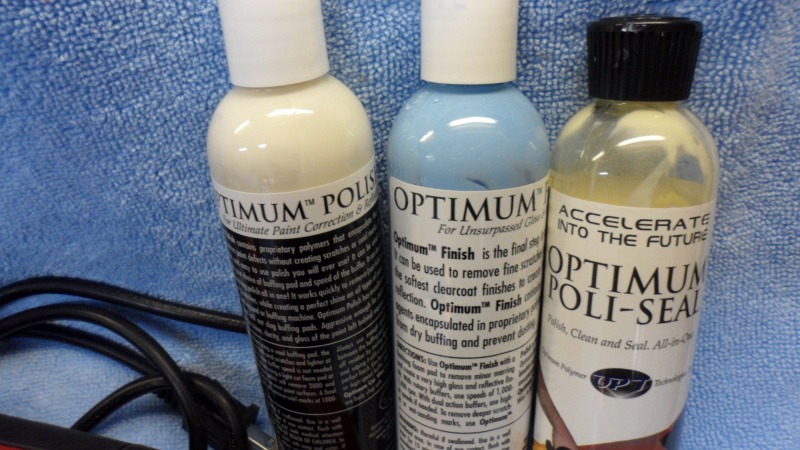
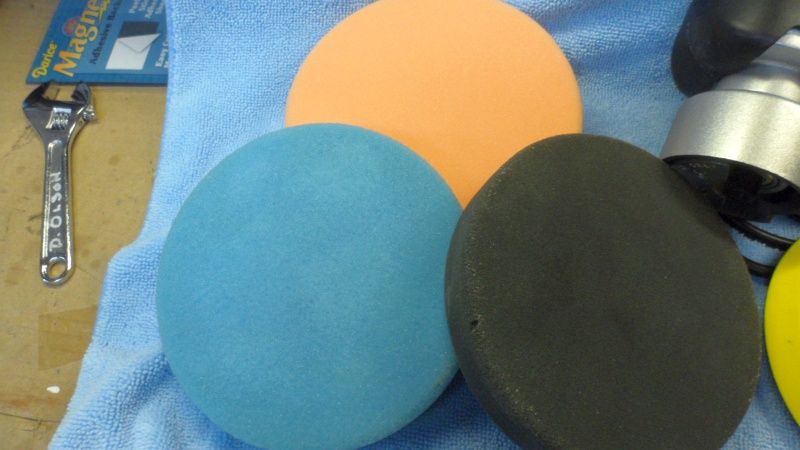
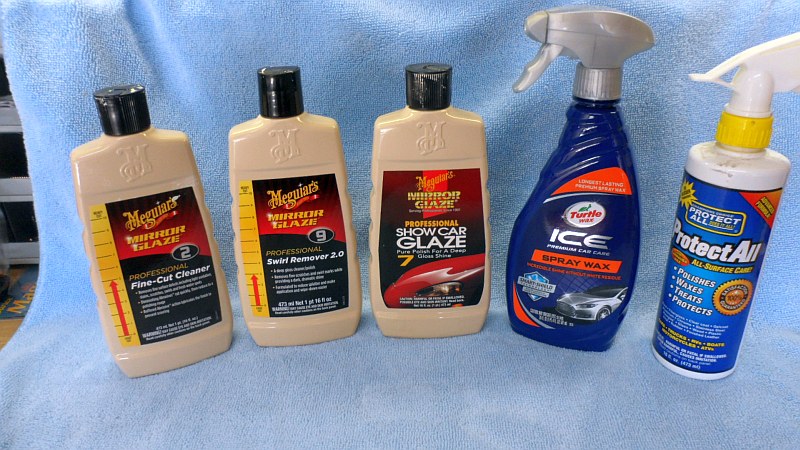
Now if I need to do some paint correction (compound, polish, wax & seal) I break out the HF DA Buffer. I have 6", 5" & 3" backing plates & various grades of foam pads. I also use a little more high-tech chemicals, Optimum Polymers, from Auto Geek.
More Pics
Other Supplies
Lots of plush microfiber cloths and/or towels for polishing & quick detailing. Once they lose their "plush feel" they are used as wheel cleaners or grease rags & then disposed of. I used Meguiar's before going to Optimum Polymers. For a detailing spray, I use Turtle Wax Ice or Protect All as a quick detailer.

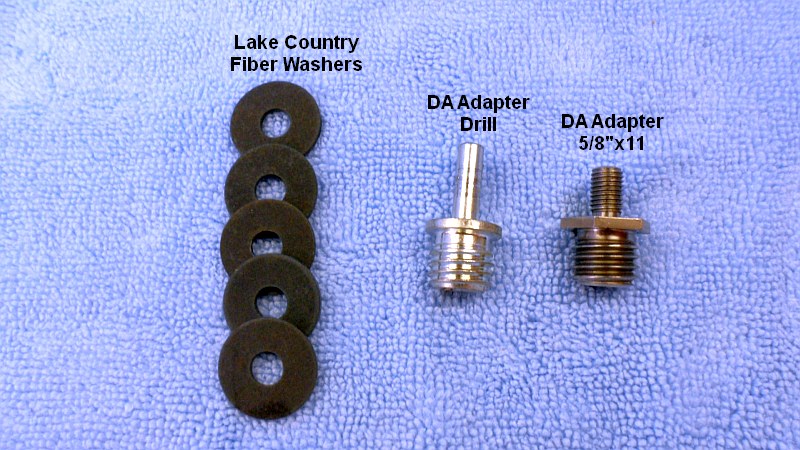
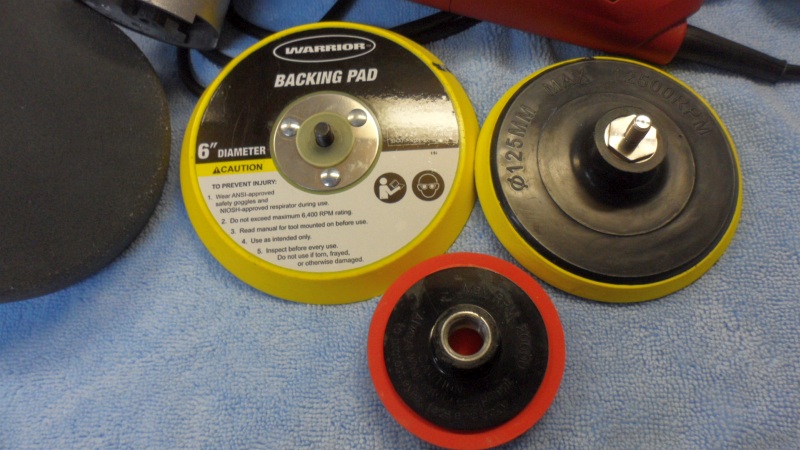
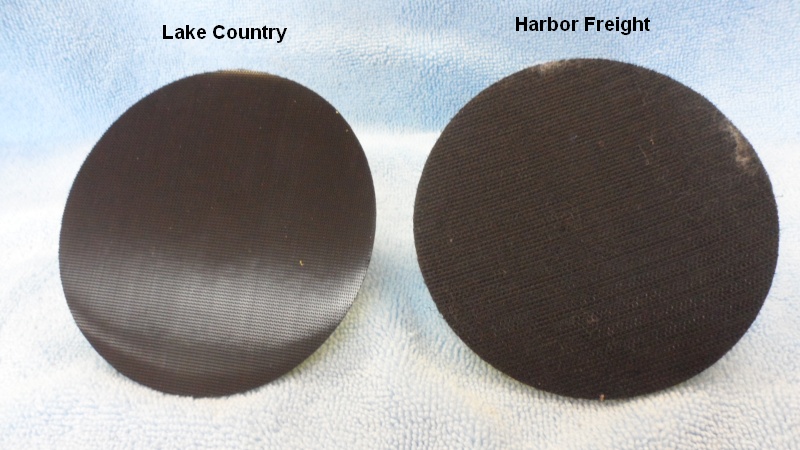
Other DA Buffer Parts
There are various grades of backing pads and buffer pads.
Is the $18 Lake Country backing pad better than the Harbor Freight? For the pro's probably yes. But, for the average DIY'er no NIMHO.
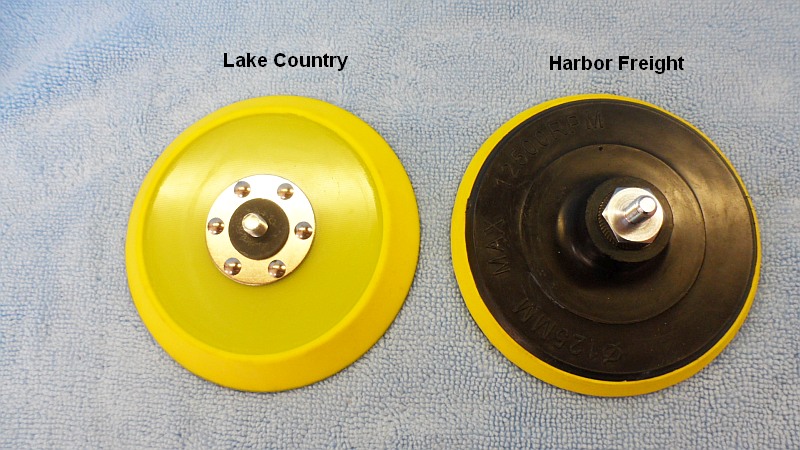
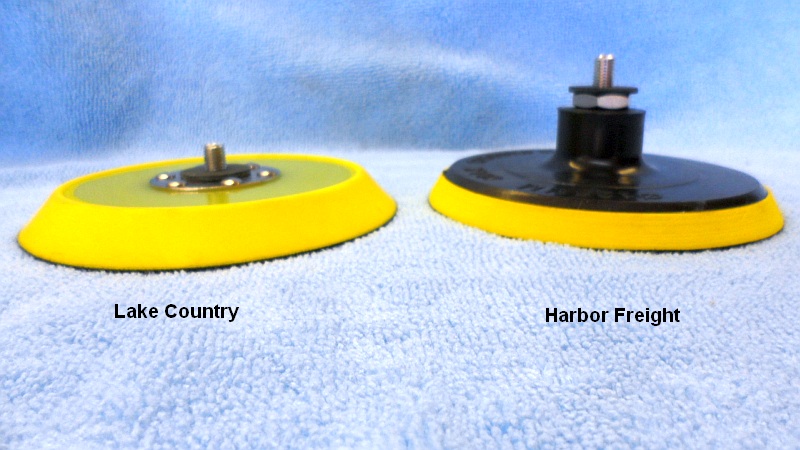
Some backing pad adapters & a fiber washer is used between the backing pad and DA mounting shaft.